How to Replace Sway Bar Link 2005-10 Pontiac G6
Created on: 2013-07-25
If the sway bar link is rattling or broken, this video will show what steps and tools are needed to replace it.
-
step 1 :Removing the Wheel
- Loosen the lug nut covers with a 19mm socket
- Pry off the center cap with a flat blade screwdriver
- Loosen the lug nuts with the vehicle on the ground
- Raise the vehicle with a floor jack
- Secure the vehicle on jack stands
- Remove the lug nuts
- Pull off the wheel
-
step 2 :Removing the Stabilizer Link
- Turn the wheel by hand
- Hold the upper stabilizer link stud with an 18mm wrench
- Remove the upper nut from the stabilizer link with an 18mm socket
- Hold the lower stabilizer link stud with an 18mm wrench
- Remove the lower nut from the stabilizer link with an 18mm wrench
- Pull off the stabilizer link
-
step 3 :Reinstalling the Stabilizer Link
- Push the stabilizer link into place
- Hold the lower stabilizer link stud with an 18mm wrench
- Fasten the lower nut onto the stabilizer link with an 18mm wrench
- Hold the upper stabilizer link stud with an 18mm wrench
- Fasten the upper nut onto the stabilizer link with an 18mm socket
-
step 4 :Reattaching the Wheel
- Slide the wheel into place
- Start the lug nuts by hand
- Tighten the lug nuts preliminarily
- Lower the vehicle to the ground
- Tighten the lug nuts to 100 foot-pounds in a crossing or star pattern
- Reattach the center cap
- Tighten the lug nut covers with a 19mm socket
Tools needed
-
A Piece of Pipe (for leverage)
18mm Wrench
Jack Stands
18mm Socket
19mm Socket
Ratchet
Floor Jack
Brought to you by 1AAuto.com, your source for quality replacement parts and the best service on the Internet.
Hi, I'm Don from 1A Auto. I hope this how-to video helps you out, and the next time you need a part for your vehicle, think of 1AAuto.com. Thanks.
In this video, we're going to show you how to replace a front stabilizer link on this 2007 Pontiac G6. It's the same as any 2005 to 2010 G6, as well as the Saturn Aura. Not a difficult procedure. You will need jack and jack stands, and you'll want to jack up both front wheels off the ground and support it with jack stands. Then you'll need a lug wrench or a 19mm socket with a ratchet, maybe even a breaker bar and a pipe for some extra leverage. Then, after that, you'll just need two 18mm wrenches, one of those 18mm will have to have an open end.
Start out by using just a socket to loosen the lug nut covers, or the wheel cover as in this case. We're going to use impact or air tools sometimes. If you don't have the benefit of air tools, just start with the vehicle on the ground, loosen the lug nuts, then raise and secure the vehicle, and move the lug nuts from the wheel and tire.
Use an 18mm wrench to grab on to the nuts, part of the stud of the stabilizer link, and then use an 18mm socket, loosen up the nut, and then it comes off. Here's the fun part of the repair. You pull that down out of the way, and you can see the other end of the link right there. Put the 18mm wrench on the nut that's in the shaft, just like before. Then, there's not really enough room to get a ratchet back in there, so you basically just have to take a wrench and slowly, carefully, one eighth of a turn at a time, and I'll fast-forward the video as we do that.
Then, just reinstall the link as you took it apart. Go ahead and speed up as we tighten up that lower nut, and like I said before: it's not all that difficult; it just takes quite a bit of time because you can't move that nut too far each time.
Bring the sway bar link back into place, and should you possibly feel the need to replace those sway bar links, at 1AAuto.com, we sell those as well. But then use a 18mm wrench and an 18mm socket and ratchet to tighten up that bolt. And that bolt should be tightened somewhere around 70 to 75 foot-pounds. Put the bracket that holds your brake hose back into place, and start the 10mm bolt on and tighten it up.
Reinstall the wheel. Put the lug nuts on by hand first just to make sure you don't cross thread them, then tighten them preliminarily. Put the vehicle on the ground, torque the lug nuts to 100 foot pounds using a star pattern. Now, reinstall your hubcap and we're going to do that with that 19mm socket. I'm just going to screw them in by hand. Also, we want to make sure you line up the valve stem with the notch in the hubcap for the valve stem. I'll go ahead and fast-forward through that.
We hope this video helps you out. Brought to you by www.1AAuto.com, your source for quality replacement parts and the best service on the Internet. Please feel free to call us toll-free, 888-844-3393. We're the company that's here for you on the Internet and in person.
Shop Products


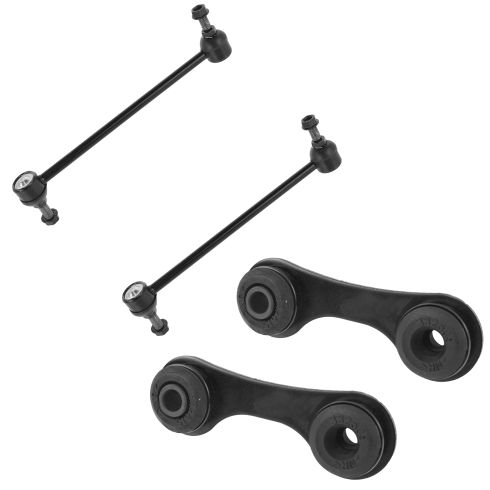
Chevrolet Pontiac Saturn Front & Rear 4 Piece Sway Bar Link Set TRQ PSA55884
Part Details:
- 4 Piece
- (2) Front Sway Bar Links
- (2) Rear Sway Bar Links
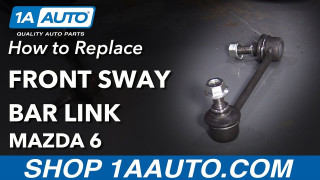
How to Replace Front Sway Bar Links 2002-07 Mazda 6
How to remove, replace, and install a sway bar end link on 07 Mazda 6.
