How to Replace Sway Bar Link 2003-07 Honda Accord
Created on: 2019-06-20
Check out this video to learn how to replace the sway bar links on your 03-07 Honda Accord. 1A Auto shows you how step by step!
-
step 1 :Removing the Wheel
- Partially raise the vehicle with the wheel still contacting the ground
- Loosen the 19 mm lug nuts
- Raise and support the vehicle on jack stands
- Remove the lug nuts
- Replace one lug nut loosely
- Hammer the tire from the back side if the wheel is stuck
- Remove the last lug nut and the wheel
-
step 2 :Removing the Front Sway Bar Links
- Remove the 14 mm lower end link nut, holding the stud with locking pliers if it is spinning
- Remove the 14 mm upper end link nut, holding the stud with locking pliers if it is spinning
- Remove the sway bar link
-
step 3 :Installing the Front Sway Bar Links
- Insert the upper sway bar link into the sway bar and thread the new 15 mm nut onto it
- Insert the lower sway bar link into the lower control arm and thread the new 15 mm nut onto it
- Tighten the nuts, carefully using locking pliers, or a hex wrench, if the studs spin
- Torque the sway bar link nuts to 22 ft-lb, if able
-
step 4 :Installing the Wheel
- Slide the wheel onto the lug nuts
- Replace the lug nuts and tighten them in a star pattern
- Lower the vehicle with the wheel lightly touching the ground
- Torque the lug nuts in a star pattern to 80 ft-lbs
- Lower the vehicle completely
Tools needed
-
Socket Extensions
Locking Pliers
14mm Socket
15mm Socket
Jack Stands
19mm Socket
Ratchet
Floor Jack
Hi. I'm Mike from 1A Auto. We've been selling auto parts for over 30 years.
Hey, everyone. Sue, here, from 1A Auto. Today, we have an 07 Honda Accord in our shop, and we're going to be showing how to remove and install the front sway bar links. If you need this part or any other part for your car, click on the link below and head on over to 1AAuto.com.
19 millimeter socket to loosen up the lug nuts. Now I'm going to raise and support my vehicle with my two post lift. You can use jack stands with a jack. Now we're clear to remove the tire.
14 millimeter wrench, I'm going to break that nut free and then of course it's going to spin. So I'm going to have to hold the inner part of it. There is an Allen head right here, but there's no way I can get there from that wishbone. I can do it on the top one, but not on the lower. So I'm going to have to hold the inner piece of metal with a pair of locking pliers.
Make sure you can get your wrench out. There we go. I'm going to remove the upper swivel link to the sway bar. 14 millimeter sock wrench again. See how much we can get before it starts to spin. It's spinning. Okay, so we'll put some locking pliers on the back just like I did on the bottom. See if I can hold that firm.
Wonderful. Now we can remove the sway bar link from the actual linking control arm. I'm going to just take a pry bar and see if I can pry that free.
To install the front sway bar link, it's just basically two reverse procedure. I like to put the sway bar link into the top of the sway bar first. The new nuts are a 15 millimeter, not a 14. It still has the Allen head in the center, which is a five millimeter Allen head.
Now I'm going to put the lower one in. Start the nut. With the wishbone in the way, I have found that it's kind of difficult to put an Allen head in there and hold that. So you're going to have to use a pair of the needle nose vise grips like I did to remove it just being careful, not pinching the new boot, using a gear wrench, ratchet wrench. I'm going to snug that pretty much as tight as I can get it because I'm going to end up torquing it.
Now I'm going to start the bottom. Put a pair of locking pliers on there, needle nose locking pliers. See if I can catch it without pinching that boot as careful as I can be. I'm going to put a longer wrench on here to tighten this because obviously I can't get a torque wrench in there. The specs for this is 22 foot pounds.
Now I can put a torque wrench on the top. So we're going to torque this to 22 foot pounds. Okay. Now we're ready to put our wheel back on. I'm just going to snug them up by hand then I'll lower it down on the ground with the weight of the vehicle on it and I'll torque the wheel to 80 foot pounds.
19 millimeter socket, and we're going to torque the wheel to 80 foot pounds in a star pattern. Double check. Now we're going to repeat the process on the other side.
Thanks for watching. Visit us at 1aauto.com for quality auto parts, fast and free shipping and the best customer service in the industry.
Shop Products


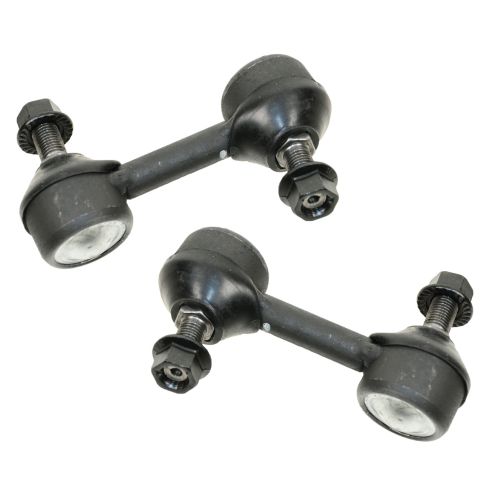
Honda Acura Front Driver & Passenger Side 2 Piece Sway Bar Link Set TRQ PSA55710
Part Details:
- 2 Piece
- (1) Front Passenger Side Sway Bar Link
- (1) Front Driver Side Sway Bar Link

How to Replace Front Sway Bar Links 2012-17 Toyota Camry
This video shows you how to install new TRQ sway bar links on your 2012-17 Toyota Camry.
