How to Replace Strut Spring Assembly 2002-03 Mercury Mountaineer
Created on: 2014-10-11
Find out how to remove and install a pre-assembled front spring strut assembly, including the torque specs, by watching this how-to video
-
step 1 :Removing the Wheel
- Pry off the center cap with a flat blade screwdriver
- Loosen the lug nuts with the vehicle on the ground
- Raise the vehicle with a floor jack
- Secure the vehicle on jack stands
- Remove the lug nuts
- Pull off the wheel
-
step 2 :Removing the Strut
- Apply rust penetrant to the three 13mm nuts on the top of the strut
- Remove the 8mm bolt from the nearby valve to access the strut nuts
- Remove the three 13mm nuts from the top of the strut
- Remove the 24mm bolt from the bottom of the strut
- Pry the strut down with a pry bar
- Pull the strut forward up and out
-
step 3 :Installing the New Strut
- Feed the strut into the lower control arm
- Push the strut studs into place
- Fasten the three 13mm nuts onto the top of the strut
- Remove the nut for the bottom strut bolt
- Tap the 24mm bolt into the bottom of the strut with a hammer
- Thread the nut onto the 24mm bolt
- Support the strut with a jack
- Tighten the 24mm bolt to 130 foot-pounds of torque
-
step 4 :Reattaching the Wheel
- Slide the wheel into place
- Start the lug nuts by hand
- Tighten the lug nuts preliminarily
- Lower the vehicle to the ground
- Tighten the lug nuts to 100 foot-pounds in a crossing or star pattern
- Reattach the center cap
-
step 5 :Fastening the Strut
- Torque the three 13mm nuts to 30 foot-pounds
- Put the valve into place
- Insert the 8mm bolt into the valve
Tools needed
-
24mm Socket
13mm Socket
A Piece of Pipe (for leverage)
Socket Extensions
Torque Wrench
Pry Bar
Jack Stands
8mm Socket
19mm Socket
Ratchet
Floor Jack
Brought to you by 1AAuto.com, your source for quality replacement parts and the best service on the Internet.
Hi, I'm Mike from 1A Auto. I hope this how-to video helps you out, and next time you need parts for your vehicle, think of 1AAuto.com. Thanks.
In this video, we're going to show you how to replace the struts on this 2003 Mercury Mountaneer. We show you the passenger side. The driver side is a similar procedure. There is just one little different thing that you have to remove to get to the bolts. This Mountaineer is basically the same as all Explorer, Ford Explorer, and Lincoln Aviator. You'll need new front struts from 1AAuto.com; 8, 13, 19, and 24 millimeter sockets with ratchet and a piece of pipe for some extra leverage; pry bar; jack and jack stands; and a torque wrench.
Pry off the hubcap by using a flat blade screwdriver in the small slot on the side. Once you get it started, you can just pull off around the edges. We'll just fast forward as Mike removes those 19 millimeter lug nuts. If you don't have air powered tools, you want to loosen them while the vehicle's on the ground, raise the vehicle and remove them the rest of the way. Now you can pull the wheel free.
At the top of your strut, are three 13 millimeter nuts. Coat the top of those with some penetrating oil. That little valve in the top of the picture is in the way, so use an 8 millimeter socket and ratchet and remove the bolt for it, so it can move around. Then, use a 13 millimeter socket and ratchet with extensions or, if you have them, use air powered tools and remove those three nuts that hold the top of the strut.
You want to remove this bolt right here, so just spray the nut on the back first with some penetrating fluid, and then, using a 24 millimeter socket and ratchet and a piece of pipe for some extra leverage, just loosen that up and remove it. Use a pry bar to pry the strut down and pull it forward and then up and out.
On the bottom, is the old strut. Above it, is the new one from 1A Auto. You can see, they're very similar and they'll fit exactly the same and work just the same. Take your new strut from 1A Auto and feed it back into the lower control arm and angle it up. Then, just push those studs back up into place and replace those nuts. After you get them all replaced by hand, you just want to tighten them up preliminarily.
Then, remove this nut. Lower the wheel knuckle, so that you can get that bolt in the strut and then just push the bolt in and hammer it in the rest of the way. Put the nut on the other side and lock it into place. Then, tighten up that bolt the rest of the way.
Now, in order to tighten up that bottom nut, you want to simulate like the weight is on the suspension, so jack the suspension up and take the weight off the jack stand. Then, you'll want to torque that nut to 130 foot-pounds.
Replace your wheel and then replace the lug nuts and tighten them in a crossing pattern. You just want to tighten them most of the way, lower the vehicle and then tighten them the rest of the way. Torque the lug nuts in a crossing pattern to 100 foot-pounds. Line up your hubcap and hit it back into place. Then, torque these three nuts at the top of the strut to 30 foot pounds. Replace the 8 millimeter bolt that holds that bracket and valve in place and tighten it up.
We hope this video helps you out. Brought to you by www.1AAuto.com, your source for quality replacement parts and the best service on the Internet. Please feel free to call us toll-free, 888-844-3393. We're the company that's here for you on the Internet and in person.
Shop Products


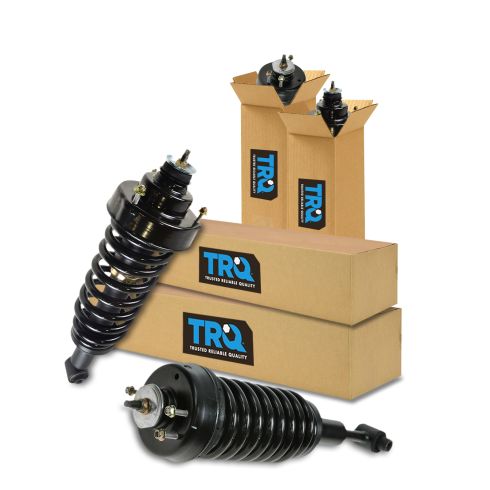
2002-03 Ford Explorer Mercury Mountaineer Front & Rear 4 Piece Shock & Spring Assembly Set TRQ SCA61071
Part Details:
- 4 Piece
- (2) Rear Shock & Spring Assemblies
- (2) Front Shock & Spring Assemblies

How to Replace Shock Absorbers 2007-16 Chevy Silverado
You can learn how to change the rear shocks on your 07-13 Chevy Silverado or GMC Sierra. Watch this video where 1A Auto experts show you step by step!
