How to Replace Strut Assembly 2008-12 Buick Enclave
Created on: 2014-12-04
Watch this video to learn how to replace the front struts on your 08-12 Buick Enclave.
-
It's recommended to seek an alignment after finishing this repair
step 1 :Removing the Wheel
- Pry off the center cap with a flat blade screwdriver
- Loosen the 22mm lug nuts with the vehicle on the ground
- Raise the vehicle with a floor jack
- Secure the vehicle on jack stands
- Remove the lug nuts
- Pull off the wheel
-
step 2 :Removing the Wiper Arm
- Pry off the wiper arm cap with a flat blade screwdriver
- Remove the 15mm nut from the wiper arm
- Remove the wiper arm
- Repeat the process for the other side
-
step 3 :Removing the Cowl Panel
- Remove the four clips along the cowl panel with a flat blade screwdriver
- Remove the ground from the cowl panel
- Pry off the clip near the edge of the windshield
- Pry off the adhesive pad on either end of the cowl panel
- Pry off the clip on the driver side of the cowl panel
- Pull up on the cowl panel to release it from its clips
- Pull the cowl panel up and off
-
step 4 :Removing the Front Strut
- Spray the lower and higher strut bolts with rust penetrant
- Remove the three of the upper 15mm strut bolts and leave the last one loosened
- Pry out the clip holding the brake line to the strut with a flat blade screwdriver
- Remove the 18mm nut from the stabilizer link
- Pull the stabilizer link aside
- Remove the two 24mm nuts from the bottom of the strut and knuckle
- Pry the wiring harness off of the strut
- Thread the 24mm nuts onto the bolts and hammer them to move the bolts
- Jack up underneath the knuckle
- Remove the two bolts from the knuckle
- Pull the strut off the steering knuckle
- Remove the last 15mm bolt from the strut
- Remove the strut
-
step 5 :Disassembling the Strut
- Place the spring compressors on either side of the spring
- Tighten each back and forth a little while alternating sides
- Remove the spark plug piece from a 13/16 spark plug socket with a 90-degree pick
- Remove the nut at the top of the strut with a 7/8 wrench and 13/16 spark plug socket
- Pull the mount plate from the top of the strut free
- Remove the spring
- Pull the boot up and off
-
step 6 :Assembling the Strut
- Remove the nut from the new strut
- Replace the boot
- Insert the spring into its notch on the strut
- Tighten the bolt onto the new strut
- Loosen each of the compressors bit by bit while alternating sides
- Repeat until the spring compressors pull free
-
step 7 :Inserting the Front Strut
- Insert the strut into place
- Push down on the knuckle and place the strut behind it
- Push the strut onto the knuckle
- Insert the bolts into the bottom of the strut and knuckle
- Hammer the bolts in and tighten them
- Torque the bolts to 120 foot-pounds
- Jack up the strut into place
- Replace the upper 15mm strut bolts by hand
- Insert the harness clip in place on the new strut
- Insert the clip holding the brake line
- Insert the stabilizer link in place
- Tighten the 18mm nut to the link
-
step 8 :Reattaching the Wheel
- Slide the wheel into place
- Start the lug nuts by hand
- Tighten the lug nuts preliminarily
- Lower the vehicle to the ground
- Tighten the lug nuts
- Tighten the lug nuts to 100 foot-pounds in a crossing or star pattern
- Reattach the center cap
- Tighten the three 15mm bolts at the top of the strut
- Tighten the lug nuts to 45 foot-pounds
-
step 9 :Reinstalling the Cowl Panel
- Insert any remaining clips into the cowl panel
- Insert the cowl panel into place
- Insert the adhesive on either side of the panel
- Push in the clips along the cowl panel
- Push on the clip near the edge of the windshield
- Push in the clip on the driver side of the cowl panel
- Replace and tighten the ground
-
step 10 :Reinstalling the Wiper Arm
- Push the wiper arm onto the stud
- Tighten the 15mm nut to the wiper arm
- Replace the wiper arm cover
- Repeat the process for the other side
Tools needed
-
24mm Socket
Torque Wrench
15mm Socket
18mm Wrench
Jack Stands
18mm Socket
13/16 Inch Spark Plug Socket
Strut Spring Compression Tool
Pick
21mm Socket
Flat Blade Screwdriver
8mm Socket
Ratchet
Floor Jack
22mm Socket
Brought to you by 1AAuto.com, your source for quality replacement parts and the best service on the Internet.
Hi, I'm Mike from 1A Auto. I hope this how-to video helps you out, and next time you need parts for your vehicle, think of 1AAuto.com. Thanks!
In this video, we're going to show you how to replace a front strut with an unloaded strut from 1AAuto.com on this 2010 Buick Enclave. We show you on the passenger side, but the driver's side is the same procedure. The items you'll need is that new unloaded strut from 1AAuto.com, flat blade screwdriver, 8mm, 15mm, 18mm, 21mm, 22mm, and 24mm socket and ratchet, 18mm wrench, torque wrench, spring compressors, a 13/16 spark plug socket, and jack and jack stands.
Start off by prying off your hub cap and then remove these 22mm lug nuts. You want to just loosen them while the vehicle is on the ground and then raise the vehicle up and remove them the rest of the way. Now the wheel will pull free.
Pry up the cap at the end of your wiper arm and then remove this 15mm nut. Then either using a wiper arm puller or just pushing it in and out and using penetrating oil and pulling it off, you want to remove the wiper arm, but a wiper puller helps. You just twist it. It pops it off the stud and you can pull it free. Then you just want to repeat the process on the other wiper arm.
Now you need to remove these four clips, and you can either use a pick and you just pry up the center of the clip and then pull the clip up and out, or you can use a flat blade screw driver, pry up the center, and then pry out the bottom. Remove this ground and pull it free. Then pry out this clip right here, and there's another one on the other side. You just need to pry them out of the body of the car, peel off this adhesive pad from the cowl panel, and do the same thing on the other side. Then pry up this clip right here on the driver's side of the cowl panel, and then pull up sharply on the cowl panel and it will release the clips. Then do the same thing for the other side. Then you want to just pull this up. Make sure all the clips have released and then pull the panel free.
Now you want to remove two of these three 15mm nuts, and then the last nut you just want to loosen most of the way. Use a flat blade screwdriver and pry out the clip that holds your brake line in place. Then an 18mm socket and ratchet you just want to get the bolt on the end of the stabilizer link to move. You have it moving. Then use an 18mm wrench and then an 8mm socket and ratchet. The 8mm socket and ratchet hold the stud into place while you remove them with the wrench.
You might have to a couple of times, spray some penetrating oil on, re-tighten the nut, and then loosen it back up. You can see, it just pulls right out. Now remove these two 24mm nuts, and you can loosen them up with a breaker bar, or you can use power tools. Once you get those nuts to a certain point, just put them back on just a little bit, and then pull this harness out of here. Just make sure you put the nuts on so they're flush with the bolts. Once you get them moving, then take the nuts off. All right, we've got the jack supporting the suspension just a little bit, so this comes up nice and loose. You want to make sure that your steering knuckle doesn't pull too far out. Remove the nut. Now we just wire tighten this right here so there's not too much stress on the axle or too much stress on the hose here.
Now with the strut out, you have to compress the spring. I've got my spring compressors. I'm just going to tighten those up. This is a large spark plug socket and it's got an insert in here to hold the spark plug up. I'm just going to take a 90-degree pick and pull that insert out so it's wide open. Put a 7/8 wrench on here and then there's a 9mm socket and I have an adapter on it to get it to 3/8. This socket is on here really tight, so I want to knock it off first.
Now you can just remove that nut and pull the top off with the spring and this pad. Take your new strut. Just loosen up the nut on the top and it will just pull out. Take this boot, transfer it over and transfer over this pad. Once you have that lined up, take the spring and lower it into place. Then the same way you got the previous nut off, you want to do that again to tighten this one back on. We'll fast-forward as Mike does that.
Before I tighten it up, I've just got my spring there, which it's in my cushion correctly. Make sure it's right there on the platform of the strut as well where it's supposed to be. Then, just to preliminarily aim, this should be facing towards the outside of the car, and then this stud here, the big one, should be towards the outboard part of the car. Once you line it up, tighten up the nut that holds the spring out of the strut, and then make sure it stays lined up as you loosen up your spring compressors.
Now feed the strut back up into place. You just want to push those studs through, replace one of the nuts preliminarily to just hold it there, and then line up the wheel knuckle into the strut. Then replace one of those bolts just to help hold it into place. Then replace the other bolt, and you can just hammer them in the rest of the way. Now just replace those two nuts. You can adjust your alignment, so you will need to have your vehicle aligned after you install these.
It looks like mine is pretty close to the middle. The top one is fixed, but the bottom one you can flex by pushing in or out on the knuckle. I'm actually just looking in behind. I can see a nice line where my old one was sitting. I'm just going to line it up there and then tighten it up preliminarily. I'm going to torque these to 120 foot-pounds.
Jack the strut up into place. I'm just going to put these 15mm nuts back on. I'll preliminarily tighten them, but we're going to torque them once the vehicle is back on the ground with the wheel on. Take the harness clip from your old strut and it just pulls out. Then you just push it into place in the new strut. Then re-clip the harness into that clip. Push this clip back into the lower part of the strut. Push the sway bar link back into place, and then just replace that nut and tighten it up.
Now you can replace the wheel, and then just replace the lug nuts and tighten them preliminarily in a crossing pattern. Then you want to lower the vehicle and tighten these the rest of the way and torque each of them to 100 foot-pounds, again in a crossing pattern.
Then you can just line up and hit your hub cap back into place. Now torque these three nuts up here to 45 foot-pounds. Pull out any clips that stayed behind in the vehicle and push them back into place in your cowl panel. Then feed the cowl panel back into place. Make sure it tucks back under, under the hood. Once you get everything lined up, just start pushing the clips back into place. Make sure that this adhesive cushion over here goes back up and over, and repeat the process on the other side.
Now replace those four clips. Just push in the lower part and then the center to lock them in. Replace the ground and tighten it back up. Make sure your weather strip is back in place, and then, for now, you can close the hood. Make sure these clips on either side of the cowl panel are back into the body of the vehicle. Push the wiper arm onto the stud. Make sure it's lined up where you want it and then replace that 15mm nut and tighten it up. Put the cover back on the end. Now just repeat the process with the other wiper arm.
We hope this video helps you out. Brought to you by www.1AAuto.com, your source for quality replacement parts and the best service on the Internet. Please feel free to call us toll-free, 888-844-3393. We're the company that's here for you on the Internet and in person.
Shop Products


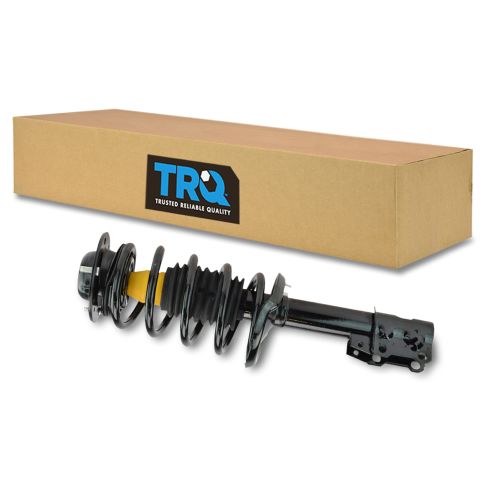
Chevrolet Pontiac Saturn Front Passenger Side Strut & Spring Assembly TRQ SCA57575
Part Details:
- No specialty tools required
- Easy install - Pre-assembled, loaded struts
How to Replace Strut Assembly 2000-05 Chevy Cavalier
Watch this video to learn how to replace the front strut assembly on your 00-05 Chevy Cavalier.
