How to Replace Strut Assembly 2003-07 Honda Accord
Created on: 2019-06-24
New Strut & Spring Assembly from 1AAuto.com
-
step 1 :Removing the Wheel
- Partially raise the vehicle with the wheel still contacting the ground
- Loosen the 19 mm lug nuts
- Raise and support the vehicle on jack stands
- Remove the lug nuts
- Replace one lug nut loosely
- Hammer the tire from the back side if the wheel is stuck
- Remove the last lug nut and the wheel
-
step 2 :Removing the Strut
- Remove the 14 mm lower strut bolt
- Remove the 17 mm nut from the 17 mm wishbone bolt and remove the bolt
- Remove the wishbone from the bottom of the strut
- Remove the three 14 mm and two 12 mm nuts from the top strut mount
- Remove the strut from the top mount
- Remove the upper control arm cotter pin
- Remove the 17 mm upper control arm castle nut
- Hit the upper knuckle to release the ball joint stud
- Remove the 10 mm nut securing the ABS wire bracket to the upper control arm
- Move the knuckle forward to remove the strut
-
step 3 :Installing the Strut
- Insert the strut top mounting studs into position
- Install the three 14 mm top mount nuts and the two 12 mm nuts
- Torque the three 14 mm nuts to 37 ft-lb
- Torque the two 12 mm nuts to 16 ft-lb
- Insert the lower strut into the wishbone
- Install the 14 mm lower strut bolt
- Torque the 14 mm lower strut bolt to 32 ft-lb
- Align the wishbone with the lower control arm
- Install the 17 mm bolt and tighten the 17 mm nut onto it
- Torque the 17 mm wishbone bolt to 47 ft-lb
- Insert the upper control arm ball joint into the knuckle
- Install the ball joint castle nut
- Torque the ball joint castle nut to 35 ft-lb
- Continue tightening to align the castle nut with the cotter pin hole in the stud
- Install the new cotter pin
- Install the ABS wire bracket onto the upper control arm
- Install the 10mm nut securing the bracket
-
step 4 :Installing the Wheel
- Slide the wheel onto the lug nuts
- Replace the lug nuts and tighten them in a star pattern
- Lower the vehicle with the wheel lightly touching the ground
- Torque the lug nuts in a star pattern to 80 ft-lbs
- Lower the vehicle completely
Tools needed
-
12mm Socket
Socket Extensions
Torque Wrench
14mm Socket
17mm Wrench
Jack Stands
19mm Socket
10mm Socket
Ratchet
Floor Jack
1/2 Inch Breaker Bar
Hi, I'm Mike from 1A Auto. We've been selling auto parts for over 30 years.
Hey everyone. Sue here from 1A Auto and today we have an '07 Honda Accord in the shop and we're going to be doing front strut assemblies. If you need those parts or any other parts for your car, click on the link below and head on over to 1aauto.com.
19 millimeter socket to loosen up the lug nuts. Now I'm going to raise and support my vehicle with my two-post lift and you can use jack stands with a jack.
And now we're clear to remove the tire.
14 millimeter socket. I'm going to take the lower strut bolt out. Make sure you pre-spray to help yourself for a smoother job. The threads on this go through the wishbone. There is not a nut on the other side. The pinch bolt has to come all the way out because of the actual strut itself has a indent in it for where the bolt lines up through the wishbone. So don't think you're going to cheat it and just loosen it up and see if you can slide this out. You won't be able to.
17 millimeter wrench and 17 millimeter socket and we're going to take the wishbone bolt out.
Just take a hammer and tap it out. So now I'm going to remove the wishbone from the bottom part of the strut.
Perfect. Now we can lower our vehicle and undo the top of the strut bolts and slide her out. Now we've lowered our car so we can access the top of the strut. There are three 14 millimeter socket style nuts and two 12 millimeter socket nuts. These do have to come out. Our new strut from 1A Auto comes with the actual all five nuts so we don't have to reuse the old ones.
We'll leave that one on because now the strut's going to feel ... want to drop down.
That's the great thing about this being at this height now. I can reach in with one hand and hold the strut and take this top one off. Take the last nut out.
Now, you can see that there's no, not much room to get this strut out, so at this point I'm going to strongly suggest we undo the top nut to the control arm. Just make your life a little easier. You're moving the upper control on ball joint castle nut. I got to discard the old cotter pin, see if she can come out without breaking.
Beautiful. We discard that because we got a new one. 17 millimeter socket and we're going to take off the upper control arm castle nut.
Now I'm going to hit this right here with a hammer and that ball joint will pop right out of the knuckle.
10 millimeter socket. We'll take this mounting bolt off the control arm. This little nut that holds the AVS wire on. I normally would have done that before. I just forgot. Now you can move the knuckle forward and guide the strut out.
Here we have our new front strut for an '07 Honda Accord from 1A Auto and here we have the actual factory strut. Now you can see that they're same style. The one from 1A Auto has the same keyway and the notch for the bolt. Comes with new bumpers and cover, strut assembly, strut's springs are the same size, same amount of coils. Strut cap, comes with a new strut cap and it comes with five new locking nuts. If you need this part or any other part for your car, click on the link below and head on over to 1AAuto.com.
So I'm going to line the strut cap with the two bolts that go for that cross member bar and then the cap studs themselves. So I can try to get this to go up in there. The front here.
Now I lowered it so that I can hopefully hold the strut and and thread onto the bolts.
The new size of the socket for the new stretch nuts is a 15 milliliter. We're going to snug these down, then we'll torque them to spec. And the two nuts that go on the little cross-member bar is a 13 millimeter socket now. So the three strut mount nuts, three identical ones, are 37 foot-pounds, and the two cross-member nuts is 16 foot-pounds.
Now we're going to reattach the wishbone on the lower strut. Make sure we line that up best we can. Got to find that notch. The only problem with, you might need a mirror so you see the keyway. The torque specs for this lower strut bolt into the wishbone is 32 foot-pounds.
Now we had to take a pry bar and we'll just prying it into the wishbone like this so that we can turn that lower part. so it lines up with the control arm.
Now we can line that up for the bolt to go through. Might need to take a hammer and tap it. Just give it a little fine tuning. I'm going to actually take my punch that I used. See if I can do this. Let's see how far up in the side away off. So we'll take the pry bar and twist it the same time. There we go.
17 millimeter socket. We're just going to snug that right down. Then we'll torque it to the manufacturer specs. 'K that's snug. I'm going to get my torque wrench. Low wishbone bolt that goes through the lower control arm is 47 foot-pounds. Now we're going to attach our upper control arm to the knuckle. Take them ... Here we go. Here we go.
Do the upper castle nut for the control arm ball joint is 35 foot-pounds. Now let's see. Well the keyway is right there for the actual cotter pin. This will also help me know if the stud is turning while I tighten this. Nope. A little bit more.
So you can see I went past the torque, but that's because the cotter pin didn't line up with the hole and you have to go tighten, never loosen to get the cotter pin in. I used a new cotter pin that came with the upper control arm. Slide that right in to the side hole. No.
So what's happening is the control arm is in the way of the length of the new cotter pin. So I'm just going to manipulate it down and that way I don't have to ... there's only one hole on this ball joint. I would have to take the whole thing out to turn the stud. Here we go.
Last is the ABS bracket. It lines right up. There's a little mounting hole for the bracket. Let that guide sit right in there. That's a 10 millimeter socket. Tighten that down.
Now we're ready to put our wheel back on.
I'm just going to snug them up by hand and then I'll lower it down on the ground. Let the weight of the vehicle on it, and I'll torque the wheel to 80 foot-pounds. 19 millimeter socket. We're going to torque the wheel to 80 foot-pounds in a star pattern.
Double check.
Now we're going to repeat the process on the other side.
Thanks for watching. Visit us at 1AAuto.com for quality auto parts, fast and free shipping, and the best customer service in the industry.
Shop Products


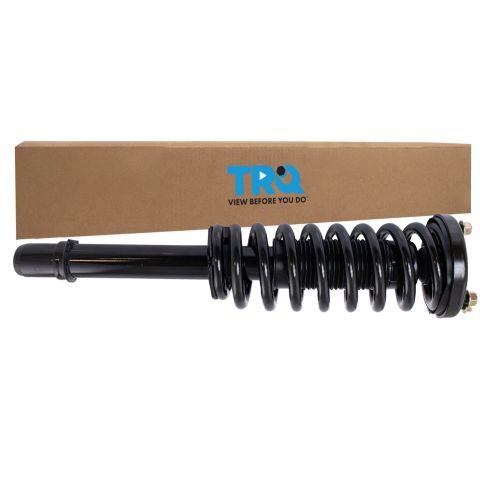
2003-07 Honda Accord Front Passenger Side Strut & Spring Assembly TRQ SCA70129
Part Details:
- No specialty tools required
- Easy install - Pre-assembled, loaded struts
- 17.48 in
- 12.68 in
- Yes
- Threaded Stud
- Yes
- Yes
- Socket
- 4.8 in
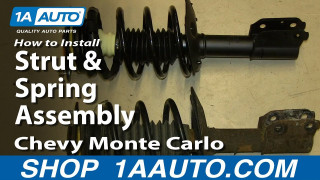
How to Replace Front Struts 2000-07 Chevy Monte Carlo
How to repair, install , fix, change or replace your front shocks with their loaded struts on 00, 01, 02, 03, 04, 05, 06, 07 Chevy Monte Carlo.
