How to Replace Strut Assembly 2002-06 Suzuki XL-7
Created on: 2014-02-26
Check out this video to learn how to replace the struts on your 01-06 Suzuki XL-7. 1A Auto shows you how to do it!
-
step 1 :Removing the Wheel
- Pry off the center cap with a flat blade screwdriver
- Loosen the 19mm lug nuts with the vehicle on the ground
- Raise the vehicle with a floor jack
- Secure the vehicle on jack stands
- Remove the lug nuts
- Pull off the wheel
-
step 2 :Removing the Air Intake
- Disconnect the mass air flow sensor wiring harness
- Disconnect the air intake temperature sensor
- Remove the three 10mm bolts along the air intake box
- Loosen the two hose clamps with a flat blade screwdriver
- Pull the air intake box up and out
-
step 3 :Removing the Strut
- Hold the washer with a pipe wrench
- Remove the 19mm nut with a socket, ratchet, and pipe for leverage
- Remove the 10mm bolt from the brake line
- Pry out the clip from the brake line with a flat blade screwdriver
- Remove the 17mm nuts from the strut and wheel knuckle
- Use a hammer and punch to remove the 17mm bolts
- Maneuver the strut from the wheel knuckle - use a hammer if necessary
-
step 4 :Installing the New Strut
- Install the old sleeve and washer to the new strut
- Feed the strut into place
- Push the wheel knuckle into place
- Insert and tighten the two 17mm bolts
- Torque the 17mm bolts between 75-80 foot-pounds
- Place the brake line into the new strut
- Replace the clip on the brake line
- Insert and tighten the 10mm bolt to the brake line
- Make sure the strut lines up properly by inspecting the top
-
step 5 :Reattaching the Wheel
- Slide the wheel into place
- Start the 19mm lug nuts by hand
- Tighten the lug nuts preliminarily
- Lower the vehicle to the ground
- Tighten the lug nuts to 100 foot-pounds in a crossing or star pattern
- Reattach the center cap
-
step 6 :Installing the Air Box
- Make sure the gasket is on top of the strut
- Insert the washer and 22mm nut by hand
- Hold the washer with a pipe wrench and tighten the 22mm socket
- Torque the 22mm strut bolt between 80-90 foot-pounds
- Lower the air intake box into place
- Reconnect the air intake hose
- Tighten the two hose clamps with a flat blade screwdriver
- Connect the air intake temperature sensor
- Connect the mass air flow sensor wiring harness
- Replace the three 10mm bolts
Tools needed
-
A Piece of Pipe (for leverage)
Socket Extensions
Torque Wrench
Hammer
17mm Wrench
17mm Socket
Jack Stands
19mm Socket
Pipe Wrench
Flat Blade Screwdriver
Center Punch
10mm Socket
Ratchet
Floor Jack
22mm Socket
Brought to you by 1AAuto.com, your source for quality replacement parts and the best service on the Internet.
Hi, I'm Mike from 1A Auto. I hope this how-to video helps you out, and next time you need parts for your vehicle, think of 1AAuto.com. Thanks.
In this video, we're going to show you how to replace a front strut on this 2002 Suzuki XL-7. We show you on the passenger side, but the driver side has a similar procedure. You should do both. The items you'll need for this include new front struts from 1AAuto.com, 10mm, 17mm, 19mm, and 22mm sockets and ratchet with an extension, piece of pipe for leverage, 17mm wrench, a pipe wrench, a punch, a hammer, a torque wrench, and jack and jack stands.
Pry off your hub cap. If you have air-powered tools you can jack up your vehicle and remove the lug nuts. If you don't have air-powered tools, you're going to want to loosen them while they're on the ground, then jack the vehicle up and remove them the rest of the way. These lug nuts are 19mm. Once those are removed, you can pull the wheel right off.
Now, on your air intake box, you want to disconnect the harness to mass air flow sensor and pull out your air intake temperature sensor. Then remove these three 10mm bolts along your air intake box. We'll fast-forward as Mike removes these. Now loosen up this hose clamp right here and this hose clamp here, and then pull this hose free. Then pull your air intake box up and out.
Next, you want to remove this 19mm nut, and you're going to need a pipe wrench to hold this large washer here still. Then, using a 19mm socket and ratchet with a piece of pipe for some leverage, you just want to break that free. We'll just fast-forward as Mike removes it the rest of the way.
Now we're going to have to remove these two bolts, and these two nuts on the other end of these bolts, but before we can do that because of the condition of our vehicle we're going to let them soak in some penetrating oil. Then the next thing you need to do is pull this bracket out and remove that 10mm bolt. We'll just fast-forward as Mike removes the bolt. Now, using a flat blade screwdriver, just pry out that clip. Now our bolts are ready to remove, and we got a 17mm socket and ratchet on one side with a piece of pipe for leverage, and then a 17mm wrench on the other side with an extra wrench just for extra leverage, too. We'll fast-forward as he removes that the rest of the way. Just the nut will come free and the bolt will stay stuck in there. That's fine. He's going to repeat the process on the lower bolt now.
Now, to actually get the bolts, you want to use a punch and a hammer and just hammer them out. For the lower one, you're going to have to angle the punch slightly. Then the bolt will pop right out. Once you've got both those bolts out, move the wheel knuckle back and forth and break that strut free. If you need to, just tap it lightly with a hammer and pull it free.
On the left is your old strut; on the right is the new one from 1A Auto. You can see they're identical, and they're going to mount exactly the same. You do need to transfer over this sleeve and this washer. Pull off this packing strip and remove the cap. Put the washer into place and that sleeve. As a side note: if your strut is this easy to pull in and out, then it's not good and it needs to be replaced.
Now take your new strut, feed it up into place, and push your wheel knuckle back into place and replace those two bolts. Once those are replaced, replace the two nuts. We'll just fast-forward here as he tightens those up. Once you've gotten them tight, you're going to want to torque both of these bolts to about 75 to 80 foot-pounds. Now put this line into your new strut and replace that metal clip. Using a hammer or your piece of pipe in this case, you just want to hit that clip all the way back in. We'll just fast-forward here as Mike replaces that 10mm bolt and tightens it up.
Now you want to check up top, make sure this lined up properly, and you can see that it did. Then you can put your wheel back on, and we'll just fast-forward as he puts the wheel on, replaces the lug nuts, and you want to tighten these preliminarily while it's in the air, and then lower the vehicle and tighten them the rest of the way. Then you want to torque each of these lug nuts in a star pattern to 100 foot-pounds. We'll fast-forward as he does the rest of these.
Now, back up top, make sure this gasket's in place, and replace this washer and the 22mm nut that comes with your strut. Then just tighten it up with your socket, ratchet, and pipe wrench. Now, using your pipe wrench and a torque wrench, you want to torque this to about 80 to 90 foot-pounds.
Now lower your air intake box back into place. You want to push it into that hole on the side here, and then lower it down and reconnect the hose. Once you've got it all lined up, tighten up those two hose clamps. Push your sensor back into place, and then reconnect your mass air flow sensor. We'll just fast-forward here as he replaces those three 10mm bolts that hold the air intake box into place. Then you're all set.
We hope this video helps you out. Brought to you by www.1AAuto.com, your source for quality replacement parts and the best service on the Internet. Please feel free to call us toll-free, 888-844-3393. We're the company that's here for you on the Internet and in person.
Shop Products


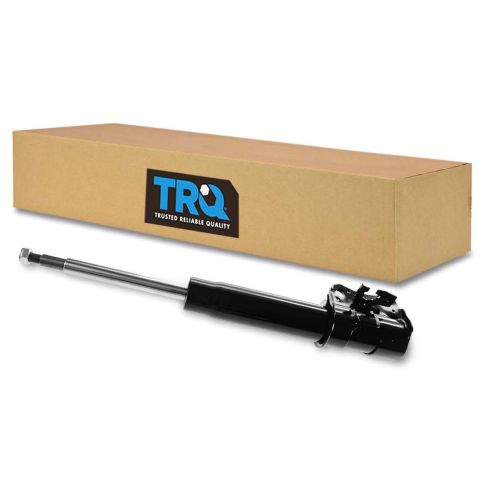
Chevrolet Suzuki Geo Front Driver Side Strut Assembly TRQ SBA58324
Part Details:
- Improved ride comfort and longer life
How to Replace Shock Absorbers 2007-16 Chevy Silverado
You can learn how to change the rear shocks on your 07-13 Chevy Silverado or GMC Sierra. Watch this video where 1A Auto experts show you step by step!
