How to Replace Strut Spring Assembly 1999-2004 Honda Odyssey
Created on: 2013-02-21
Watch this video to learn how you can replace the front struts on your 99-04 Honda Odyssey. 1A Auto will show you the steps!
-
step 1 :Remove the wheel
- Loosen the lug nuts with a lug wrench
- Raise and secure the vehicle
- Remove the lug nuts and wheel.
-
step 2 :Remove the bottom of the strut
- Apply penetrating oil to the nuts on the bottom of the strut.
- Use a breaker bar and penetrating oil to unbolt the 18 mm strut bolts on the bottom
- Unclip the ABS sensor wire.
-
step 3 :Remove the top of the strut
- Pop the hood and secure it.
- Use a flat blade screwdriver to pry up the little covers to access the 14 mm nuts.
- Apply penetrating oil to the 14 mm nuts at the top of the strut.
- Hold onto the strut as you remove it.
-
step 4 :Install the new strut
- Bolt the strut back in, torquing your 14 mm bolts to 30 ft lbs
- Have someone help you guide the top of the strut into place and get the nuts started under the cover.
- Insert your spindle to the lower end of the strut and raise your control arm until the bolt holes line up.
- Torque the bottom 18 mm nut to 85 ft lbs
- Make sure you don’t pinch your ABS wire and its placed correctly.
-
step 5 :Replace the wheel
- Put the wheel on and hand tighten the lug nuts.
- Lower the vehicle and torque the lug nuts to 100 ft lbs using a star pattern.
Tools needed
-
20mm Socket
21mm Socket
Flat Blade Screwdriver
18mm Wrench
Jack Stands
18mm Socket
19mm Socket
Ratchet
Floor Jack
1/2 Inch Breaker Bar
22mm Socket
Brought to you by 1AAuto.com. Your source for quality replacement parts and the best service on the internet. Hi, I'm Mike from 1A Auto. I hope this how to video helps you out and next time you need parts for your vehicle, think of 1AAuto.com. Thanks.
In this video we're going to show you how to replace the front strut on this 2003 Honda Odyssey. Pretty much the same as any '99-'03. I'm sorry, '99-'04. We show you the passenger side front strut placement. Driver's side is the same. We do always recommend that you replace your struts in pairs, as well as you will need to take your vehicle for an alignment after this repair. You'll need a new set of struts from 1AAuto.com. You'll need a jack and jack stands, 8-22mm sockets. You'll need ratchets for those sockets with a breaker bar or a pipe for some extra leverage for some of the big ones, an 18mm wrench, some penetrating oil, and a flat blade screwdriver.
As you can see here, I've got the vehicle raised up and I'm removing the lug nuts with my impact wrench. If you don't have an impact wrench, you want to start with the vehicle on the ground, loosen the lug nuts with a 19mm socket and breaker bar or your tire iron. Then raise and support the vehicle and remove the lug nuts and wheel the rest of the way. You can see here I'm kicking the tire. That's basically just a way if your tire or wheel is a little bit frozen on because of the aluminum, just give it some good kicks and break it loose. Then you can remove the tire. We're going to start by putting some lubricant on the ends of the bolts so the nuts actually come off on the front and the back side. We've got an 18mm wrench and an 18mm socket for the top of the end link. The 18mm wrench goes on the back. Socket goes on the front. Then you just have to use your muscle to tear it apart. I'm just going to speed up here as we remove that nut the rest of the way. Now we can pull the end link out. There are a couple bolts on top that hold the break hose and the ABS sensor. Spray them down with some penetrating oil, as well as the two large bolts that hold the strut. The 10mm socket and ratchet to remove the upper, or the break hose. Then 8mm socket and ratchet or a wrench to remove the ABS sensor wire.
Next we're going to remove these two 22mm nuts so we can pull the bolts out of the strut and remove the bottom half of the strut. Most people have ratchets. If you need a little extra leverage, you can always put a pipe on the end of it and get yourself a whole lot more force on it. As you can see, it works. One step better than the ratchet would be a breaker bar. It is obviously a little longer so you don't need to add pipe to it usually. As you can see, it normally works too. Just see us cheat here as we get out the impact wrench and pull those nuts off the rest of the way. To get these two bolts out, you can see that they're already loose so we really just have to tap them out. Just going to fast forward here. You can just use your wrench, turn the bolts counterclockwise and pull on them and they'll come out, or just use some kind of punch or tool to knock them out from the other side.
Now you just basically need to wiggle them apart and then the bottom of the strut is detected. On the top you can see that there is three covers, and that's how you access the top bolts for the strut. First we'll pop the covers off. The three bolts on the top of the strut are 14mm so we'll drop a 14mm socket down there and... Fast forward as Jeremy removes two of the bolts. We're going to leave one on for right now. If you do drop one down in there you can actually just take that plastic cover, the cover that has the three holes in it, pull up on it, and you'll see me do it later, pull up on it and a couple clips come loose and you can reach underneath there and grab the nuts if you drop them. Now we'll loosen up the last nut and you see the strut start to drop down. As you can see, the new one looks a lot like the original one, except obviously brand new. It will look and fit and bolt in just like the original one did. You want to put the top in first. Make sure you put the ABS sensor wire in the right spot. That's going to go under the strut. While one person is lifting up, you can actually lift up this roof here. Grab your new bolts. Help guide it up in there. Turn it a little bit the other way. Guide it up in, and start your bolts.
I'm just going to fast forward as Jeremy reaches under that cover, puts on the rest of the bolts and then kind of preliminarily tightens them. If you didn't have a helper, what you could do from the last scene is put one of the lower bolts into the lower strut mount area and then just use a jack to jack up the suspension to help you guide the strut into place. Now we're going to torque these top three strut bolts to about 34 pounds. I'm just going to fast forward as we, as Jeremy tightens up the last two bolts, then puts that plastic cover back down in place. Make sure all the clips are secure, and then put the three little plastic covers that go over top of the bolt holes into place. We can basically align this by sticking something through the bolt holes. Now make sure the ABS wire is in the right spot and you should be able to get the knuckle into the middle of the strut. Fast forward here as Jeremy pushes those bolts through, puts the nuts on and just kind of preliminarily tightens them up.
You'll want to torque these bolts to between 115-120 pounds. Speed it up here as Jeremy bolts on some of the final components, the 8 and 10mm bolts that hold the ABS sensor and the break line, as well as a little bit later you'll see him put the strut, the stabilizer link strut back on. Obviously we're showing you the passenger side. You always want to replace these struts in pairs and as well have your vehicle aligned after you do this type of repair. Put your wheel back on and start all your lug nuts just by hand first, and then while the vehicle is still in the air just kind of preliminarily tighten them with your socket and ratchet or as I'm doing with my impact wrench. Again, use your torque wrench and you want to tighten your lug nuts between 95 and 100 foot pounds. Use a star pattern as you tighten.
We hope this helps you out. Brought to you by www.1AAuto.com, your source for quality replacement parts and the best service on the internet. Please feel free to call us toll free 888-844-3393. We're the company that's here for you on the internet and in person.
Shop Products


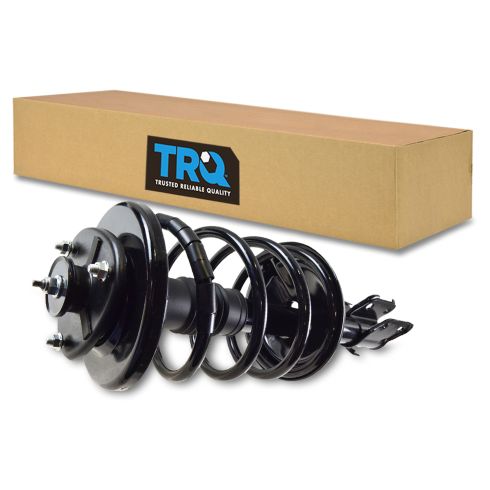
1999-04 Honda Odyssey Front Passenger Side Strut & Spring Assembly TRQ SCA57478
Part Details:
- No specialty tools required
- Easy install - Pre-assembled, loaded struts
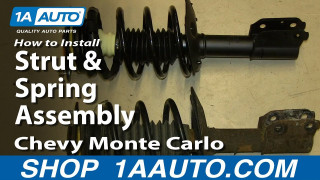
How to Replace Front Struts 2000-07 Chevy Monte Carlo
How to repair, install , fix, change or replace your front shocks with their loaded struts on 00, 01, 02, 03, 04, 05, 06, 07 Chevy Monte Carlo.
