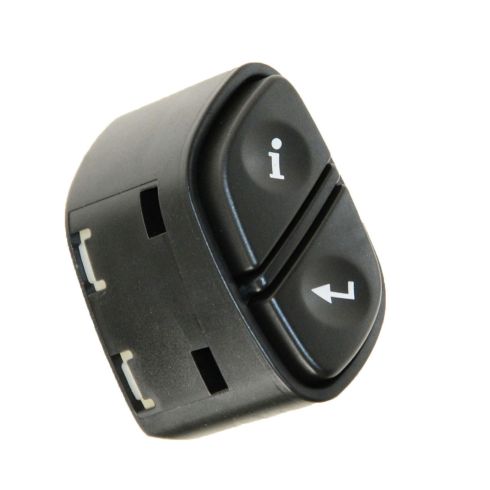
How to Replace Steering Wheel Personalized Settings Switch 2003-07 GMC Yukon
Created on: 2020-04-03
Watch this video to learn how to replace a steering mounted switch on your 2003-07 GMC Yukon.
Tools needed
-
21mm Socket
Torque Wrench
Number 2 Torx driver
8mm Wrench
Ratchet
Needle nose pliers
T20 Socket
Pick
Disconnect the battery. Disconnect the negative terminal. Use an 8-millimeter wrench and disconnect that. Just slide it out of the way. I wanna release the airbag. I'm gonna use a small blunt object, like a pick with the tip cut off. Works pretty good. And just pushing here. There's a little spring that you push on that releases this side of the airbag. Do the same on the other side. We could pull the airbag up and disconnect the wires on the backside. All right. There's two clips right there, and just squeeze those clips. Slide the connector out.
Slide that off, place the airbag aside, and just make sure you put it face up. If you see, this is how the spring works with the pick. If you push the pick in there, you're just trying to move that spring. So you might have to feel around for it. And disconnect this wire right here. This is for the horn. You're just gonna grab this white tab, push down a little bit, and then twist it. And twist it to the left and slide this out. Disconnect this connector right here. There's a little lock tab right there. I'll just use a pick or a screwdriver. Slide that connector off. We're gonna loosen this nut up. Use a 21-millimeter socket and a ratchet. If you can, hold it with your knees or have a partner hold it for you while you loosen it.
Now, before I take the nut off completely so that I don't hit myself in the head with the steering wheel, just grab the steering wheel, rock it back and forth, and it should loosen up. If it's really, really tight, you can use a puller. There's special pullers for these. And take the nut the rest of the way off. Slide the steering wheel out. Slide these wires through. You wanna make sure this clock spring doesn't twist, which...it seems like it has a lock on it. So it shouldn't move. On the backside of the steering wheel, take this cover off. Use a T20 socket. Take these two screws out. Slide that cover off, take some needle nose pliers and just push on this retainer right here. Just squeeze it in. There we go. Just like that. Move the wires. And just take a skinny screwdriver. I'm using a Torx driver. And just, on the back side right here, just push straight through and the switch should slide right out. Disconnect the switch. There's a little button right there. And take the new switch, slide it in position. The connector, push it back in place. And we'll take the wiring harness and we position it the way it was and the connector, push that retainer back in position. That looks good. Take the cover, slide it over, and put the screws back in, and tighten the screws down. Snug them down.
Take the steering wheel. Slide the wires through the square opening and line steering wheel up. There is a little tab on the shaft of the steering column and a little arrow. You wanna line that up. And it should be slotted. You shouldn't be able to put it on any other way. It should only go on one way. Put the nut back on. Tighten this up. Now you're gonna torque this nut to 29 foot-pounds. Reconnect this connector. Just line it up. Lock it in place. And then the horn connector, slide that in position and push it down. It should lock in place. Take the air bag, line the connectors up just like that. Just make sure the wires don't get caught on anything. Slide that in position. Lock it down. Now let's reconnect the battery. And snug down the terminal. Give it a wiggle, and make sure it's tight. And you're good to go.
Shop Products

How to Replace Relay 1998-2007 Volvo V70
How to remove a washer pump relay on 98, 99, 00, 01, 02, 03, 04, 05, 06, 07 Volvo V70

