How To Replace Spark Plugs 2003-09 Toyota 4Runner
Created on: 2019-10-20
Watch this video to learn how to replace the spark plugs on your 03-09 Toyota 4Runner. 1A Auto shows you how to do it yourself and save money!
-
step 1 :Changing the Passenger Side Spark Plugs
- Remove the two 10 mm nuts to remove the engine cover
- Release the two air filter box latches, remove the air box cover and set it aside
- Disconnect the ignition coil electrical connector
- Remove the 10 mm bolt securing the ignition coil
- Pull the ignition coil straight out
- Remove the spark plug carefully with a 5/8 in spark plug socket
- Compare the removed spark plug with the replacement spark plug to ensure the replacement is correct
- Use a spark plug gap too to verify the correct gap on the pre-gapped spark plugs
- Seat the spark plug into the 5/8 spark plug socket
- Carefully lower the spark plug into the spark plug well
- Carefully start the spark plug threads by hand
- Torque the spark plug to 14 ft-lb
- Apply dielectric grease to the ignition coil socket and electrical connector
- Insert the ignition coil into the spark plug well
- Secure the ignition coil with the 10 mm bolt
- Reconnect the ignition coil electrical connector
- Repeat for the remaining passenger side spark plugs
- Insert the rear tabs of the air box cover into the air box, and close the cover
- Secure the air box cover with the two latches
-
step 2 :Changing the Driver Side Spark Plugs
- Repeat the same removal and installation process as the passenger side spark plugs
- There are several obstructions to remove on the driver side for easier access
- Remove the hoses from the retaining brackets to access the middle spark plug
- Remove the two 12 mm bolts to remove the support bar to access the rear spark plug
- Install the engine cover by setting the rear tabs in position, and securing it with the two 10 mm bolts
Tools needed
-
Socket Extensions
Torque Wrench
5/8 Inch Spark Plug Socket
10mm Socket
Ratchet
Hey friends, it's Len here from 1A Auto. Today we're going to be working on our 2006 Toyota 4Runner and I want to show you how to replace some spark plugs. If you need these or any other part, check us out, 1aauto.com, thanks.
Okay, friends. So now that we've got the hood up, we're going to take a look at this cover, this has to come off. You're going to notice a 10 millimeter right here and a 10 millimeter nut there. You can use a ratchet, you can use your electric device, whenever you've got. Just remove the nut, looks like that, nothing too special. This one, same as the first. We'll set it aside. Now grab your cover, lift it straight up like this, and then you're going to draw it towards you. You're going to notice you've got a little hooky do there and there and those just kind of sit right on this rubber and that rubber.
All right, so next, let's pop these little clips right here. We're going to take our air filter box, set it aside. If you haven't checked your air filter, now's a perfect time. Just lift it up, take a peak, it looks pretty good. I'll set it back in. So now we have a fairly clear view of our coils and everything. Now set this this way. You've got coils here one, two, three, coming down the line here, right? And then of course on the other side of the engine, you're going to be looking at the same thing. An exception of just the upper intake part's going to kind of be blocking some of it. Might be a little harder to see, but it's definitely doable.
So as we look at this, I'm just going to show you how to get off one of these coils real quick. We can squeeze this little tab right where my thumb is and you can see the lock lifting up. Give your harness a little wiggle. If it doesn't want to break free, just grab my pocket screwdriver here. Let's see if I can give it a little push. Help it along. Awesome. Take a look at your electrical connector. Just make sure you don't have any funny colors in there. If you see any rainbow colors inside an electrical connection, it's probably not a good thing. You want nice, beautiful metal. This looks great. I'm just going to tap it a little bit. It looks like there's quite a bit of sand and dirt around here. So we'll set that aside though.
So now we're looking at our coil bolts here. As you can tell it's fairly rusted. It should be a 10 millimeter. So I'm just going to try to scrape off the majority of this extra crud. Now we'll see about getting a 10 millimeter socket on there and see if we can get this to loosen up. Okay. So I've got my nice a long ratchet here. I grabbed an extension and I've got my 10 millimeter socket down there. Just going to see if I can break this free. Feels like a no.
Okay. So when you have a bolt that's stripped out on the head like that and you just can't your socket to want to grab onto it, get yourself one of these types of sockets. It's called a twisty socket. It has like rifling on the inside. And what you need to do is you put it over the head of the bolt that's stripped, you give it a couple of loving bonks with your hammer. And as it goes on, it's going to twist, twist, twist, and lock in. And then as you continue with a ratchet and you try to turn it, it's going to continue trying to lock into that bolt, grip it and pull up at the same time. So it's just going to continue to grip, grip, grip until it finally breaks free.
So let's give this socket a try. I'm just going to go right on here. Grab my little hammer, a couple of loving bonks, see if this works. Oh yeah. So this socket works great for getting the bolts out. Something you've got to think about is getting the bolt back in. Generally speaking, what you would want to do is replace it, obviously. I mean, if the head's no good to the point that you can't get it out, more than likely you just need to replace it because how are you going to tighten it up? So we'll just set this aside.
At our coil here. Give it a little twist, lift it straight up. This boot should come with it and here's your coil. Okay, so now that we have our coil out, we want to make sure that the tube's nice and clear. I'm just going to spray a little compressed air inside there. Can see debris coming out. Last thing you want is anything getting down inside your cylinder because you didn't clean that out. Use my spark plug socket, slide it right down in here and I just want to show you why I said spark plug socket, not just a regular five eighths socket. If you look down deep inside there, you're going to notice that there's a little rubber like I don't know, little rubber piton inside there I guess we'll say. And that just holds onto the tip of the spark plug and keeps the socket from wobbling around and potentially cracking the ceramic of the spark plug.
If you use just a regular plain old five eighths socket, you're not going to have anything holding that socket still and you might crack your spark plug, which might not be a big deal if you're just taking out the old spark plug. But when it comes time to put it in a brand new one, you're going to want to make sure you have something good on there and you don't want to ruin a brand new spark plug. Put that in there with our extension. I've got my three eights ratchet. Okay. So here's our spark plug. So if you look at the tip of your spark plug or the inside end of it, I guess, because I would say that the outer portion's the tip. But anyway, the inner portion, you can see that it's worn at an angle. This spark plug's definitely worn and it needs to be replaced. All right.
Generally speaking, it should be nice and flat going across the top. If it was a platinum, you'd see like flat across the top and then a little iddy biddy tip coming up. If it was a double platinum, you'd have a tip coming up from the bottom there, and then of course one coming from this electrode area there. But that's what that looks like.
Okay. So I just want to show you on your spark plug real quick. The original one we took out of here, the gap is definitely, it's very bad. The gap on the spark plugs is supposed to be 0.043 so we've got a little spark plug gap or here and that just pretty much tells you what size you're dealing with. The closest one that I can get up to as a 0.044 so this technically should be a little bit bigger than the gap that the vehicle requires. But I can take my gapping tool and wobble it all around. I can even go a 0.08 and it almost fits in there like super close. So as you could tell, the gap on that is really bad. So your spark is going to have to jump all the way from down there across to here. It has a long way of jumping. And so you're going to have a weaker spark and you're going to have poor fuel economy with something like this, probably even notice a running condition.
Going to grab our 1A Auto one here. I'm going to find my little spot again. You've got the 0.044, that's super close to 0.043, just try to stick it in there. It looks like it's just about to squeeze in. I would say that that's perfect. Okay. You want to check all your plugs with a spark plug gapper. Sometimes what happens during shipping is maybe a box gets dropped or something like that. And if a box gets dropped and this gets peened down you're going to have a running issue, obviously. Okay, so just grab yourself a spark plug gapper, your spark plug gap on this should be 0.043. Make sure that it's 0.043 in between the electrode and the top area right there. And then you're clear for an install.
Okay, so we're going to take our five eighths spark plug socket. We've got our brand new quality 1A Auto part. Slide it right in here. By the way, we sell these sockets, the five eighths spark plug socket. I'm just going to slowly put it down inside this hole. Start screwing it in. So I'm just turning this in by hand. We're going to make sure we bottom it out and then we're going to grab the torque specification for it and we can continue. Okay, that's bottomed out. Let's grab the torx spec. So now we're going to torque down our spark plug to 14 foot-pounds, which is not very much by the way. That's it right there. I'm just going to double check it. Awesome. Okay, so we have our 1A Auto coil here.
We're going to use a little bit of dielectric grease. This is a special kind of grease that allows electricity or current to flow through it. I like to put it on here along the edge right there, and then I like to go right up along here. Now it's good. The reason why I put it down here is so that it will slide onto that spark plug. Nice and easy. I like to put it up here, so hopefully it'll help keep moisture out of there. Just gives the rubber a little extra. Carefully slide this right down in, bottom it out.
We're going to grab our bolt. We went and grabbed a brand new one. There's our old, as you can tell, this one's meh. Put it over there. Grab this. Start it right into the hole there. We're going to tighten this up now, almost there. All right, that's nice and snug. Perfect. Grab your electrical connector. We already checked it out so we know that's in great condition. We're going to slide it right onto the coil and we're going to listen for a click. I heard it. Let's give it a tug. It's definitely not coming off. Awesome. Let's move along.
Okay, so now that we've got this one done, we're going to do the same thing to all the rest of this and then we'll do the same to the other side. All right, so let's get our air filter back on here. You're going to notice you have these little pitons and they're going to go into the hooky dos back there. So just slide it in rear first, make sure you get it in. We've got our clips here. There's one, there's two. Give it a shake and a pull. Obviously this side's latched in, but a lot of times what happens is as you could miss on the rear, and even though this is latched in, I'll show you what can happen. You think you have it latched in. Oh yeah, this is great. Awesome, right? You're going to have a lot of dirty air getting sucked into there, so let's avoid that. Make sure you got it on. Awesome.
We're going to go over the other side of the engine. When you come on this side, you're going to notice it's kind of like a little bit more of a jumbled mess and you might notice a couple of things in your way as you're trying to do this stuff. So you've got one coil down here, right, with your bolt, you've got the center coil right there, and then you've got another one all the way back over here. Okay. You can see my thing, it's right there. More than likely what you're going to have to do is take off this bolt right here and then the lower one down there and get this right out of the way. Okay.
It's just a metal bar. It's easy peasy. You've got a little clamp right here, you just squeeze it with your fingers and that hose is going to be able to move right out of the way and you'll be able to get all these coils right out of here, easy peasy, just like the other side. And then of course you can get to your spark plugs if needed. So we've got our little hooky dos on the cover here. And then the rubbers right there as I showed you before, I go just like this so I can see, slide them on there. We're going to bring this down nice and easy. We're going to line up the studs with the holes. Perfect. We've got our two nuts. They're both the same. We'll snug these up. Give it a little tug. That feels good. Make sure you have all your tools and parts out from underneath the hood and down the road, you go.
Thanks for watching. Visit 1aauto.com for quality auto parts shipped to your door, the place for DIY auto repair. And if you enjoyed this video, please click the subscribe button.
Shop Products


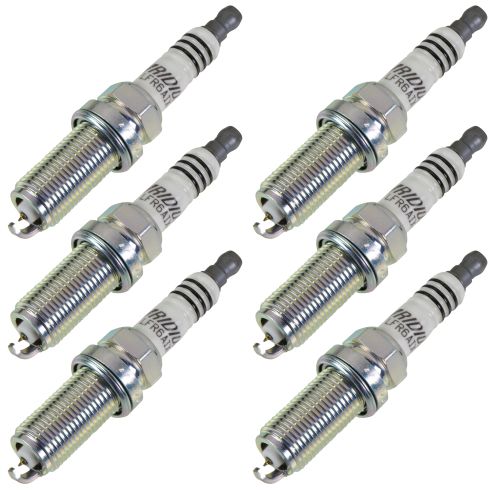
Toyota Subaru Lexus BMW Saab 6 Piece Spark Plug Set NGK NGETK00045
Part Details:
- 6 Piece
- (6) Spark Plugs

How to Replace Spark Plugs 2003-07 Cadillac CTS
Need to replace the spark plugs on your 03-07 Cadillac CTS? We'll show you how in this 1A Auto video!
