How to Replace Dome Light Bulb 2007-14 Toyota FJ Cruiser
Created on: 2019-07-31
If the dome light needs to be replaced, this video will show how to remove the lens and replace the bulb
-
step 1 :Removing the Dome Light Cover
- Find the access slots
- Pry down the cover from the slots with a flat blade screwdriver
-
step 2 :Servicing the Dome Light Bulb
- Pry out the bulb with a flat blade screwdriver
- Press the new bulb into place--passenger side first
-
step 3 :Installing the Dome Light Cover
- Press the dome light cover into place
Tools needed
-
Gloves
Flat Blade Screwdriver
Hey friends, it's Len here at 1A Auto. Today we're working on our 2007 Toyota FJ Cruiser, and I want to show you how to replace the inside dome light. It's going to be a very simple job. I can do it. You can do it too. As always, if you need any parts, you can always check us out 1aauto.com. Nice.
So right up in behind this plastic right here is where the dome light actually is. You just need to get up in here. I use a pocket screwdriver and there's like a little hatching right there. Just grab it, this one right there. We'll take down the lens cover. It's not broken or cracked. If it was, you could replace it. This one looks fine. We'll set it aside. Right up in here is where the bulb is. So to get that out, let's use your pocket screwdriver once again. Grab this. Let's see. See if I can get it down. Here it is. Somewhere down here. Yeah. Got it.
So that's what our dome light bulb looks like. It's not just a regular light bulb. There it is. Let's take a look at it. If it's not working, it's probably burnt. This one was working. I just want to show you how to remove and replace it. So I'm going to go ahead and reinstall it. I'm just going to go up in here. I'm going to start with the passenger side, and then I'm going to slide it up into the driver's side. The driver's side has kind of like a little tension prong on it, so that's why I'm going to start over here.
Let me see if I can get my fingers up in there, and then I'm just going to help the bulb up, just like that. Give it a little test. That looks good. Okay. Grab our Lens. Obviously we want to line up the slot with where the switch is. Probably don't have to say that, but I will anyway. Then we'll just take this, started in on one side, hit up there. Test it one more time. Looks good. So there you are. Easy peasy. Thanks for checking in.
Thanks for watching. Visit 1aauto.com, your place for DIY auto repairs, for great parts, great service, and more content.
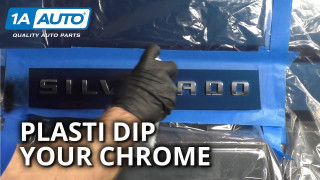
How to Cover Chrome Emblems or Badges on Your Truck with Plasti Dip
Say goodbye to chrome! Learn how to dip, or coat with special rubberized paint, any part of your vehicle you like!
