
How to Replace Side Mirror 2004-09 Subaru Outback
Created on: 2018-05-03
How to repair, install, fix, change or replace a broken, smashed, cracked, or shattered side view mirror on 08 Subaru Outback
-
step 1 :Removing the Door Panel
- Pry out the trim door behind the door handle
- Pry off the door pull
- Remove the Phillips screw from the door pull
- Remove the Phillips screw from the door handle
- Pry out the door panel with a trim tool
- Lift the door panel off
- Disconnect the electrical connector
- Disconnect the cables from the door handle
-
step 2 :Removing the Side View Mirror
- Disconnect the electrical connector
- Pry off the rubber boot on the door panel behind the mirror
- Remove the three 8mm bolts from the mirror
- Remove the mirror
-
step 3 :Installing the Side View Mirror
- Apply the padding to the new mirror
- Insert the mirror into place
- Tighten the three 8mm bolts to the mirror
- Press on the rubber boot to the door panel
- Connect the electrical connector
-
step 4 :Installing the Door Panel
- Connect the cables to the door handle
- Connect the electrical connector
- Lift the door panel on
- Tighten the Phillips screw to the door handle
- Tighten the Phillips screw to the door pull
- Press on the door pull trim
- Press on the door handle trim
Tools needed
-
Flat Blade Screwdriver
Phillips Head Screwdriver
Rust Penetrant
Hi, I’m Mike from 1A Auto. We’ve been selling auto parts for over 30 years!
We'll start by opening the door. First, we're going to take this little trim piece off. We'll use a flat blade tool carefully behind the panel. Pull it, and then you can use your fingers and pull it back with three little clips. Next we're going to take this trim piece off here with a flat blade tool, a little area to put your screwdriver. Push down and pull it out. Clips on the back.
Next we're going to take this trim piece off, pry it down right here with a flat blade tool, being careful not to damage any of the surfaces. You're going to pull it out. This is difficult to come out. There is clips and retainers that hold it in. We're going to start with a Phillips head screwdriver. We have three screws: one there, one here and then one up here.
Next we're going to use a door panel trim tool. We sell these at 1aauto.com. You can go in behind and pop off the clips, then you just lift and pull back. On the inside, we're going to pull the inner door latch and lock mechanism off. We have to pull this cover up. We have to disconnect these cables. You're going to pull out and then you're going to pull up. A little ball will come up. Same with this one.
Next we have to disconnect our connector for the window switches. You're going to push this little tab here and pull it down, and then we're going to disconnect our door light. Push down on this tab. That's going to pull right out. We're going to remove the mirror now. We're going to disconnect this connector right here. There's a little tab. You just push it in.
Then we're going to disconnect this cover right here. Use a little flat blade tool. Pop that off. We have three fasteners right here. I'm going to be using an eight-millimeter socket with an extension and a ratchet. Carefully pull that one out. Before I pull this one out completely, I want to support the mirror on the outside. You pull the mirror off.
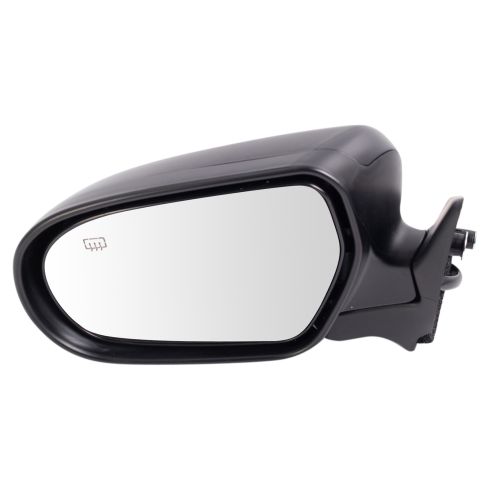
This is our old mirror. This is our new mirror from 1aauto.com. As you can see, the shapes are the same. Everything is all set. If you take a look at the connector, the connectors are the same. They both have the heated mirror on them. As you can see, the mounting points are the same, and it comes with this weather guard also. It's the same. Order our mirror from 1A Auto, and you'll be ready to rock and roll.
We can put this weather guard on. Peel back. There we go. Peel this off. This is going to go through here like this. Just like that. It needs a little pressure. We're going to install this piece. This goes through the connector first, that one and over that and over the other arm. We're going to install our mirror.
I'm going to have in my right hand my eight-millimeter socket with extension and the eight-millimeter bolt ready so when I put it in, I can install it right away. First thing, I'm going to slide the connector through the hole. We're going to push the mirror down. We're going to start putting the bolt. Once that bolt is started, you can go get your other bolts. Once they're all in, you can snug them right down. We can take our connector, plug it in.
Now we're going to reinstall the door panel. We're going to start where we left. We're going to reattach the door light, just push it in. We're going to reattach the connector for the window switches. Push them. We're going to reattach the lever and lock mechanism with the cables. The small cable goes on the top. Take this ball towards there first, like that, then you slide it over just like that. Same with this one. The ball goes in this hole, and then it goes through the slot in this. It goes down like that, and then we slide this cover down.
Next, you want to take this, going from the top. Get it in up top here, there's a groove. Once that's lined up, you should be able to line the pins up. Just push just like that. Phillips head screws and a Phillips head screwdriver, start screwing in the panel. We're going to install this cover. It's going to slide in like that. This last cover up top. Now we're going to put this little cover on in there. This would have been easier to do before we took the panel Put the panel back on. We'll cover that back up.
Thanks for watching. Visit us at 1AAuto.com for quality auto parts, fast and free shipping, and the best customer service in the industry.
Shop Products


2005-09 Subaru Legacy Driver Side Power Heated Textured Black Mirror TRQ MRA06046
Part Details:
- Textured Black
- Black
- Yes
- Electric
- No
- No
- Clear
- Textured
- Flat
- No
- 3
- No
- No
- No
- No
- No
- No
- No
- Manual
- No
- No
- No
- Black
- Textured
- No
- 6
- Plastic
- 7.09 in
- No
- No

How to Replace Side Rear View Mirror 1992-99 Buick LeSabre
Find out how to replace the door panel and the side view mirror with this how-to video
