How to Replace Shift Cable 2000-06 Chevy Tahoe
Created on: 2020-10-20
This video shows you how to install a new automatic transmission shift cable in your 2000-2006 Chevy Tahoe.
Tools needed
-
Socket Extensions
Flat Blade Screwdriver
Socket Driver
7mm Socket
10mm Socket
Ratchet
Needle nose pliers
Trim Tool Set
Pick
On the driver's side of the transmission, we're going to pop this cable off. Just use a little screwdriver, and just slide that off. And there's a retainer right here. A little clip. Just get under there with a screwdriver. Take that off. Now I'm going to use some needle nose pliers and just squeeze these two tabs, and you can push the cable through, just like that.
Now I'm going to push this through. As I pull it through over here, just get it past the transfer case. It just goes in between, right there. And there might be a retainer holding this onto the floorboard. And then just slide it over here. And slide that just like that. There's another retainer that holds this right here. Just use a trim tool, try to pry this off. There we go. And that broke. That's okay.
Then right here is where it's going to go through the floor. And just take and try to push this through. Just take a screwdriver and just push it. And that's good, just like that. We need to take this trim panel off. First, put the key in, turn the key on, and then shift as far down as you can. And also rotate the steering column down. You just grab this panel, and just slide it out, just like that. We're going to take this panel off. Take this cover off first. Just grab here. Slide that off. Now, to take this off, there's two 7-millimeter bolts. Just use a 7-millimeter socket, take these out. And just slide it straight back.
There should be clips in here. This one doesn't have those clips, but they slide in there and there. I'm going to take this shield off. Use a 10-millimeter socket. There's two nuts on this side and two on the other side. Take those off, and slide this off. Now I'm going to pop off the cable right here. Just use a straight blade screwdriver. Just pop that off right there. And down here, there's a little retainer, or a lock. Take that off. And then take some needle nose pliers and just squeeze the little tabs on the cable, and then you can push it through, just like that.
I'm just going to pull this ducting off. I'm going to use a trim tool, and there's a little pushpin over here. You have to get underneath that. There we go. And then it just slides out, just like that. That's where the pushpin is. Now I'm going to loosen up the bracket that the BCM is held on. There's two screws right here. I'm going to use a 7-millimeter socket to take those screws out. And then there's two screws on the other side, right there and right there. Loosen those up. All right, loosen that up.
And you don't have to take this out. Just loosen it up, just so you can get the cable past. Underneath here, there's a spring that's still holding this cable from coming out. I need to take this bolt out right here, but you have to get it from the backside, here. So I'll use a 10-millimeter socket and a ratchet, try to take that out. And this piece right here, just slide it out. This piece is broken, but normally there's clips right there, so you're going to have to pop it this way. Just be careful of the handle.
And then, under the carpet, we're just going to fold it over right here, just like that. We can pull this through. Now you're just going to have to fish it behind that spring. It's kind of like a retainer. And it'll slide right out. And there it is. Now, there's two parts to the cable. We're going to start with this part, this is the upper part, and slide this, thread this back in the way the old one came out, up top first. All right, just slide this in position like that.
And then before I hook it up, I am going to try to get it through that spring in the back. It's just kind of hard to explain how it goes. Okay, that's around that spring. I can reposition this. Just spin this around, and slide that in there. That's good. I can hook this up right here. Just lock that on. And take this retainer, or clip, and line that up, and just lock that in place.
Now I'm going to reinstall that 10-millimeter bolt that goes on the back of that spring that holds the cable. Now I'll pull the carpet up, and slide the cable back down that hole. Watch out for that. And then make sure the cable goes in this groove right here. And secure this grommet to the floor. It should click in place, just like that. And that's secure. And then push the carpet back down. And take this cover, put this over here, and it's going to snap towards the front of the vehicle. Slide this on underneath the seat.
Try to get these lined up, and push them down. Now put the BCM bracket back in position, and screw those screws back in. Now take this air duct and slide that in position, and push the pushpin back in. All right. Now take this panel, or this cover right here, and slide this on. And take the nuts, and put the nuts on. Get those started. And take this panel, line this up, and lock that in place. And then take the two screws. Put those in underneath, right there and right here. Put this side fuse cover on. Now lower the steering wheel, and then shift the lever all the way down, and put this cover on.
Just slide this down first. This lined up. There's some guide pins on the side. And you get the bottom in first. With the shift lever, just make sure this is all the way back into the park position, with the key off. All right, now take this piece. Now, we want to run this the same way that the old one came out. Just slide it through here, and then go past the transfer case. And try not to just pull on the end of this. And get this to line up through the bracket. Lock that in right there.
Now take this horseshoe bracket, or lock, that goes in between here. Put this on the harness...I mean, the cable. That's just going to keep the cable on there. That's good. And then put this into the cable on the lever of the transmission, and lock it in place. And then make sure...You want to make sure the transmission is in park. So move that all the way to the front. And then make sure that shift lever is in park as well.
All right. Now we need to put these two cables together. Take this little protector off this one, and then there's a cable inside there that has to line up in there. So just line these two together, and they're going to lock together. And then once they lock, you can't pull them apart again. And then you're just going to push this in a little bit more, so it feels comfortable, so it's not popping out right there.
Now, there's a lock right here. And once this is not too loose, right about there, lock that down. And then let go of this, and that's going to lock it. And then you can double-check. If you have to adjust this, you can pull this back and pull that lock up, and adjust it in or out accordingly. And then take this retainer, and it's going to slide right there.
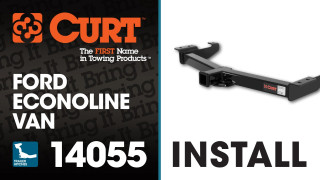
Trailer Hitch Install CURT 14055 on Ford Econoline Van
This video depicts the installation of the CURT 14055 class 4 trailer hitch on a Ford Econoline Van. Install Sheet - https://www.curtmfg.com/masterlibrary/14055/installsheet/CM_14055_INS.PDF Application Coverage: 2000 - 2014 Ford Econoline E-250 or E-350 2000 - 2014 Ford Econoline E-150 or (Drilling Required) Special Notes: ***DO NOT EXCEED VEHICLE MANUFACTURER'S RECOMMENDED TOWING CAPACITY*** PERIODICALLY CHECK THIS RECEIVER HITCH TO ENSURE THAT ALL FASTENERS ARE TIGHT AND THAT ALL STRUCTURAL COMPONENTS ARE SOUND. *** USE EXISTING VEHICLE HARDWARE *** Warning: -This video is intended to be used as reference. Please refer to print instructions for complete installation information. -Need help or have some questions? Call Technical Support at 800.798.0813 (Monday-Friday 8am-7pm CST)
