How to Replace Serpentine Belt Tensioner 1992-99 Lincoln Town Car
Created on: 2011-05-10
Watch this video for detailed step-by-step instructions on how to replace the serpentine belt tensioner on your 92-99 Lincoln Town Car.
-
step 1 :Disconnect the battery
- Use your 8 mm wrench to disconnect the negative battery terminal
-
step 2 :Remove the serpentine belt
- Locate your serpentine belt routing diagram
- Use a 3/8� ratchet handle to release tension from the belt tensioner.
- Remove the serpentine belt.
- Inspect the serpentine belt for excessive wear.
-
step 3 :remove the serpentine belt tensioner
- Unbolt the tensioner with your 10 mm socket and ratchet
- Remove the tensioner.
-
step 4 :install the new serpentine belt tensioner
- Bolt the belt tensioner in with your 10 mm socket and ratchet.
- Torque to 20-25 ft lbs.
-
step 5 :Replace your serpentine belt
- Use your serpentine belt routing diagram
- Route the belt around the pulleys
- Use the 3/8� drive ratchet to release tension and loop the belt over the last pulley.
- Reconnect the negative battery terminal
Tools needed
-
8mm Wrench
10mm Socket
3/8 Inch Drive Ratchet
Brought to you by 1AAuto.com. Your source for quality replacement parts and the best service on the internet. Hi. I'm Mike Green. I'm one of the owners of 1A Auto. I want to help you save time and money repairing and maintaining your vehicle. I'm going to use my 20 plus years experience restoring and repairing cars and trucks like this to show you the correct way to install parts from 1AAuto.com. The right parts installed correctly. That's going to save you time and money. Thank you and enjoy the video. In this video, we're going to show you how to take off and put back on a serpentine belt tensioner on this 2000 Lincoln Town Car. Same as any 98 to 02, this vehicle has the 4.6 liter. Tools you'll need are a 3/8 ratchet handle, and a 10 millimeter socket, as well as an 8 millimeter wrench to disconnect the battery.
8 millimeter wrench. Disconnect your negative battery cable. Before you move your belt, you want to make note of how it's routed. On most vehicles, there's a belt-routing diagram, although I don't see one on this Town Car. You can see that it goes down around your crank pulley, way down there. Around the power steering pulley like that, then up to the alternator. Around the idler pulley. Down to the A/C pulley, and then back up to the tensioner, and then around the water pump and down. Removing the belt is quite simple. Right here is your tensioner. It has a 3/8 hole in it right here, where you can put a ratchet handle. Then you want to move it clockwise. You can see the belt loosens up. You can take the belt off the alternator. Slowly let your handle back. Pull it out. You don't have to remove the belt all the way, but I do to get it out of the way for filming. Now your tensioner. Quite easily. There's a 10 millimeter bolt right here. 10 millimeter socket ratchet. Speed up a little bit through removing that bolt. Bolt comes out. The tensioner comes off. There's nothing wrong with my tensioner. Even though it looks a little corroded, it actually looks fairly new, just seen a little bit of weather.
Putting it back on is pretty easy. I thread the bolt in, start the bolt. The tensioner does have a little knob right here that goes into the block to locate it. Tighten up this bolt. Tighten it to about 20 to 25 foot pounds. I'm not going to be able to really film this that well, but I'll try and explain what I'm doing. I'm going to take a loop, like this, and I'm going to put it down and around the air conditioning compressor, down here on the passenger side of the motor. Loop it on there. I'm bringing that right around my tensioner. From there, bring this side up and around my idler pulley. This then goes down around my water pump here, and then around the crank pulley, which is the largest center pulley. I'm going to bring this off of my alternator, and then put it down and around my power steering pulley. I've got everything in place. I've got the belt on all my pulleys except for my alternator. I can put my wrench on my tensioner. Pull my tensioner all the way over. Belt comes up and around my alternator. Pull my tensioner off. Check the belt in all the locations. It looks good.
Reconnect and tighten up your negative battery cable and you should be good to go. We hope this helps you out. Brought to you by www.1AAuto.com. Your source for quality replacement parts and the best service on the internet. Please feel free to call us toll-free 888-844-3393. We're the company that's here for you on the internet and in person.
Shop Products
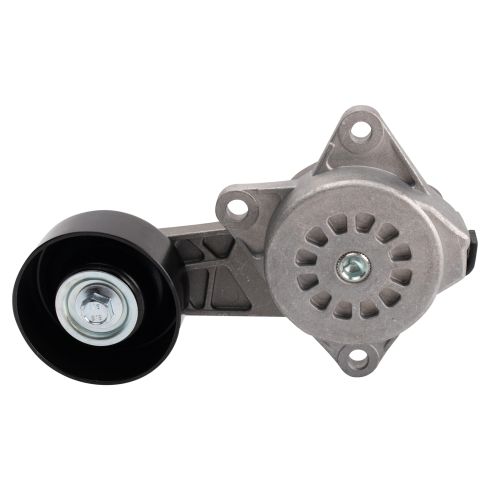
Ford Lincoln Mercury Accessory Drive Belt Tensioner TRQ BPA03802
Part Details:
- Pulley
- Smooth
- 17 mm
- Silver; Black
- 17 mm
- 2.99 in
- 1.22 in
- 0.67 in
- 0.67 in
- 3
- 31 mm
- Aluminum & Steel
- 76 mm

How to Replace Serpentine Belt Tensioner 2002-06 Chevy Suburban 1500 V8 5-3L
How to repair, install, fix, change or replace a broken, noisy, squeaky, worn or groaning serpentine belt tensioner on 02, 03, 04, 05, 06 Chevy Suburban
