How to Replace Serpentine Belt Tensioner 1998-2002 Ford Escort
Created on: 2013-06-04
Use the belt diagram and step-by-step instructions provided in this video to help you replace the serpentine belt tensioner on your 98-02 Ford Escort.
-
step 1 :Removing the Serpentine Belt
- Familiarize yourself with the belt routing diagram
- Remove the seven 10mm nuts from the splash shield
- Pull the splash shield aside
- Attach a 13mm socket and ratchet to the tensioner pulley
- Turn the tensioner pulley clockwise to loosen the serpentine belt
- Pull the belt off of the crankshaft pulley
- Pull the belt down and out
-
step 2 :Removing the Serpentine Belt Tensioner
- Pry the tensioner away from the engine with a pry bar to access the bolts
- Remove the three 10mm bolts from the tensioner
- Pull the tensioner off and out
-
step 3 :Installing the New Serpentine Belt Tensioner
- Lift the new tensioner into place
- Insert the three 10mm bolts into the tensioner
-
step 4 :Installing the New Serpentine Belt
- Maneuver the new belt into place
- Loop the belt below the A/C and crank pulleys
- Pull the belt around the tensioner and the water pump to the alternator
- Bring the belt around the idler pulley and onto the power steering pulley
- Reposition the belt as necessary
- Pull the belt off of the crank pulley
- Attach a 13mm ratchet to the tensioner
- This may be a 15mm bolt if the tensioner has been replaced
- Turn the tensioner clockwise to loosen the belt
- Stretch the belt onto the crank pulley
- Check that the belt is routed correctly
- Put the splash shield into place
- Insert the 10mm bolts into the splash shield
Tools needed
-
13mm Socket
Socket Extensions
15mm Socket
Pry Bar
Jack Stands
10mm Socket
Ratchet
Floor Jack
Brought to you by 1AAuto.com, your source for quality replacement parts and the best service on the Internet.
Hi, I'm Don from 1A Auto. I hope this how-to video helps you out, and next time you need parts for your vehicle, think of 1AAuto.com. Thanks.
In this video, we're going to show you how to replace a serpentine belt tensioner. If you have problems with your belt squeaking, a lot of times, it can be because the tensioner is not providing enough tension. It's letting the belt slip. That also can be due to a bad belt. In this video, we do remove the serpentine belt totally. You don't have to do that, but usually it's a pretty good practice if you're replacing the tensioner. The belt probably needs to be replaced as well. You'll need jack and jack stands. You could probably do this without jacking the car up, but it's a lot easier to access it, if you take the wheel off. Then you'll need a new tensioner and belt from 1A Auto, 10, 13, and 15mm sockets with a ratchet and extension and a pry bar.
The first thing you're going to want before you do this repair is a belt diagram and we have a nice one made up for you right here. It should give you a pretty good representation of how the belt is routed. Starting at the top left, that's the alternator. Then, going to the right, that's an idler pulley. It goes to the power steering pump then down to the A/C compressor. Then over to the crank shaft, then to the tensioner pulley, then to the water pump., another idler pulley and up to the alternator.
In the lower front and right front wheel area, there are seven 10 millimeter bolts that hold the splash pan in place. In this case in our car there's only four and you're going to remove all of them. Actually what we find is we take off one, and the pan bends down and we try to remove the other ones, but the clips in behind were so rusted that we decided we didn't want to break all them, so we just left it that way and just let the pan or the splash guard hang down out of the way. I've got a 13 millimeter socket on the end of my ratchet and I'm going to put it on the bolt that goes through the pulley, the tensioner pulley, and I'm going to turn it clockwise to remove the pressure on the belt, and then slide the belt off the crank, and the rest of the pulleys. Now the rest of the way, it's a matter of just pulling it down, twisting it a little bit to get it off some of the pulleys. Then you could also pull it off from the top as well.
The tensioner has three bolts that hold it in, three 10mm bolts, but one of them is very close to this power steering line and, as opposed to taking the power steering pump off, we're just going to give it a gentle nudge to get our 10mm socket in the way. We're just going to use a pry bar and just give a little bit of a tweak. Check now. You can see that I tweaked it just enough to get the socket on there. And I'm just going to fast forward. You can't really see what we're doing but we're just using a 10mm socket with a ratchet and removing the three bolts that hold the tensioner in place. It does take an awful lot. The repair itself isn't that difficult but just getting your hands in there and the angles, just takes a little while to get those bolts out.
I've got the old part and the new part from 1A Auto. The mounting holes are going to be in the same spot, it should go right back in. In order to do that, it will be going in sideways up above the A/C compressor and then turning it Once it gets up there, it seems to be the best way to do it and then match up your holes. And we'll speed it up here again. Don just puts all three bolts in place, gets them started at first and then goes at it with the ratchet, socket and ratchet. Again, just the angles of getting in there are difficult. It makes it so you can only turn the ratchet by 1/8 of a turn at a time which just takes a little while. One other note, we did disconnect the AC compressor. We didn't show that part. We just disconnected it. That makes it easier to get the new . it makes it easier to get the tensioner out and back in.
You're not really going to be able to see me doing the belt, but sneak it back in, follow the diagram for routing it. That first step that Don just did was, he just got the belt down, down below the A/C and the crank pulley preliminarily. What Don just did there was that there's just some clearance issues getting by the water pump and those tensioner pulleys, so he just twisted it at the side and got it over on its way to the alternator. The top part it's pretty much done. It's around the alternator, underneath the idler and over the power steering. Now, I want to get this belt on the other side of this pulley, the ribbed pulley here, so I'm going to twist it and try not to have it fall off the alternator pulley, which is right above it. All right, good. Now what we've done here is we pulled a loop across and you can see I'm helping him out a little bit just holding the belt off of the A/C pulley so he can pull the loop from that tensioner on the backside of the motor towards the front and put it onto the tensioner in the front of the engine. In order to get the wrench in there it's better to have the pulley off of the crank rather than the A/C pulley, so he just transfers it, takes it off the crank so he has enough room to get it on.
I'm using a 15 millimeter here, which is what the new one came with and turning it clockwise. I have to release the tension on the bearing and I've got to make sure too that all my belts are on the pulleys, because if they're off a little bit it's not going to give me the room I need. So everything is on except for the crank pulley. As I do this it's going to give me more room. I'm going to hold it tight. You can see Don, is working the wrench with the right hand and then using his left hand to push the belt up onto the crank pulley. Make sure they're all on. Make sure all of them are on and the belt is lined up with the teeth on your pulleys and plug you're A/C back in if you took that off to gain more flexibility getting in there. I'm just going to give it one more look up top and below. I want to make sure the tooth belt is seated correctly on the power steering, alternator, water pump, and below this idler pulley. Once you've done that just put the splash pan back up and bolt it back in place.
We hope this video helps you out. Brought to you by www.1AAuto.com, your source for quality replacement parts and the best service on the Internet. Please feel free to call us toll-free, 888-844-3393. We're the company that's here for you on the Internet and in person.
Shop Products
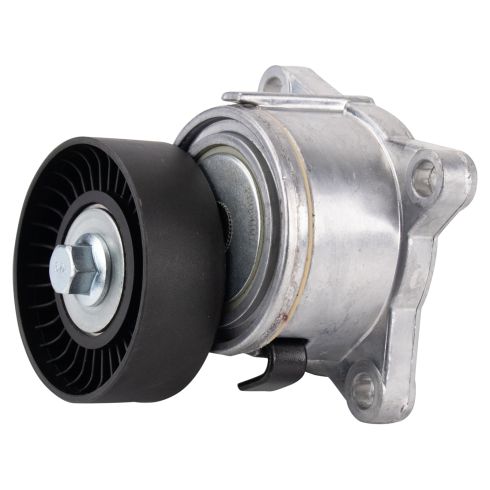
Ford Escort Accessory Drive Belt Tensioner TRQ BPA03805
Part Details:
- 17 mm
- 3.02 in
- 26 mm
- Silver; Black
- 17 mm
- Smooth
- 76.7 mm
- 0.67 in
- 0.67 in
- 3
- 1.02 in
- Aluminum & Thermoplastic

How to Replace Serpentine Belt Tensioner 1999-2014 Chevy Silverado 1500
Learn how to replace the serpentine belt tensioner in your 99-06 Chevy Silverado with this 1A Auto video.
