How to Replace Serpentine Belt Tensioner 1997-2006 Chevy Malibu
Created on: 2011-09-23
Check out this video on how to replace the serpentine belt tensioner on your 97-06 Chevy Malibu.
-
step 1 :Removing the Engine Mount
- Support the engine underneath the oil pan with a floor jack
- Apply penetrating oil to the engine mount studs
- Remove the two 15mm nuts from the engine mount
- Loosen one of the 18mm bolts from the engine mount
- Raise the engine slightly with the jack
- Remove the two 18mm bolts from the engine mount
- Pull out the engine mount
-
step 2 :Removing the Serpentine Belt
- Raise the engine more with the jack
- Insert a 3/8 inch drive ratchet into the serpentine belt tensioner
- Pull the tensioner up to loosen the belt
- Pull the belt off the alternator
- Slowly release the tensioner
- Pull the belt off the other pulleys
-
step 3 :Removing the Belt Tensioner
- Remove the tensioner bolt with a 15mm socket
- Pull off the tensioner
-
step 4 :Install the New Tensioner
- Thread the 15mm bolt through the new tensioner
- Put the tensioner into place
- Start the 15mm bolt by hand
- Tighten the 15mm bolt into the tensioner
-
step 5 :Reinstalling the Serpentine Belt
- Familiarize yourself with the belt routing diagram
- Loop the belt around the crankshaft pulley
- Bring it around the A/C compressor
- Bring it under the power steering pulley
- Bring it across to the idler pulley
- Bring it around the tensioner pulley
- Pull it over the alternator
- Insert a 3/8 inch drive ratchet into the tensioner
- Loosen the belt with the tensioner
- Pull the belt underneath the idler pulley
- Check that the belt is routed correctly
-
step 6 :Reinstalling the Engine Mount
- Put the engine mount into place
- Lower the engine slightly with the jack
- Start the two 18mm bolts into the mount
- Lower the engine all the way and pull the jack out
- Start the two 15mm nuts
- Tighten all the engine mount fasteners
Tools needed
-
Socket Extensions
15mm Socket
18mm Socket
Ratchet
3/8 Inch Drive Ratchet
Floor Jack
Brought to you by 1AAuto.com, your source for quality replacement parts and the best service on the Internet.
In this video, we will show you how to change your serpentine belt tensioner. If your belt is squeaking, sometimes it can be because this tensioner has gone bad. It's not holding enough tension against your belt. This is on a 2001 Malibu. It should be the same as any '97 to '03 Malibu with the 3.1 liter engine. Tools you'll need are a jack or engine hoist, 15mm and 18mm sockets with ratchets and extension, and then you need a 3/8 drive. You either need a flexible bar or the ratchet handle.
Your serpentine belt is obviously right here on the passenger side of your engine. What you actually need to do, is remove this engine mount which involves removing two 18mm bolts here, and then two 15mm nuts, one there and one down there. That is the engine mount, so you either need to support here with an engine crane, or you need to use a jack and support underneath the oil pan here. Do not jack the car up yet. You actually just want to support the weight of the engine. Spray some penetrating oil on those studs down lower. I cheat a little bit and use a 15mm socket, with an impact wrench. There's no reason you can't reach everything pretty easily with just a regular ratchet and extension. Now, I've got my 18mm socket on here. I'm going to loosen up one of these bolts. I'm going to start loosening the other bolt. You're going to see the engine falling which is actually more the car rising. What you want to do now is take your jack. Jack the engine up. Now, it's supporting the engine. You can remove these bolts the rest of the way. This mount, slide it back right out.
I'm just going to remove these two lines just to make it easier for you to see. What you want to do, is take your jack. Jack the engine up a little bit extra. Right down in here is your tensioner. What I have is a little flex arm. What you want to do with this flex arm is put it down. Here is a 3/8 inch hole at the bottom of the tensioner. You want to put it in just like that. You see right here is my bar. I'm going to reach in, and pull the bar up which pulls on the tensioner and releases the tension on the belt. You can pull the belt off, and slowly release your bar back down. Be careful not to pinch your fingers. Take the bar out, and then just take your belt off above with this.
Here's your alternator. Your tensioner is right down here, 15mm socket. It just comes up and out. I'm going to take that bolt out.
Here's the original tensioner, and a new tensioner from 1A Auto. You see it's all the same. It has the little marking to hold it in the right spot. Put the bolt through. Put it down in. Start the bolt first. Make sure that that detent holds it. Tighten up the bolt.
Here is your belt routing diagram. This is key. Make sure you have this before you take the belt off. If you don't have this, make sure you draw yourself a diagram similar, so you can get the belt on again. It's hard to film this, so you just have to take my word that I'm doing what I say I'm doing. Take your belt. You want to put a loop down underneath the crankshaft which is the lowest largest pulley, and in the A/C compressor which is the pulley that's lowest and closest to the front of the vehicle. It comes up under this power steering pulley right up over here. I'm going to reach down, and pull it, and point it back to this idler pulley here, and then around under the tensioner pulley. I can pull it up on top of my alternator right here. Now, I'm all routed except for the idler pulley. I'm going take my 3/8 bar, put it down in to my tensioner. I need both hands. Pull the bar up. Grab on my belt here, and slip it under that idler pulley, then let my tensioner go. I got a couple off a little bit here. Just check, make sure your belt is on correctly everywhere. It doesn't look like it's quite on my crank pulley correctly. Pull up again on the tensioner. Reach down. Flip it a little bit. Now, it's on there correctly. It appears to be on everywhere correctly.
We're just going to speed through putting this stuff back in. Put the mount back down in there. You can let your engine down just a little bit. Start the two top bolts on the mount. Preliminarily tighten them up. You can let the engine all the way down. Take the jack out. Start your 15mm nuts on top. Preliminarily tighten them as well. Here, I'm just reconnecting those hoses that I moved out of your way. Now, use a wrench. Make sure that the mount bolts are tight, but not too tight.
We hope this video helps you out. Brought to you by www.1AAuto.com, your source for quality replacement parts and the best service on the Internet. Please feel free to call us toll-free, 888-844-3393. We're the company that's here for you on the Internet and in person.
Shop Products
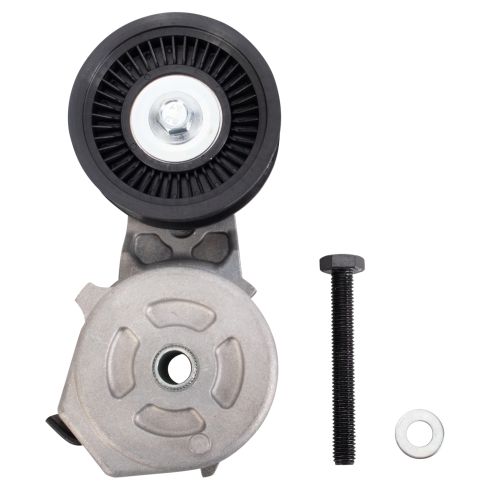
Accessory Drive Belt Tensioner TRQ BPA03819
Part Details:
- Pulley
- 1.1 in
- 17 mm
- 1
- Silver; Black
- 17 mm
- 2.99 in
- 28 mm
- 0.67 in
- 0.67 in
- Grooved
- Aluminum & Thermoplastic
- 76 mm

How to Replace Serpentine Belt Tensioner 2002-06 Chevy Suburban 1500 V8 5-3L
How to repair, install, fix, change or replace a broken, noisy, squeaky, worn or groaning serpentine belt tensioner on 02, 03, 04, 05, 06 Chevy Suburban
