How to Replace Serpentine Belt 1999-2004 GMC Sonoma
Created on: 2012-02-27
How to repair, install, fix, change or replace a broken, cracked, snapped or cut serpentine belton GMC Sonoma 4.3L model years 94, 95, 96, 97, 98, 99, 00, 01, 02, 03, and 04. New Serpentine Belt from 1AAuto.com.
-
step 1 :Removing the Serpentine Belt
- Familiarize yourself with the route of the serpentine belt
- Insert the 3/8 inch drive ratchet into the tensioner
- Turn the tensioner down to loosen the belt
- Pull the belt off the pulleys by hand
- Release the tensioner
-
step 2 :Installing the Serpentine Belt
- Install the belt following the routing diagram
- Loop the belt around the crank pulley
- Bring it around the water pump
- Bring it around the power steering pulley
- Bring it around the A/C Pulley
- Bring it around the alternator
- Bring it around the tensioner
- Insert the 3/8 inch drive ratchet into the tensioner
- Pull the tensioner down with the 3/8 inch ratchet
- Pull the belt over the idler pulley
- Release the tensioner
- Check that the belt is routed correctly
Brought to you by 1AAuto.com, your source for quality replacement parts and the best service on the Internet.
Hi, I'm Mike from 1A Auto. I hope this how-to video helps you out, and next time you need parts for your vehicle, think of 1AAuto.com. Thanks.
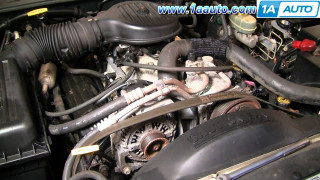
In this video I'm going to show you how to replace this serpentine belt on this 2003 GMC Sonoma. It is a pretty easy operation. This vehicle has the 4.3 liter. The only tool you'll need is a 3/8 drive ratchet handle.
Here's our belt routing diagram. You always want to make sure you have this before you take the belt off. Look at the top of the alternator. Right down here is your tensioner. I've got a 3/8"� drive ratchet handle. There is a 3/8"� square hole in the tensioner. Take your handle, push down, that takes the tension off the belt, and flip the belt off. Slowly let your tensioner back. Remove. Now, you can remove the belt.
Now, go back to our belt routing diagram. What I'm going to do is I'm going to take a loop and put it down around the crankshaft first. Then come up and down around our power steering up to our A/C and then over. What I'll do is I'll leave it off this idler pulley here, so we go right above that, and then, we'll pull the tensioner over and put it down on the idler pulley. Now take a loop and put it right down through here and then take my hand and put it up onto the crankshaft pulley. Then it's coming around the water pump here and now I'm reaching down here and putting a loop down and around the power steering pump, which is down here on the right side as you're looking at the engine. It's pretty tough to get around down in there. Then it comes up onto the A/C compressor and across the alternator. It came off my crankshaft so I'm going to put my arm down in there and make sure it gets down and around the crankshaft.
Basically, then, I have it routed around my tensioner there. It's not around the side of the pull yet. It's on my A/C pulley; it's down there on my power steering pulley, and also down and around the crankshaft pulley. It's a little hard to see way down there.
I take my 3/8 ratchet handle, put it into my tensioner again. Push my tensioner down and then take this and put it right down, I'll have to pull it a little bit, need to tighten it up around all the pulleys. As I was trying to do this I realized that it actually had come off the crankshaft pulley a little bit, so I'm reaching down in there making sure it's on that crankshaft pulley correctly. Push that under there, and let it off. It's under the idler pulley, around my tensioner, down and around my power steering pulley, up and around. The only thing I can't really show you is the crankshaft; you can see it down there and maybe a little bit right down there. It's all in there correctly though.
We hope this video helps you out. Brought to you by www.1AAuto.com, your source for quality replacement parts and the best service on the Internet. Please feel free to call us toll-free, 888-844-3393. We're the company that's here for you on the Internet and in person.
How to Replace Serpentine Belt 1998-2003 Dodge Durango
How to repair, install, fix, change or replace a broken, cracked, snapped or cut serpentine belton 98 to 03 Dodge Durango, the 92, 93, 94, 95, 96, 97, 98, 99, 00, 01, 02, and 03 Dakota, 92 to 93 Dodge Truck, and 97 to 02 Dodge Ram models.
