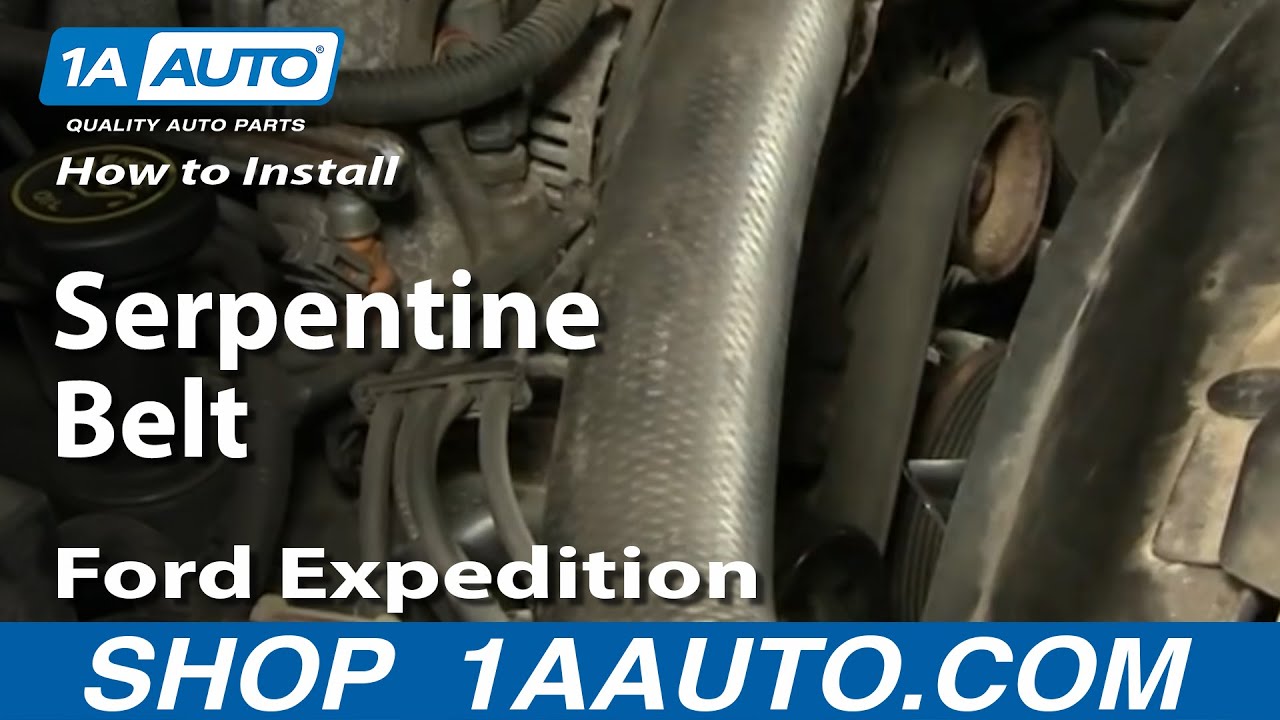
How To Replace Serpentine Belt 1997-2003 Ford Expedition
Created on: 2010-07-15
Follow the tips in this video and learn how to remove the serpentine belt with basic tools, and find out the best practice for reinstalling it
-
step 1 :Removing the Serpentine Belt
- Disconnect the negative battery cable using a 8mm or 5/16 wrench.
- Insert a 1/4" ratchet bar into the tensioner.
- Use a wrench for leverage.
- Loosen the belt and remove it from the alternator
- Remove the ratchet.
- Remove the serpentine belt.
-
step 2 :Installing a New Serpentine Belt
- Use Belt routing diagram as a reference.
- Feed a loop of the belt down around the AC compressor.
- Feed another loop down around the crank.
- Feed it down around the power steering pump.
- Lift the belt up over the water pump.
- Loosen the tensioner with the ratchet and pull the belt up over the alternator.
- Use the ratchet to tighten the tensioner.
- Make sure the belt is in place.
- Reconnect the negative battery cable.
- Start the car and make sure it sounds ok.
Tools needed
-
1/2 Inch Ratchet
8mm Socket
5/16 Inch Wrench
Brought to you by www.1AAuto.com. Your source for quality replacement parts and the best service on the internet.
Hi I am Mike Green. I am one of the owners of 1A Auto. I want to help you save time and money repairing or maintaining your vehicle. I am going to use my 20 plus years experience restoring and repairing cars and trucks like this, to show you the correct way to install parts from 1aauto.com. The right parts installed correctly; that's going to save you time and money. Thank you and enjoy the video.
In this video we are going to show you how to remove and put back on a serpentine belt on this '97 Expedition; same as any '97-'02 Expedition or '97-'03 F-150 with a 4.6L V8. This video is kind of an exercise that's hard to shoot so you don't get to see a lot of what I am doing. I try to explain it as best I can and I hope you get enough out of it. The only tools you are going to need are an 8mm or 5/16 wrench to disconnect the battery and a 1/2 inch ratchet handle.
What you want to do is disconnect your negative battery cable and on these trucks it's either a standard 5/16 or 8mm also works. To remove the serpentine belt you can see down in there, hopefully you can see, I've got this here is a inch ratchet bar and it's connected into see that right there it's actually in the belt tensioner. I'm going to take this nice big wrench and just go in through my inch ratchet like that. I'm going to pull or push the wrench, which loosens the belt. You can remove the belt from the alternator there. Just be careful as that comes back. Now I can remove my ratchet handle.
Now I can remove my serpentine belt. Hopefully you get it off the power steering side first. Feed it kind of down in between here. This way, you can grab on to it. Take it out from down here. You're going to pull it in front of the AC compressor. Once you've pulled it up out of the AC then the belt will come up and out. Check your belt. Cracks on the inside, on the ribbon like that, are not uncommon. You want to make sure that there's no cracks on the outside. This belt actually looks okay so we can reinstall it. When you are ready to put your serpentine belt back on you definitely want to find this diagram right here. This is your routing diagram. It's really going to be difficult for me to video putting the belt on so I'm going to kind of show you what the best practice is.
What you want to do is curl your belt up and feed a loop down through here then put that loop around the AC compressor. Then the same thing, take it make a loop feed it down here to put around your crank, and then feed a loop down here to your power steering pump. Then make sure it's up and over your water pump. Then you should basically be able to pull your belt up and then you put your handle back into the tensioner here, pull this way on the tensioner, and you should be able to pull up and on to the alternator. Just take your belt kind of lay it out here. Take it make a loop in it. Now you are going to feed it down between the tensioner and the idler pulley. You've got to kind of force it, one side of it, down through. Once it's through quite a bit I'm going to go down underneath and pull it down on the AC compressor. Now I'm going to feed a loop; basically you are just going to kind of force it down in front of my water pump, which has the fan on it. I'm going to force the loop down there; go down and around the crank. I'm going to go down underneath and reach up grab a hold of that and bring it down around the crank. Then this stays here and you kind of keep it on this side of the water pump. I don't know how much of that you're seeing. Then you feed the belt down to your power steering pump. Once again I'm going to reach up from underneath and pull it down and around my power steering pump. Now I'm kind of over here pushing this down in I can reach it from the bottom and get it around my power steering pump.
Getting the belt routed is really an exercise in kind of feeding it from the top and looping it around at the bottom. Hopefully you saw some. Now I've got my belt routed and I need to get it up on to the alternator is the last step. We want to make sure our ratchet is going to tighten. I'm going to get it in and on the tensioner here. Then again I'm going to take my wrench and you pull your wrench. By pulling the wrench down you de-slack the belt. I'm going to pull the belt up and put it on the alternator and let it go. Then you are all set.
Just kind of look down there and make sure it's around everything right. If it's of on any of the pulleys you just got to take it off, loosen it up again, get it right, and put it back on. Once you got your belt on, reattach your battery, start up the car, listen make sure there is no screeching or grinding or anything, and if it's all nice and quiet then your belt's on there correctly.
We hope this helps you out. Brought to you by www.1AAuto.com. Your source for quality replacement parts and the best service on the internet. Please feel free to call us toll free 888-844-3393. We're the company that is here for you on the internet and in person.
How to Replace Serpentine Belt 2000-02 Lincoln Town Car
This video will show you how to remove the serpentine belt and also the sequence for reinstalling it correctly
