How to Replace Right Rear Lower Control Arm 2001-06 BMW 325Xi
Created on: 2019-06-18
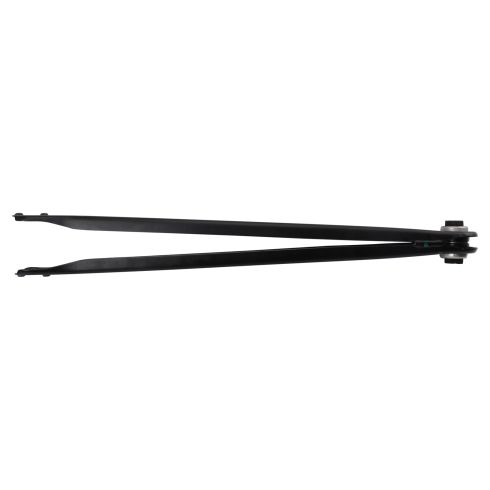
Watch this video to learn how to replace the right side rear lower control arm on your 01-06 BMW 3 Series vehicle. 1A Auto shows you how, step by step!
-
step 1 :Removing the Wheel
- Loosen the 17mm lug bolts with the vehicle on the ground
- Raise the vehicle with a floor jack
- Secure the vehicle on jack stands
- Remove the lug bolts
- Pull off the wheel
-
step 2 :Removing the Right Rear Lower Control Arm
- Apply Rust penetrant to the inner and outer control arm nuts and bolts
- The outer lower control arm bolt adjusts wheel alignment, so make note of its position
- Remove the outer 18 mm nut from the outer 18 mm lower control arm bolt
- Tap the 18 mm bolt out with a hammer and punch
- Remove the inner 18 mm bolt. The inner nut has a self-holding ear.
- Remove the plastic control arm cover
- Remove the lower control arm
-
step 3 :Installing the Right Rear Lower Control Arm
- Install the inner end of the lower control arm with the flat part facing up
- Insert the inner bolt through the control arm and thread it onto the self-holding nut
- Install the outer control arm onto the wheel knuckle, using a pry bar to position the knuckle, if necessary
- Insert the outer bolt, making sure to align it to the same orientation as when it was removed
- Place the cam washer on the bolt, and replace the 18 nut, and tighten it
- Using a jack, or jack stand, lift the lower control arm to approximate ride height
- Torque the outer 18 mm nut to 81 ft-lb
- Tighten and then torque the inner 18 mm bolt to 81 ft-lb
- Replace the plastic control arm trim
-
step 4 :Installing the Wheel
- Slide the wheel into place
- Start the 17mm lug bolts by hand
- Tighten the lug bolts preliminarily
- Lower the vehicle partially to the ground
- Tighten the lug bolts to 95 foot-pounds in a crossing or star pattern
- Lower the vehicle completely
Tools needed
-
Socket Extensions
Torque Wrench
Hammer
Rust Penetrant
Pry Bar
18mm Wrench
17mm Socket
Jack Stands
18mm Socket
Center Punch
Ratchet
Floor Jack
1/2 Inch Breaker Bar
What's up guys? I'm Andy from 1A Auto. In this video, I'm going to show you how to replace the rear lower control arm on this 2001 BMW 325XI. If you need this part or other parts for your vehicle, click the link in the description and head over to 1AAuto.com
I'm going to loosen up these lug bolts. I'm going to use a 17 millimeter socket and a breaker bar. Now I'm going to raise and support the vehicle. We're using a two post lift. If you're doing this at your house, you can use a jack and jack stands.
Now I'm going to take the 17 millimeter socket and an extension just to take the lug bolts out. Now when I go to take the last one out, I am going to hold the wheel so that the wheel doesn't fall. Take that one out, set it aside and grab the wheel and shake it off.
I want to pull this bolt out, this nut and bolt. There is a cam in here that is to adjust the alignment so after you do this repair, you're going to have to go to an alignment shop and have your alignment performed. Now I will take some rust penetrant, just get it on there. It's really rusty so spray it down, let it soak for a little bit.
Take an 18 millimeter wrench, put it on the backside of the bolt then I'm going to take a 18 millimeter socket, just going to, because this is rusty, just take a hammer, tap it on there real good. Then I can either use a breaker bar or I'm going to use this air gun. Loosen this up. We actually sell this air gun at 1AAuto.com. Make sure you're in the loosen side. Because that nut was really rusty, I couldn't the 18 millimeter socket to work, it was just spinning so I'm using a 17 millimeter socket, I'm just going to hammer it on there, try again. There we go. Loosened it up. Take it off by hand. And there you go.
Now I can tap the bolt out. You don't want to hit it too hard, you don't want to mushroom it. Just tap it a little bit. I'm going to use a punch and drive this through. We actually sell a punch set with these punches at 1AAuto.com. Take that washer off, we're going to have to reuse that. You can kind of judge when you put the new arm on, kind of how the washer was. If it was to the side or to the other side, put it on the same way.
Just be careful when you punch this bolt out. Punch that out just like that. Just going to push the lower knuckle and slide that out. The knuckle's just going to slide in a little bit. Just be careful. You don't want this arm to hit you or anything. Next, we want to pull this bolt out right here. On some vehicles you may have to remove the axle to get the bolt completely out. I'm going to try taking the bolt out first but my assumption is, I'm going to have to pull that axle out. I'm going to use an 18 millimeter socket and breaker bar and break it loose.
Now I'll use a 18 millimeter ratchet wrench and try to get it out. Just spraying a little rust penetrant on here, make it come out a little easier. That's completely loose. There is this little thing right here that's like the little nut. It's nice, it has this little ear that prevents it from spinning so you don't have to put a wrench on that side. Just slide the bolt out. Let's see and it just made it out so I don't have to pull the axle which is nice. But, if you have trouble and you can't get the bolt out, pull the axle out.
With a pry bar or a screwdriver, take this little plastic cover off right here. Just like that. I'm just going to spread this control arm apart a little bit, slide it out, just like that.
Here's the old part, here's the new part of 1AAuto.com. It's got the same shape. It's got the same mounting locations. It's got the same bushing on the other side. Get yours at 1AAuto.com and you can do it yourself.
All right, take the arm, we want to install the arm with the flat part on the top. The bottom part has the curved part just like that. Get that lined up. It's easier to put the bolt in now. Get that in or at least started. Before I completely put that in, I want to put that other piece, this piece in. This lined up. On the backside and just get this started. With that started, we can line this up. We can spread these out a little bit. Just be careful not to spread it too much, you don't want to bend it. Just like that. We can take the pry bar, be careful not to hit your brake line. Line it up. Pull the head out.
All right, now we're going to install this cam bolt. Remember the location of how you took it out then your alignment will be closer. It's still a good idea to go have the alignment adjusted afterwards. Go a repair shop, have that done. We'll slide this in on the backside first. And that's good. Lined up, slide this down and just get that lined up there. Watch your fingers. Be careful. Once you get it kind of lined up, grab a hammer and tap the bolt in while you pry it out. There we go.
Holding the bolt from the backside, I'll just tap it a little bit. Then we'll take this washer, slide this on and with a wrench I can try to position this kind of how it was. My 18 millimeter wrench, just get the nut on. This nut was stuck in the socket. It's an 18 millimeter socket you used for this but this one I'm using a 17 millimeter because it's rusted. Little bit smaller. Take a ratchet, get this in position. On our vehicle it was pretty much straight up and down. Make sure that's good on the other side. We'll snug this up. Now before I torque this nut down, I just want to take the load off the suspension. You kind of want to get the suspension in the same position it would be while you're driving down the road. If you have the ability to do that before you torque this nut and same with this bolt over here. If you can do that, would be good. Just be careful.
Now with my 18 millimeter wrench on the backside, 18 millimeter socket on this nut and a torque wrench. We actually sell this torque wrench from 1AAuto.com. I'm going to torque this to 81 foot pounds. That's good. And with the suspension still raised up, I'm going to use my ratchet wrench, tighten this down, then I'll use the torque wrench and torque this to 81 foot pounds as well.
After you're done getting the arm on, just take this plastic piece. It's just a little trim piece and slide this in position. Just locks in place. Lock the top part in first and then just rotate it, get the bottom part in. Now I'm going to take the wheel, slide it in position. Make sure the holes lined up and hold the wheel. I'm going to take my 17 millimeter socket and the lug stud and get one started. And I can grab the other ones. I'm going to use a 17 millimeter socket and a torque wrench and I'm going to torque these lug bolts in a star pattern to 95 foot pounds. Go right around again, just make sure everything's tight. And you're good to go.
Thanks for watching. Visit 1AAuto.com for quality auto parts shipped to your door. The place for DIY auto repair. And if you enjoyed this video, please click the subscribe button.
Shop Products


Top 5 Problems Nissan Pathfinder SUV 2nd Generation 1996-2004
This video shares the top problems with the 2nd Generation Nissan Pathfinder!
