How to Replace Rear Window Regulator 2010-16 Cadillac SRX
Created on: 2018-08-24
How to repair, install, fix, change or replace a slow, stuck, cracked or damaged window regulator on 10, 11, 12, 13, 14, 15, 16 Cadillac SRX
Tools needed
-
Razor Blade / Gasket Scraper
Measuring Tape
Socket Extensions
Flat Blade Screwdriver
Phillips Head Screwdriver
10mm Socket
Ratchet
Trim Tool Set
Hi Mike from 1A Auto, we've been selling auto parts for over 30 years.
We're going to remove this trim piece right here. I'm going to use a trim tool, slide it under here. Pry up a little bit.
Pry it up like that, these are the retainers that were holding it on, that one was holding us up a little bit, just push down on that. Then we'll disconnect the electrical connector. I'm just going to push this button right here and pull out the connector. I'm going to remove theses two screws, I'm going to use a Phillips head screwdriver.
Take those out. So now we have door pins all around the perimeter of the door panel. I'm going to use a trim tool, get underneath here, I'm just going to pry it out and go all the way around.
Once those are all popped out you can grab the door panel, lift up, slide it out. Pull the electrical connector through and then there's this electrical connector here and here. To disconnect this electrical connector I'm going to use a small flat bladed screwdriver, just slide it in there, lift up and then pull that out. There's a little button that you push right here on this connector and slide that out, then the electrical connectors are disconnected.
Now we can remove this cable that goes to the inside door panel. To disconnect this cable from the inside door handle I'm going to lift up on this side of the cable, this little yellow retainer and then you can slide this out like that. Then the ball will slide up like that and then we can remove the door panel.
We're going to remove this insulator. You can use a utility knife or a razor blade, cut some of this while we're pulling it off, it helps.
Pull this cable through. Just fold it down. You can leave it right there like that.
Now I'm going to use some masking tape, I'm going to tape up the window so it doesn't fall. I'm going to use three pieces, generally that's enough to hold the window up. Make sure it sticks real good, if you have to clean the window before you do this, it's a good idea.
I'm going to disconnect this electrical connector, there's a little button on the back side, you're going to push down on that button, slide the connector off. We're going to take these two nuts off, I'm going to use a 10 mm socket and extension and a ratchet.
Actually, I just need to loosen them up so that the window's separated from the regulator. We'll do the same on this one.
Let me just feel and make sure it's separate from the window. That's good. I'm going to remove this 10 mm bolt, and this one down here.
Then this one we can loosen up. Now, if I wanted what I could do is connect this and then lower the window regulator, so that would drop down and then I wouldn't have to take this bolt out all the way, but I'm going to show you what it would be like if the window was stuck up, then I'll take this bolt out completely. I'm going to hold the regulator while I take this bolt out so it doesn't drop.
Pull that bolt out. Slide this regulator down, I'm going to slide it up here, and slide the regulator down that way. Pull the regulator up.
Slide this window regulator up in like this. Slide it back down here. Try to guide these onto the window, if you were installing a new regulator, then these guides would probably be down lower. I'm going to put a little pressure on the window regulator so that I can get this bolt in. Line up the hole, get this bolt started.
Before I tighten that bolt down, I'm going to take these other bolts, get those started, right there and down here.
Alright, so there's too much tension on the regulator to get that lower bolt in. So I'm actually going to lower the regulator. I'm going to put the electrical connector back on. Snap that on and I'm going to take my window switch, we're going to connect that to the connector temporarily. Like that. I'm going to turn the key on.
So with the key in the accessory mode, what I can do is lower this window, keep your hands clear. That brings these brackets down. Now, with that the regulators going to be loose. I can install this bolt, slide it up a little bit. Now I'll tighten these bolts down. Snug that one up, snug this one up.
Then snug this top one up as well. Once those are tight then I can take the window switch and slowly guide this up. Make sure these are sitting on the window properly, then go up all the way. Then I can turn the key off. We're going to snug these nuts up.
We're going to torque these nuts to 98 inch pounds, make sure you're on inch pounds, not foot pounds.
At this point, everything's safe, we can take this tape off. The window is secure. At this point I turn the key back on, now I can test the window to make sure it goes up and down properly before we put the door panel back on. Otherwise if something doesn't work you may have to take it apart again. It works going down and it works going up. So we're good to put the door panel back on.
Now we can reinstall this insulation. This wire and harness is going to go on this side, this cable is going to go through that hole right there. Just line it up, then this little plug goes right there and then just push around and that sealer should re-adhere to it, if it doesn't you can always add more.
It's good. I'm going to reattach this cable to the inside door handle, this ball is going to go in the slot right here. I'm going to slide the cable to the side. And then lock it on like that.
Then I can connect these electrical connectors. This one is going to get connected right here. Just line it up, there is a slot, lock it in. This other harness is going to slide through the slot through here, you're going to fish it through the front of the door. That will connect to the window switch and then there's one more wire harness that's going to connect right here, to the LED light. When those are all connected then we can slide this panel back on.
We want to make sure this door lock knob is in the up position and then we're going to slide it through the hole over here. Once that's through, then we can get, push the top of the door panel towards the window. Make sure that channels in place. Then we'll line up all the door pins, once those are all lined up then we can tap it back on. Just like that. I'll install these two Phillips head screws.
Snug. That one's snug. I'm going to connect this electrical connector to the window switch, just line it up, lock it in place. I'm going to take this trim, line the retainers up, there and there, then you can just push it down. Lock it in place.
Thanks for watching. Visit us at 1aauto.com for quality auto parts, fast and free shipping, and the best customer service in the industry.
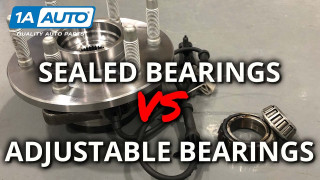
Wheel Bearings on Cars and Trucks Sealed Bearing vs Adjustable Bearing
Do you know the difference between sealed wheel bearings, and adjustable wheel bearings on cars and trucks?
