How to Replace Rear Wheel Speed Sensor 2010-15 Chevy Camaro
Created on: 2017-03-30
How to replace the wheel speed sensor on 10, 11, 12, 13, 14, 15 Chevy Camaro
-
step 1 :Removing the Wheel
- Loosen the five 22mm lug nuts
- Raise and support the vehicle
- Remove the lug nuts
- Pull off the wheel
-
step 2 :Removing the Wheel Speed Sensor
- Remove the 10mm bolt that holds the sensor to the hub
- Remove the sensor from the hub
- Pop off the two retainer clips for the sensor wiring harness
- Disconnect the sensor electrical connector at the frame side
- Pull out the sensor and wiring harness
-
step 3 :Installing the Wheel Speed Sensor
- Connect the sensor electrical connector at the frame side
- Clip on the wiring harness retainers
- Insert the sensor into the hub
- Insert the 10mm bolt for the sensor
-
step 4 :Installing the Wheel
- Slide the wheel into place
- Start the five lug nuts
- Lower the vehicle to the ground
- Tighten the lug nuts to 140 foot-pounds of torque in a star pattern
Tools needed
-
Flat Blade Screwdriver
Torque Wrench
Jack Stands
10mm Socket
Ratchet
Floor Jack
Trim Tool Set
1/2 Inch Breaker Bar
22mm Socket
Hi, I'm Mike from 1A Auto. We've been selling auto parts for over 30 years. We're dedicated to delivering quality auto parts, expert customer service, fast and free shipping, all backed by our 100% satisfaction guarantee. Visit us at 1AAuto.com, your trusted source for quality auto parts.
In this video, we're going to be working with our 2011 Chevy Camaro 3.6 Liter V6. We're going to show you how to remove and replace your vehicle's rear wheel speed sensor on the passenger side. This procedure should be similar to the driver's side as well. If you like this video, please click subscribe. We have a ton more information on this and many other vehicles. If you ever need parts for your car, you can follow the link down in the description over to 1AAuto.com. Here are the items you'll need for this repair.
Using a 22 millimeter socket and a breaker bar, loosen all of your lug nuts. Raise and support your vehicle. We're using the lift to make it easier to show you what's going on, but this job can easily be done at home on a jack and jack stance. Remove your lug nuts. Remove your wheel and tire.
Using a 10 millimeter socket and ratchet, remove the bolt on the ABS sensor securing it to the hub. Wiggle the sensor and remove it from the wheel hub. Pop off the two retainer clips for the harness from the adjustable link. I'm using a trim tool. You can also use pliers or a screwdriver. There's a variety of ways to pop these off. It's really just a matter of what you have and what your preference is. Pop the rubber retainer out. It's a little tricky to see, but if you reach in here, you can release the tab which is actually on the opposite side of this connector on the female side. You want to reach in there, push down on the tab, and then pull the connector towards you, and remove it from the vehicle.
Reach in and reconnect your electrical connector. Make sure that it clicks and seats in fully. Pop in the rubber retainer as well as your two plastic clips. Reinstall your wheel speed sensor into the hub and tighten down the 10 millimeter bolt.
Reinstall your wheel and tire and get all five of your lug nuts on as tight as you can by hand. You may also use a 22 millimeter socket to help you spin these in. Lower your vehicle back onto its wheels. You can now torque your lug nuts to 140 foot pounds in a cross pattern.
Thanks for watching. Visit us at 1AAuto.com for quality auto parts, fast and free shipping, and the best customer service in the industry.
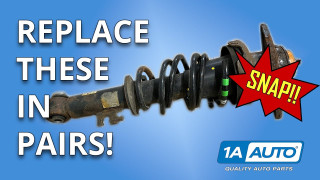
Broken Springs Leaking Struts Always Replace These Car and Truck Parts in Pairs
Andy explains why it's always better to replace parts in pairs, on both sides of your car or truck, for better and safer driving performance!
