How to Replace Rear Upper Control Arms 2009-12 Ford Escape
Created on: 2019-04-23
Watch this video to learn how to replace a rear upper control arm. The experts at 1A Auto show how to replace a rear upper control arm on your 09-12 Ford Escape.
-
step 1 :Removing the Rear Upper Control Arm
- Loosen the wheel lug nuts
- Raise and support the vehicle
- Remove the wheel
- Apply rust penetrant to the mounting nut and bolt on either end of the upper control arm
- Loosen the nut on the outer ball joint of the control arm, leaving it flush with the end of the stud
- Hammer the stud and nut with a punch to loosen the control arm ball joint
- Pull the upper control arm up
- Measure the distance between the upper control arm and the knuckle and save the measurement for later
- Loosen the inner control arm mounting bolt with an 18 mm socket and breaker bar, them remove it with a ratchet
- Remove the upper control arm
-
step 2 :Reinstalling the Rear Upper Control Arm
- Install the rear upper control arm at the inner mounting joint with the 18 mm bolt and hand tighten
- Support the outer end of the control arm to the level that was measured earlier
- Torque the inner 18 mm bolt to 129 ft-lb
- Install the outer control arm ball joint into the knuckle and thread on the 18 mm nut
- Use a pry bar to push down the control arm and tighten the 18 mm nut and torque it to 46 ft-lb
- Replace the wheel
- Lower the vehicle
- Torque the lug nuts in a star pattern to 100 ft-lb
Tools needed
-
Measuring Tape
Hammer
Socket Extensions
Torque Wrench
Rust Penetrant
Pry Bar
18mm Wrench
Jack Stands
Center Punch
Ratchet
Floor Jack
1/2 Inch Breaker Bar
What's up guys? I'm Andy from 1A Auto. Here in this video I'm going to be replacing the rear upper control arm on this 2012 Ford Escape. If you need this part or other parts for your vehicle, click the link in the description and head over to 1aauto.com. Now remove the wheel. I'm going to use a 19 millimeter socket and a breaker bar. Loosen up the lugnuts before I raise the vehicle.
All right, now I'm going to remove the lugnuts. Grab the wheel. This wheel is stuck on there pretty good. So I'm just going to put a lugnut on. Take a hammer and hit it from the backside. You can take the lugnut off and pull the wheel off. All right, knowing this nut is pretty rusty, so I'm just going to use some rust penetrant. Soak it down, let it soak for a while. Now I'm just going to spray this bolt over here cause we're going to have to take that one out. It's pretty rusty. Just use some rust penetrant. I'm just going to take an 18 millimeter socket and a breaker bar and then you'll loosen this nut up.
This is broken free. I'm just going to take an extension and a ratchet, take this nut off. All right, let's make sure that's loose. I am going to put this back on. Just get it on a couple threads, right about there. I am going to take a punch. If you have a smaller one, that's fine. It doesn't have to be this big, and just give it a tap on the bottom. Separate that.
Now this is loose and separated, you can take the nut off. Slide the control arm up. So when I go to install the new upper control arm, I'm going to want to torque this bolt over here on this same level of where this arm is. So you can take a tape measure, just measure where the arm is to the knuckle, and it's about three inches right there.
So what I can do is I can have someone hold this arm while I torque that bolt with the new one. Now I'll just take a 18 millimeter socket and a breaker bar. Loosen up this bolt. Well, it's tight. Once it's a little bit loose, you can use a ratchet. That will go. You can just grab the arm and slide it out.
Here's the old upper control arm. Here's the new rear upper control arm from 1aauto.com. As you can see, the length is the same, the mounting positions are the same, comes with a new ball joint and a new nut. I'm going to take this nut off. This is just a protector, throw that out. Get yours at 1aauto.com and you'll be ready to rock and roll.
Slide the upper arm into position. Get the bolt, get that started. Take the 18 millimeter socket and the ratchet, tighten this up. All right, so before we torque that bolt over there, we wanted to raise this up. You want this about ride height and we measured it before and it was three inches, so I'm just going to take this socket. Let's take this socket here and that equals the three inches, so we're good. Now we can tighten that up right there. Now I'll take my 18 millimeter socket and torque wrench. I'm going to torque this bolt to 129 foot pounds.
Now I can remove the socket, and I can install this ball joint, slide that down, install the nut, and we're going to take a pry bar. Go on top of the upper control arm, go underneath the spring over there, pry down, take a socket extension and a ratchet, tighten this nut up, and once that get snugged down a little bit, I can torque it with the same 18 millimeter socket and torque wrench. I'm going to torque this to 46 foot pounds.
If while you're tightening this nut, you find this stud is spinning because of the ball joint, you can use the pry bar. Try to pry it down a little bit more, or you can take an 18 millimeter wrench, tighten it up this way and then have a socket. This is a nine millimeter socket and a ratchet. Put the ratchet on the end of that and then you can hold the studs while you tighten it up with the wrench. I'm going to put the tire back on, put the locknuts on.
All right, I'm just going to use the 19 millimeter socket, tighten these down by hand. I'm going to take my socket and a torque wrench, and I'll torque these to a 100 foot pounds, and I'm going to do it in a star pattern so that the wheel gets tightened down evenly. Just going to go around again, make sure everything's tight.
Thanks for watching. If you want the parts to do it yourself, check out 1aauto.com, the place for DIY auto repair.
Shop Products


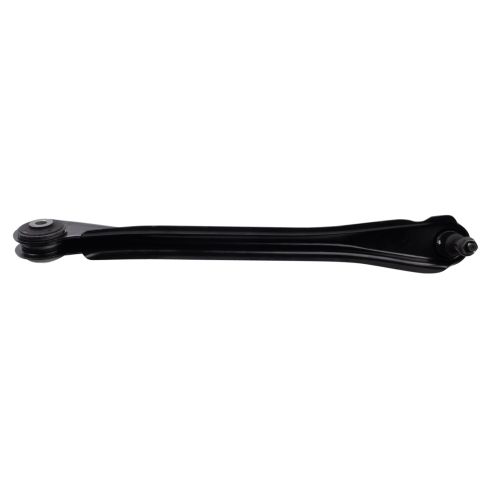
Ford Mazda Mercury Rear Passenger Side Control Arm with Ball Joint TRQ PSA63968
Part Details:
- Press In
- No
- Yes
- No
- Steel

How to Replace Rear Upper Control Arm 2002-06 Nissan Altima
How to repair, install, fix, change or replace failing, rusted, rotted, or damaged rear upper control arms on 02, 03, 04, 05, 06 Nissan Altima.
