How to Replace Rear Sway Bar Links 1992-2001 Toyota Camry
Created on: 2016-09-12
How to remove, replace, and install a sway bar end link on 92, 93, 94, 95, 96, 97, 98, 99, 00, 01 Toyota Camry
-
step 1 :Removing the Wheel
- Pull off the hub cap by hand
- Loosen the lug nuts with the vehicle on the ground
- Raise the vehicle with a floor jack
- Secure the vehicle on jack stands
- Remove the lug nuts
- Pull off the wheel
-
step 2 :Removing the Sway Bar Links
- Attach locking pliers to the upper sway bar ball joint
- Remove the upper sway bar link nut with a 14mm socket and ratchet
- Remove the locking pliers
- Attach locking pliers to the lower joint
- Remove the lower sway bar link nut with a 14mm socket and ratchet
- Remove the sway bar link
- Remove the locking pliers
-
step 3 :Installing the Sway Bar Links
- Remove the 17mm nuts from the new sway bar link
- Put the sway bar link into place
- Start the 17mm nuts onto the sway bar link
- Attach locking pliers to the upper sway bar ball joint
- Tighten the upper nut to 29 foot-pounds of torque
- Attach locking pliers to the lower joint
- Tighten the lower nut to 29 foot-pounds of torque
-
step 4 :Reattaching the Wheel
- Slide the wheel into place
- Start the lug nuts by hand
- Tighten the lug nuts preliminarily
- Lower the vehicle to the ground
- Tighten the lug nuts to 76 foot-pounds in a crossing or star pattern
- Reattach the center cap
Tools needed
-
21mm Socket
Torque Wrench
14mm Socket
Rust Penetrant
17mm Socket
Jack Stands
Ratchet
Floor Jack
1/2 Inch Breaker Bar
Brought to you by 1AAuto.com, your source for quality replacement parts and the best service on the Internet.
Hi, I'm Mike from 1A Auto. I hope this how-to video helps you out, and next time you need parts for your vehicle, think of 1AAuto.com. Thanks.
In this video, we're going to be working on our 1998 Toyota Camry. We're going to be showing you how to remove and reinstall the rear sway bar links. These are small ball and socket joints, very similar to your ball joint. When these go bad, they can get up and down play in them that they're not designed to have, which can create a clicking or clunking sound going over big bumps, or as there's a difference in weight transfer from the left and right sides of the vehicle. This can also cause some sloppiness when cornering. That little bit of play will allow these to travel in and out before the sway bar starts to twist up and control the body roll of the vehicle in a corner. If you're having an issue with handling or some strange clicking and clunking sounds under the vehicle, this may be your solution.
If you like this video, please click "subscribe." We have a ton more info on this car, as well as many other makes and models. If you want these sway bar links for your vehicle, follow the link in the description over to 1AAuto.com. Here are the items you'll need for this repair.
Grab onto the hub cap and remove it from the wheel. We're going to use a 21 mm socket and breaker bar to remove all five lug nuts. We'll crack them loose now, raise and support the vehicle, and then finish removing the lugs. We've put our vehicle on a lift to make it easier to film for you, but this job can be easily done with a jack and jack stands. Remove the wheel and tire.
Place a pair of locking pliers around the back side of the sway bar. Use a 14 millimeter socket and ratchet to remove the nut on the other side. Remove the sway bar link and the locking pliers. Lock a pair of vise grips the same way, onto the back of the joint at the bottom. Take the nut off with the 14 millimeter socket and ratchet. Before starting this, we soaked our hardware in penetrating oil to make removal more easy. Remove the nut and the sway bar link. If you've got your vise grips on there tight, you can use the end of the ratchet to spread them open and get them off of there.
Here we have our old sway bar link that we removed from our vehicle, and our new part from 1AAuto.com. As you can see, they're the exact same length. The heads are skewed in the exact same direction. These are not directional, by the way. You can use these on the right or the left side, though we always recommend you replace them in pairs. They come with new nuts on them. What happens to these is: this is a ball and socket joint, just like your ball joint is on the front end of your vehicle. They develop up and down play in them eventually, where this socket actually gets bigger than the ball and it can click up and down. This causes some noises going over bumps, as well as issues with handling. If your car isn't handling like it's supposed to or has some clicking or clunking sounds going over bumps, these new parts from 1AAuto are going to go in, direct fit, just like your original equipment and fix you up right.
Remove the new nuts from your sway bar link, and install them into the sway bar, and into your strut. Start them on by hand, and then we'll clamp the back sides the same way we did when we removed them, with a pair of vise grips. Just be careful not to tear the boots. These new hardware are 17 millimeter, so we'll be using a 17 millimeter socket and ratchet. Torque these bolts to 29 foot-pounds. Repeat these steps on the opposite side, and you're good to go.
Reinstall the wheel and tire. Get all the lug nuts down as tight as you can by hand. Lower the vehicle carefully back onto the wheel and tire. Torque the lug nuts to 76 foot-pounds in a cross pattern. Line up the notch in the hubcap over the valve stem, and tap the hubcap back into place.
Thanks for tuning in. We hope this video helps you out. Brought to you by www.1AAuto.com, your source for quality replacement parts and the best service on the Internet. Please feel free to call us toll-free, 888-844-3393. We're the company that's here for you on the Internet and in person.
Shop Products


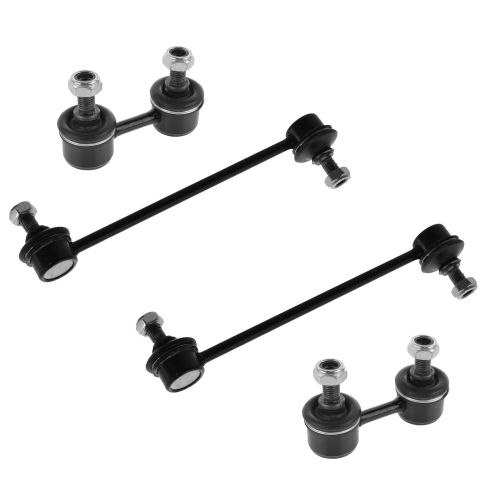
Toyota Avalon Camry Lexus ES300 Front & Rear 4 Piece Sway Bar Link Set TRQ PSA55929
Part Details:
- 4 Piece
- (2) Front Sway Bar Links
- (2) Rear Sway Bar Links
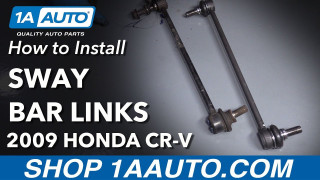
How to Replace Front Sway Bar Links 2007-16 Honda CR-V
How to remove, replace, and install a sway bar end link on 07, 08, 09, 10, 11, 12, 13, 14, 15, 16 Honda CR-V
