How to replace Rear Sway Bar Links 2003-08 Honda Pilot
Created on: 2017-08-09
New Sway Bar Link from 1AAuto.com How to repair, install, fix, change or replace a broken, busted, bad, loose, or damaged tie rod on 03, 04, 05, 06, 07, 08 Honda Pilot.
-
step 1 :Removing the Wheel
- Loosen the 19mm lug nuts with the vehicle on the ground
- Raise the vehicle with a floor jack
- Secure the vehicle on jack stands
- Remove the lug nuts
- Pull off the wheel
-
step 2 :Removing the Sway Bar Link
- Turn the wheel by hand
- Hold the lower stabilizer link stud with a 14mm wrench
- Remove the lower nut from the stabilizer link with a 5mm Allen wrench
- Hold the upper stabilizer link stud with a 14mm wrench
- Remove the upper nut from the stabilizer link with a 5mm Allen wrench
- Pull off the stabilizer link
-
step 3 :Installing the Sway Bar Link
- Push the stabilizer link into place
- Start the 14mm nuts by hand
- Hold the upper stabilizer link stud with a 14mm wrench
- Fasten the upper nut onto the stabilizer link with a 5mm Allen wrench
- Hold the lower stabilizer link stud with a 14mm wrench
- Fasten the lower nut onto the stabilizer link with a 5mm Allen wrench
-
step 4 :Reattaching the Wheel
- Slide the wheel into place
- Start the lug nuts by hand
- Tighten the lug nuts preliminarily
- Lower the vehicle to the ground
- Tighten the lug nuts to 80 foot-pounds in a crossing or star pattern
Tools needed
-
5mm Hex Wrench
14mm Wrench
Socket Extensions
Torque Wrench
14mm Socket
Rust Penetrant
Jack Stands
19mm Socket
Ratchet
Floor Jack
1/2 Inch Breaker Bar
If your vehicle's equipped with a locking lug nut, you're going to want to have it ready. Get it to fit on there. These are 19-millimeter. Take our breaker bar, we'll loosen them up, about a half turn. Once you've loosened your lug nuts, raise and support your vehicle. We're going to use a lift for this, so to make it easier for you to see what we're doing, but you can do this on jack stands in your driveway. These are pretty loose now. Going to take my socket in my hand and undo them with my hands. I'm doing the last one. Just make sure you've got hold of the wheel. It might come loose. This one came off pretty easy.
To remove the rear swear bar link, there's a nut here at the bottom and a nut here at the top. There's an Allen key in here to counter hold it once it's loose on both ends. There should also be a keyway behind here to hold it. I will start by spraying with some rust penetrant. Spray both of them, and use a 14mm socket and a breaker bar. Since this one doesn't have a key way on the back to hold it, I'm going to put my 14mm wrench on and use a 5mm Allen key on the end of my breaker bar. Put it into the sway bar.
The inside of this is stripped, which can often happen. There is no keyway on the back of this to hold with a wrench, so I'm going to use some locking pliers and break the top one free. This one is now stuck, so I'm trying to get the top one free and then pop it off the lower ball joint and try and get it off that way. The 5mm part of this one is also stripped out. I was able to get some locking pliers in here. I got my 14mm wrench, and I'm going to keep spraying it with some rust penetrant. I'm going to work it back and forth to get the nut free, because there's a lot of gunk on the threads. Just kind of go back and forth, back and forth. Then slowly loosen it.
If it starts to get tight, just kind of go back. I'm going to switch to a ratcheting 14mm, because we're getting pretty close. Got that one loose. With this top one loose now, the sway bar links are basically just a ball joint. I'm just going to take it and just sort of force it off. Now I can get in here. Once I take this rubber boot off, and you can see the ball joint that's in there. Now I can get in there with some locking pliers and really grip on that, and work on getting that bottom nut out. So I just popped it out of the socket here, and took the boot off with it. The break line in here. I'm going to hold it up against the spring, get the 14mm ratchet and work it back and forth. I finally got it loose; take it off with my fingers and we'll pull it out.
Here's our old sway bar link from the vehicle. You can see it came apart as we were trying to remove it and that can happen. Boot was ripped. It doesn't have any way to counter hold this other than the Allen head key, which is stripped on both ends. So I used some locking pliers on it, and just worked the nut back and forth to get it off. Then eventually you've got one side off, and just pop the other side out. That's the easiest way to remove it.
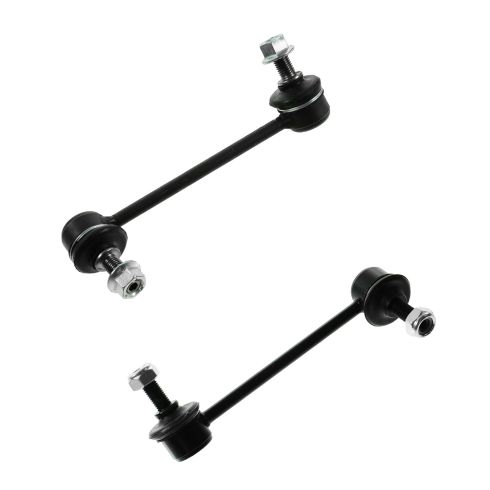
As you can see, it's virtually identical the new one 1aauto.com. These are driver's side and passenger side specific, so you'll need to make sure you have the correct one for whichever side you're doing, or if you're doing both.
Just make sure that you use the correct one for the passenger side and the correct one for the driver's side, because they'll only fit one way. It comes with new nuts. You can see that Allen key socket to counter hold it; we'll use that when we're torquing it.
Get your new sway bar link, and insert it in the bottom. Put the nut on. Insert it in the upper part, this is the sway bar. Bend those a little bit if you have to. Then just a ball joint in there to move around. Got to find the right spot. Our replacement nuts are 15mm, so we'll use a 15mm ratcheting wrench, and a 5mm allen key to hold them. Then work on the upper one; again, put the allen key in to counterhold it. I'm just going to tighten this as tight as I can go.
Reinstall the wheel. Put the lug nuts on by hand. 19mm socket ratchet, I'm going to snug these lug nuts. Torque wrench set to 80ft/lbs. Torque your lug nuts in a star pattern.
Thanks for watching. Visit us at 1AAuto.com for quality auto parts, fast and free shipping, and the best customer service in the industry.
Shop Products
Honda Pilot Acura MDX Rear Driver & Passenger Side 2 Piece Sway Bar Link Set TRQ PSA55784
Part Details:
- 2 Piece
- (1) Rear Passenger Side Sway Bar Link
- (1) Rear Driver Side Sway Bar Link

How to Replace Front Sway Bar Links 1998-2008 Ford Ranger
Check out this video to learn how to replace the front sway bar links on your 98-08 Ford Ranger.
