How to Replace Rear Sway Bar Link 2001-05 Honda Civic
Created on: 2016-06-01
How to remove, replace, and install a sway bar end link on 01, 02, 03, 04, 05 Honda Civic
-
step 1 :Removing the Wheel
- Loosen the 19mm lug nuts with the vehicle on the ground
- Raise the vehicle with a floor jack
- Secure the vehicle on jack stands
- Remove the lug nuts
- Pull off the wheel
-
step 2 :Removing the Sway Bar Link
- Hold the upper stabilizer link stud with vice grips
- Remove the upper nut from the stabilizer link with a 14mm socket and ratchet
- Hold the lower stabilizer link stud with vice grips
- Remove the lower nut from the stabilizer link with a 14mm socket and ratchet
- Pull off the stabilizer link
-
step 3 :Installing the Sway Bar Link
- Push the stabilizer link into place
- Start the 14mm nuts by hand
- Hold the upper stabilizer link stud with vice grips
- Fasten the upper nut onto the stabilizer link with a 14mm socket and ratchet
- Hold the lower stabilizer link stud with vice grips
- Fasten the lower nut onto the stabilizer link with a 14mm socket and ratchet
-
step 4 :Reattaching the Wheel
- Slide the wheel into place
- Start the lug nuts by hand
- Tighten the 19mm lug nuts preliminarily
- Lower the vehicle to the ground
- Tighten the lug nuts to 80 foot-pounds in a crossing or star pattern
Tools needed
-
Socket Extensions
14mm Socket
Rust Penetrant
17mm Socket
Jack Stands
Vise-Grips
19mm Socket
Ratchet
Floor Jack
Brought to you by 1AAuto.com, your source for quality replacement parts and the best service on the Internet.
Hi, I'm Mike from 1A Auto. I hope this how-to video helps you out, and next time you need parts for your vehicle, think of 1AAuto.com. Thanks.
In this video, we're going to show you how to replace a broken or old rear stabilizer link with a new part from 1A Auto. This is a 2003 Honda Civic. It's the same for 2001 to 2005. We show you on one side. It is the same for both sides.
You'll need new sway bar links from 1AAuto.com, 14-17mm socket with ratchet extensions, vice grips, jack and jack stand, and penetrating oil.
Raise and support the vehicle. Remove the rear tire.
The sway bar link is located behind the brake drums or discs on either side of the vehicle. Install vice grips on the back of the sway bar link. Press them against a solid piece to keep the bolt from rotating when you loosen the nut. Use a 14mm socket ratchet to remove the not on the outside edge of the sway bar link. Repeat the steps for the bottom of the link. You may have to re-position the vice grips a few times. Make sure that the inner part of the sway bar link isn't spinning.
If you have heat or torch, it does help to melt out the plastic in the lock nut. Move your sway bar link from the vehicle.
Here we have out old part from our 2003 Honda Civic. Here we have our new part from 1AAuto.com. As you can see, we have the exact same joints, links. These are directional. This is the passenger rear side we have in front of us. It even comes with new nylock hardware.
Sway bar lengths are known to cause clunking sounds or a little bit of an unstable feeling, excessive sway when cornering.
Install your new part into both the mount on the lower control arm and the sway bar before installing your new nuts. Install your vice grips on the opposite side of the sway bar link to keep it from rotating while you install the new nuts. Then we'll be using a 17mm socket and extension to tighten the hardware.
Remove your vice grips. Install them on the top of the sway bar link to keep that from rotating. Tighten it up with your 17mm socket. Remove your vice grips.
Reinstall your tire.
Thanks for tuning in. We hope this video helped you out. Next time you need parts for your car, please visit 1AAuto.com. Also check out our other helpful how-to and diagnosis videos.

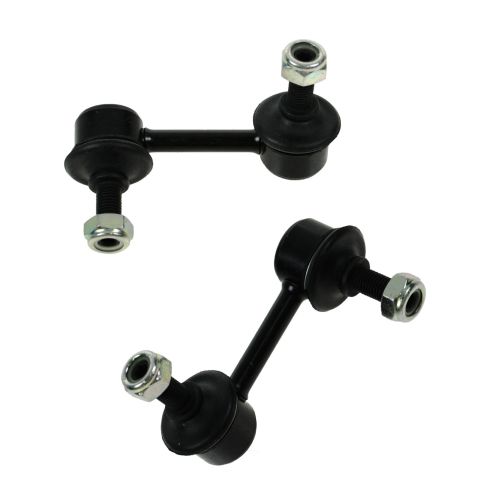
Honda Civic Rear Driver & Passenger Side 2 Piece Sway Bar Link Set TRQ PSA55697
Part Details:
- 2 Piece
- (1) Rear Passenger Side Sway Bar Link
- (1) Rear Driver Side Sway Bar Link

How to Replace Front Sway Bar Links 2012-17 Toyota Camry
This video shows you how to install new TRQ sway bar links on your 2012-17 Toyota Camry.
