How to Replace Rear Struts 2003-08 Toyota Matrix
Created on: 2020-08-26
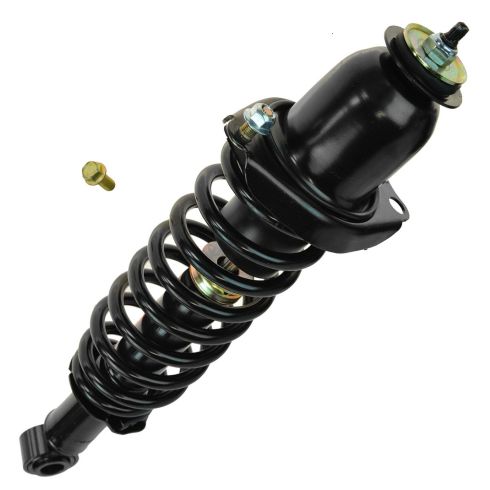
This video shows you how to install new reliable TRQ struts in your 2003-2013 Toyota Matrix.
Tools needed
-
Torque Wrench
Hammer
Socket Extensions
14mm Socket
Rust Penetrant
Pry Bar
Jack Stands
19mm Socket
Liquid Thread Locker
Trim Tool Set
Ratchet Strap
Socket Driver
Wheel Chocks
10mm Socket
Floor Jack
Okay, friends. To get started on this job, I just want to let you know ahead of time you're gonna have to jack up the vehicle quite a bit. You're gonna want this wheel to be at least 8 inches up off the ground to be able to service the suspension. With that said, when you're trying to jack it up and you're trying to make sure that it's going to be supported properly, you're definitely gonna want to do it by the body of the vehicle. You don't want to have anything underneath the axle, particularly. With that said, let's get started.
Okay, friends, one of the first things you need to do is get into the trunk area. Once you get inside, we're going to remove all these 10-millimeter headed bolts that hold those latches. Something that I want to quickly mention is you don't need to open this up and you definitely don't want to touch this nut back here. If you touch this, there's a possibility you could hurt yourself. The next thing we need to do is get this out of the way. To start that we're going to remove these 2 10-millimeter headed bolts. And then, of course, if your unit's locked, you'll unlock it and then lift it up and out of the vehicle.
Okay. Let's go ahead and unlock this. Lift this up, put it right up there. Let's get this outta here. Now, if you just tilt your rear seat, you can see where one of the mounting nuts is right there. Is that easily accessible? It's fairly easy, but it's not going to be the easiest to torque. And I always like to torque things like this down. So, I'm going to go ahead and get this right out of the way. The next thing we need to do is take off this plastic piece right here. You're going to see there's a little plastic push tab right there. And there's another one over here. Use a tool that looks like this, a little forkey tool, try to get along both sides of it right underneath in between the plastic unit itself and the piton, and then pop it out of there. If you can't get it out with a fork tool, you could also try to use some pliers like this. There it is. Set it aside. Do the same to the other one. Now that we have those out of there, let's carefully move this out of the way. Little rubber seal. We're just gonna try to get right underneath this and pop it up.
Okay. This is looking pretty good. Okay. Now, we're just gonna lift up on this. You're going to notice that it's hanging up in this area right there. What we need to do is come from the passenger side, lift it up, and kind of roll it towards the inner portion of the vehicle. There we are. Can see it has a little hooky-do there. You just gotta kind of get the right amount of angle to pop it up and out. Now that we have that out of the way, let's go ahead and pull up on this. Should just want to separate. So, while we're pulling out on this, I noticed that it's catching right along there. Continue with your plastic trim tool so you don't damage anything. And just go ahead and separate these two. There we are. This is looking much better now.
Okay. So, now, we have a nice clear view of our top mounting areas. Let's get these mounting nuts off of here. Okay. Now, we don't necessarily have to remove the wheel to get to our lower mounting stud there and, of course, the lower mounting bolt right there. But it's much easier for me and, of course, for the video, it's going to be easier to see. So, I'll just do that. Our upper mounting bolt is right here. It's going to be a little bit difficult to get to because there is a rubber mount that's there. But use your 14-millimeter socket and possibly a hammer and just try to get it up on there. Let's spray down this nut area. Use your 19-millimeter, remove the nut. The next thing we need to do is pry the shock off of the axle unit. When you do that, there isn't going to be anything else holding the shock in. So, of course, you're gonna want to make sure you hold onto it and be very careful for any pinch points. There it is, friends.
Now, what we need to do is prep our shock. So, you want to make sure you take off your nuts. And, of course, you wanna make sure that you have your gasket so it's sitting right inside the groove. Once you've done that, let's get ready for our install. Go ahead and get this up in the vehicle. Okay. So, we've got this up in there a little bit. I'm just going to start this bolt in a little bit. The next thing we're going to need is a pry bar. I'm going to come right inside the axle area here, pull this down and just try to line that stud up with the hole on the shock. Loving bonk with our rubber mallet. Let's put on a tiny bit of thread locker down here, put your washer on, start that bolt. We're not gonna go ahead and tighten this up yet. We're just going to kind of get it started. Just like this. Little bit of thread locker on our bolt for up here. Okay. Let's snug this up. Let's get our two upper mounting nuts up on here. All right. Let's bottom them out. Let's torque these to 59 foot-pounds. Now, let's torque the bottom bolt. Now's the best time to go ahead and do the same to the other side. Now, if you removed your wheel, go ahead and snug it back up on there and we're going to put the wheel so it's putting the force of the vehicle on the ground.
Okay. So, now, that we have the weight of the vehicle on the ground, it's putting a load on the suspension. At this point, we're going to torque this and we're going to torque it to 59 foot-pounds. There we are. Do the same to the other side of the vehicle. All right. Let's get our little side panel started here and then we're going to go over towards the front area and we're going to make sure we get the black panel on there as well. Let's take this panel, slide it behind the black panel. Once you have it looking pretty good, we're gonna make sure it slides down along here as well. Okay. Bring it down. Push this all in. That feels pretty great. Line this up. Give that a couple of loving bonks as well. Make sure the trim comes all behind this right here. That's super important. You want to make sure the rubber piece is sealed.
All right. Let's get these back on the vehicle. Just pay attention to the little hooky-dos there. Those need to make sure they line up. Slide it into the hole. Go ahead and start in that bolt. Make sure you get a few good threads before you try to tighten it up because you don't want to cross-thread these. Make sure it's nice and snug. Do the same to all the rest. Now, it's going to be time to get the cover in for this area right here. Something to pay attention to is on the bottom side you're going to find three little hooky-dos, make sure you line them up with the holes. Then go ahead and rock it down and lock it in. Now, let's go ahead and get our rearward trim piece in. Just pay attention to the little hooky-do. It needs to go in the slot right back here. Line that up. Okay. Yup. Sitting into the slot. Go ahead and press it down. Double-check to make sure your seal is going all the way around as it should. This looks good. Let's go ahead and make sure we put in our push clips. There we are.
Now it's going to be time to put our storage compartment in here. You just want to make sure you have these flipped up. It's gonna make it much easier. So, put this in just like this and then just kind of lift these up. You want to make sure that they're gonna match up. They're of course gonna fall back down, but that's okay. Also, pay attention to your hooky-dos, make sure they're lined up with the holes. Go ahead and close this down. Perfect. Grab your two mounting bolts and snug them up. The battery's getting a little low. That's tight. Awesome. Make sure you lock it in.
Now, it's going to be time to fold up our seat. Grab your seat belt, pull it towards the side, and then go ahead and lift this up. Make sure it's completely locked. Retract your seat belt. Do the same to the other side. Close the door, close the trunk. If you removed your wheel, make sure you torque your lug nuts to 76 foot-pounds. Torqued.
Shop Products


How to Replace Front Struts 2000-07 Chevy Monte Carlo
How to repair, install , fix, change or replace your front shocks with their loaded struts on 00, 01, 02, 03, 04, 05, 06, 07 Chevy Monte Carlo.
