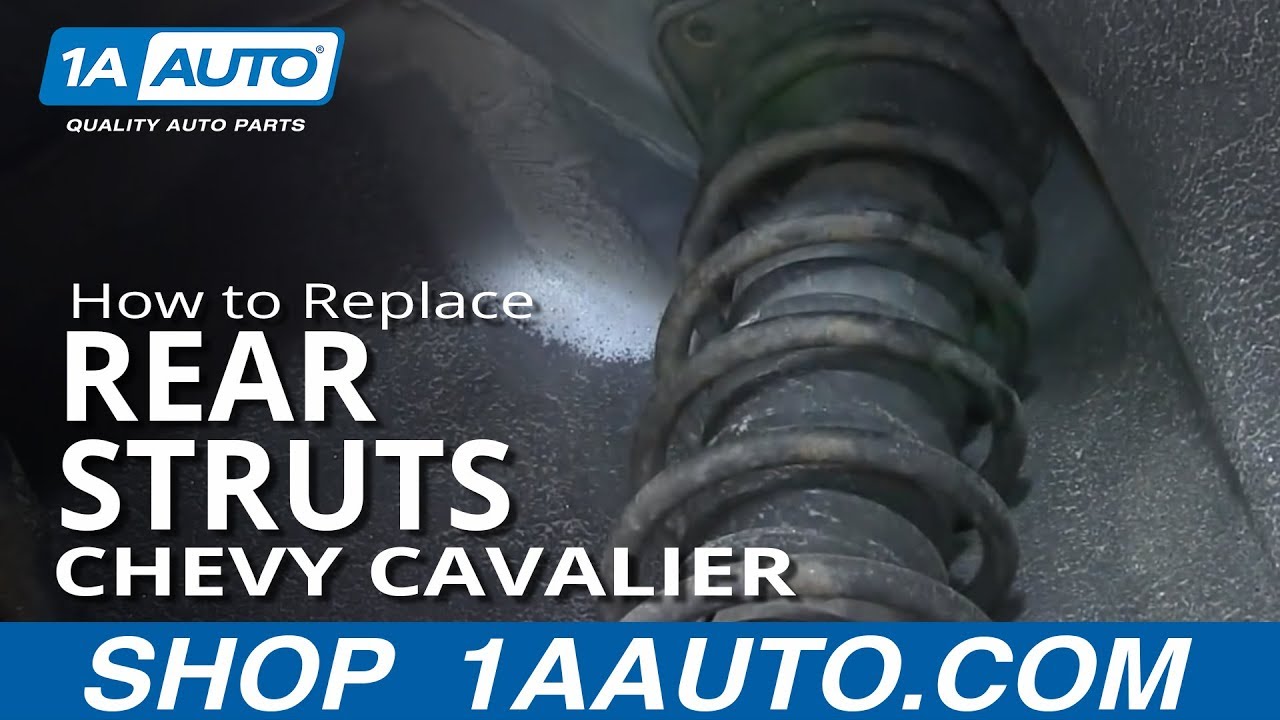
How to Replace Rear Struts 1995-99 Chevy Cavalier
Created on: 2013-08-27
This video shows you how to replace the rear struts on your 95-05 Chevy Cavalier or Pontiac Sunfire. Save money and DIY with help from 1A Auto!
-
step 1 :Remove the top of the strut
- Pop the trunk and secure it.
- Pull away the carpet
- Use your 13 mm socket and ratchet and some penetrating oil to remove the three bolts securing the top of the strut.
-
step 2 :Remove the wheel
- Loosen the lug nuts
- Raise and secure the vehicle
- Remove the lug nuts and wheel.
-
step 3 :Remove the bottom of the shock
- Unbolt the bottom bolt securing the shock.
- Use a breaker bar and an 18 mm socket and some penetrating oil.
- You might need a hammer to work the bolts out once you have removed the nuts.
- Use a pry bar to pry the spindle free from the strut
-
step 4 :Install the new strut
- Work the strut into place and bolt in the top 10 mm bolts
- Torque the three 13 mm nuts to 35 ft lbs
- Bolt in the bottom nut and 18 mm bolt and torque to 85 ft lbs.
-
step 5 :Replace the wheel
- Put the wheel back on and hand tighten the lug nuts
- Lower the vehicle and torque the lug nuts to 100 ft lbs
Tools needed
-
13mm Socket
Socket Extensions
Pry Bar
Jack Stands
18mm Socket
19mm Socket
10mm Socket
Ratchet
Floor Jack
Brought to you by www.1AAuto.com. Your source for quality replacement parts and the best service on the internet. Hi, I'm Don from 1AAuto. I hope this How to Video helps you out, and the next time you need a part for your vehicle, this of 1AAuto.com. Thanks.
In this video, we're going to show you how to replace a rear strut on a 2007 Chevy Cavalier. The same procedure from the left side to the right side. As well as many of the model years of the Chevy Cavalier. In order to do this repair, you're going to need a Jack and Jack Stands 19,18,13, and 10 mm sockets, socket wrench, and an extension, and a long screwdriver or pry bar.
Pop your trunk and we're going to do the right side in this video. Pull down the carpet right below the trunk hinge there, and you're going to find a 13 mm nut on a post. We're going to go ahead and remove that nut. I'm going to use a 13 mm socket and socket wrench to go ahead and do this. I'm going to fast forward as I take that nut off. You want to remove the hubcap with a 19 mm socket. If you don't have air tools, loosen the lug nuts before you raise the vehicle. Once you have the lug nuts loose, raise and support the vehicle and remove the wheel and tire. The wheel off, you'll see on the back side there the lower part of the strut. There's an 18 mm bolt that we're going to need to take out. We're going to go ahead and spray it down with some penetrating oil. Make the job a little easier for us.
I'm using an 18 mm socket on a socket wrench, and I'm going to use a pipe to go over the handle of the socket wrench. Give me a little bit more leverage to break that free. Once I've got it free, I'll take the pipe off to be able to swing the wrench a little bit easier. I'm going to go ahead and fast forward as I take that bolt out. Up inside the wheel well on top of the strut assembly, you're going to find two 10 mm bolts. We're going to need to take those out with a 10 mm socket, socket wrench, and extension. I'm going to go ahead and fast forward as I do that. Take that last bolt out. There you go. Let it drop. Apply a little pressure to the break drum there and pull the strut assembly out. Here's a side by side of the old part and the new part from 1AAuto. An exact fit replacement part.
Going back in is a reversal of the process of taking it out. We're going to apply a little downward pressure on that suspension there. Feed the single post that had the 13 mm nut in the truck compartment up through its hole. Then start threading on your 10 mm bolts that go in through there. Get those tightened up. We need to align the bottom of the strut so it fits into the suspension. I'm using a long flatted screwdriver just too kind of pry it so it gets in there straight. Once that's done, we can go ahead and put that 18 mm bolt back through. Use your 18 mm socket, socket wrench and tighten that back up. Torque the 18 mm bolts about 85 ft.-lbs. Back inside the trunk, install that 13 mm nut on top of the post on the top of the strut assembly. I'll go ahead and fast forward as I do that. Reinstall your wheel and tighten down your five lug nuts. I'll fast forward as I do that. Now, go ahead and torque the five lug nuts to 100 ft.-lbs. in a star pattern. Then, reinstall your hubcap by aligning the hole in it for the valve stem on your tire. Then, tighten them up by hand with your 19 mm socket.
We hope this helps you out. Brought to you by www.1AAuto.com. Your source for quality replacement parts and the best service on the internet. Please feel free to call us toll free 888-844-3393. We're the company that's good for you on the internet and in person.
Shop Products


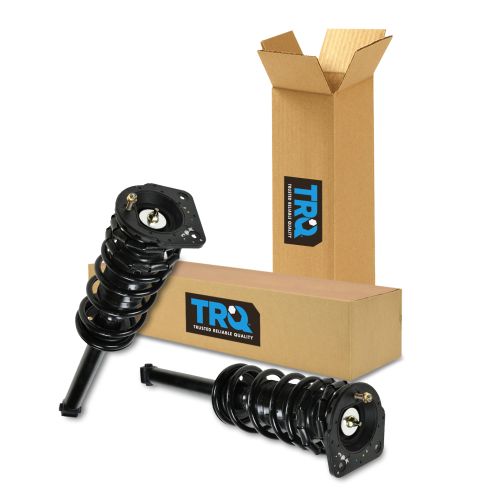
1995-05 Chevrolet Cavalier Pontiac Sunfire Rear Driver & Passenger Side 2 Piece Shock & Spring Assembly Set TRQ SCA56937
Part Details:
- 2 Piece
- (1) Rear Passenger Side Shock & Spring Assembly
- (1) Rear Driver Side Shock & Spring Assembly
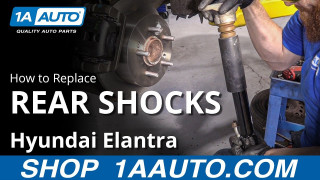
How to Replace Rear Shocks 2007-10 Hyundai Elantra
Check out this video to learn how to replace the rear shock absorbers on your 07-10 Hyundai Elantra. 1A Auto shows you how to do it yourself!
