How to Replace Rear Struts 2000-07 Chevy Monte Carlo
Created on: 2014-07-29
How to repair, install , fix, change or replace your rear struts with their loaded struts. This video is applicable the 00, 01, 02, 03, 04, 05, 06, 07 Chevy Monte Carlo
-
step 1 :Removing the Wheel
- Pull back the insulation from the trunk
- Remove the three 15mm nuts with a wrench
- Loosen the lug nut covers with a 19mm socket
- Pry off the center cap with a flat blade screwdriver
- Loosen the lug nuts with the vehicle on the ground
- Raise the vehicle with a floor jack
- Secure the vehicle on jack stands
- Remove the lug nuts
- Pull off the wheel
-
step 2 :Removing the Rear Strut
- Hold the bolt on the sway bar link with a 14mm wrench
- Remove the nut with an 18mm socket
- Push the sway bar out and to the side
- Remove the two 21mm nuts from the bottom of the strut and knuckle
- Remove the two 13mm bolts from the brake caliper
- Pry the caliper off with a flat blade screwdriver
- Hammer the bottom of the strut to loosen the bolts
- Hammer the bolts out
- Remove the rotor
- Lift the strut up and push it back off the knuckle
- Pull it out from the studs at the top
- Remove the rear shock strut
-
step 3 :Inserting the Rear Shock Strut
- Insert the strut into place
- Push down on the knuckle and place the strut behind it
- Push the strut onto the knuckle
- Insert the 21mm bolts into the bottom of the strut and knuckle
- Jack up the knuckle with a floor jack
- Line up the studs on the shock strut
- Replace the 15mm nuts in the trunk
- Hammer the 21mm bolts in and tighten them
- Torque the 21mm bolts to 120 ft/lbs
- Push the rotor into place
- Hammer the brake caliper back on
- Replace the 13mm bolts in the brake caliper
- Push the sway bar link into its slot
- Insert and tighten the 18mm nut on the sway bar link
-
step 4 :Reattaching the Wheel
- Slide the wheel into place
- Start the lug nuts by hand
- Tighten the lug nuts preliminarily
- Lower the vehicle to the ground
- Tighten the lug nuts
- Tighten the lug nuts to 100 ft/lbs in a crossing or star pattern
- Reattach the center cap
- Tighten the lug nut covers with a 19mm socket
- Tighten the three 15mm bolts in the trunk
- Replace the trunk insulator in place
Tools needed
-
14mm Wrench
21mm Socket
13mm Socket
15mm Wrench
Hammer
Socket Extensions
Flat Blade Screwdriver
Torque Wrench
18mm Socket
19mm Socket
Ratchet
Floor Jack
Brought to you by 1AAuto.com, your source for quality replacement parts and the best service on the Internet.
Hi, I'm Mike from 1A Auto. I hope this how-to video helps you out, and next time you need parts for your vehicle, think of 1AAuto.com. Thanks.
In this video, we're going to show you how to replace the rear struts on this 2003 Chevy Monte Carlo. It's the same part and similar process on these Monte Carlos from 2000 to 2007. We show you on the passenger's side but the driver's side is the same procedure. The items you'll need for this is new rear struts from 1AAuto.com, 13mm, 18mm, 19mm, and 21mm socket and ratchet with an extension, 14mm and 15mm wrenches, a hammer, flat blade screwdriver, a torque wrench, and jack and jack stands.
Start off in the trunk. Pull back this insulation, and you'll want to remove these three 15mm nuts. You can remove this cap so that one is easier to get to. You will have to use a wrench for the back one, but you can use a 15mm socket and ratchet for the other two. Loosen up the lug nuts and pull your hubcap off. Then remove the lug nuts. You'll want to loosen these while the vehicle is on the ground, raise the vehicle, and remove them the rest of the way. Do this if you don't have air powered tools. Now, just pull the wheel off.
Using a 14mm wrench on the back and an 18mm socket and ratchet, just remove this nut. Push the sway bar out and put it to the side. Now, remove these two 21mm nuts. Next, remove these two 13mm bolts that hold your caliper into place. Now, pry your caliper off and set it aside. Hammer the bottom of the strut to loosen the bolts and then hammer the bolts out. Now, pull your rotor off, lift the strut up, and push it back off the knuckle. Once you get it off the knuckle you can pull it down and pull it out.
On the bottom is the old strut; above it is the new one from 1A Auto. You can see they're identical, and they'll fit exactly the same. Feed the strut into place. Push down on the knuckle and feed the strut behind it. Just push it onto the knuckle and feed your bolts through. Put the two bolts in place and place the nuts on the other side just have them on there hand-tight. Now put a jack underneath the knuckle and line up the studs. You want to make sure you have at least one of them lined up. Once you can see one, just replace the nut. Now pry out right here so that the other studs will line up. Then, using the jack, just push the studs up and through. Then replace the nuts.
Now hammer these two bolts in as much as you can, and then just tighten up the nuts and pull the bolts the rest of the way through. Now torque these to 120 foot-pounds. Push the rotor into place. Then put your caliper into place and hammer it on. Then replace the bolts on the back of it and tighten them up. Make sure you push your sway bar link back into place and replace that 18mm nut.
Replace your wheel and then replace the lug nuts. Tighten them preliminarily, lower the vehicle, and tighten them the rest of the way. Then torque each of these to a hundred foot-pounds in a crossing pattern. Then replace your hubcap and tighten up these lug nut caps. Now, go back into the trunk and tighten up those three 15mm bolts. Put the rubber stopper and rubber bumper back on the top of the insulator, and then put the trunk trim back in place.
We hope this video helps you out. Brought to you by www.1AAuto.com, your source for quality replacement parts and the best service on the Internet. Please feel free to call us toll-free, 888-844-3393. We're the company that's here for you on the Internet and in person.
Shop Products
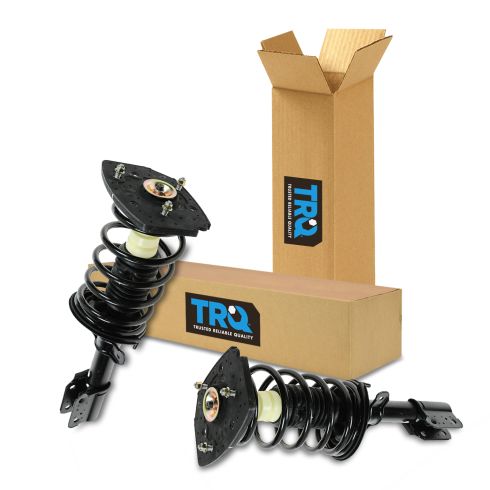
Chevrolet Buick Pontiac Rear Driver & Passenger Side 2 Piece Strut & Spring Assembly Set TRQ SCA57036
Part Details:
- 2 Piece
- (1) Rear Driver Side Strut & Spring Assembly
- (1) Rear Passenger Side Strut & Spring Assembly

How to Replace Rear Shocks 2000-04 Nissan Frontier and XTerra
Check out this video and learn how to replace the rear shocks on your 00-04 Hyundai Elantra. 1A Auto shows you step by step!
