How to Replace Rear Strut Assembly 2003-11 Honda Element
Created on: 2019-08-10
Check out this 1A Auto video to learn how to replace the rear shocks on your 03-1 Honda Element!
-
step 1 :Removing the Wheel
- Raise the vehicle with minimal weight on the wheel
- Loosen the 19 mm lug nuts
- Raise and support the vehicle
- Remove the lug nuts
- Remove the wheel
-
step 2 :Removing the Strut
- Remove the top strut mount panel on the inside of the vehicle
- Remove the two 15 mm top strut mount nuts
- Remove the 21 mm nut from the 18 mm lower strut mounting bolt
- Remove the lower strut mounting bolt
- Remove the two 10 mm bolts securing the evap canister to allow extra clearance, if necessary
- Remove the strut
-
step 3 :Installing the Strut
- Insert the strut top mount into the vehicle
- Install the two 15 mm top strut mount nuts
- Torque the two 15 mm top strut mount nuts to 54 ft-lb
- Reinstall the strut mount panel
- Install the lower strut mount
- Install the 18 mm lower strut mount bolt
- Install the 21 mm nut onto the 18 mm bolt
- Torque the 21 mm bolt to 69 ft-lb
- Reinstall the two 10 mm bolts securing the evap canister
-
step 4 :Installing the Wheel
- Install the wheel onto the wheel studs
- Install the lug nuts and tighten them by hand
- Lower the vehicle with minimal weight on the wheel
- Torque the lug nuts to 80 ft-lb
Tools needed
-
Socket Extensions
Torque Wrench
Hammer
15mm Socket
Rust Penetrant
Pry Bar
18mm Wrench
18mm Socket
19mm Socket
21mm wrench
10mm Socket
Ratchet
1/2 Inch Breaker Bar
Hi, I'm Mike from 1A Auto. We've been selling auto parts for over 30 years.
Hi, everyone. Sue here from 1A Auto, and today on our '06 Honda Element, I'm going to show you how to remove and replace the rear strut assembly. If you need this part or any other part for your car, click on the link below, and head on over to 1aauto.com.
19 millimeter socket, and we're going to break free the lug nuts.
You got the pressure of the vehicle on the tire still, so it doesn't turn.
I use a two post lift at home. You can use a jack and jack stands.
I'm going to take all the lug nuts off and remove the tire.
I'm going to spray the lower strut assembly bolt and nut. Try to get some of that rust off.
So the access to the top of the strut assembly is in the rear part of the Honda Element. So you need to remove the rear seat, and then you have the trap door right here. It's got a little cutout for a body tool, and you just reach in there and pull that plastic cover right out. Now you can see the assembly down there.
So we're going to loosen up the two top strut mounting nuts, and there's a 15 millimeter socket. We're not going to touch the center, ever, on spring loaded assembly. That is where it compresses the spring and strut together. There's a lot of pressure there. You need a strut tool to compress that spring to do that.
You can get your hand down there. Discard the nut. Same with this side.
I'm using a two post lift, At home, you can use a jack and jack stands.
Now we're going to raise the vehicle up to access the lower amount.
Now we've raised our vehicle and we have access to the lower strut assembly, mounting nut and bolt. So the back, the nut, is a 21 millimeter. I'm going to put that on. And the bolt is an 18 millimeter socket. Going to break this free.
Going to hit that with some spray again. So you can see I sprayed it earlier, but I want to re-spray it right now.
If we can get that by hand now. Perfect.
Now, I'm going to take a pry bar and pry on that bolt while I ratchet that out.
The key is to get it behind something to give some pressure on that.
So now you can see that there's pressure on that. That's why the bolt is moving up.
Time to take my pry bar, see if I can get it to release some of that pressure, and get that moving out of there.
So now, I'm going to grab onto it and take my pry bar, see if I can pry it out of the mount on the bottom, and pull it down. Let's see if we can clear the EVAP canister. That's pretty tall, so I don't think I'm going to clear that EVAP canister, so I'm going to dismount the canister so I can get it to just move the extra two inches I need of clearance.
So I'm going to let down the EVAP canister, and I'm just going to dismount the two mounting bolts for the bracket. It's a 10 millimeter socket, and hope it doesn't break. The other mounting bolt is right here.
Now with the EVAP canister able to move out of the way, I can bring this down, slide it right past.
Here we have our new rear strut assembly for our '06 Honda Element from 1aauto.com, and here is the assembly that we took out. It is an aftermarket assembly, so there's not much to compare it to other than the worn out bushings. And you can see how our company, 1A, does the bushings different, they invert it so the water can run out and cause more flex. This is a nicer one because it flexes more so it doesn't cause a breakdown of the plastic like that, the rubber. Comes with a new seal for the top, and locking nuts. If you need this part or any other part for your car, click on the link below and head on over to 1aauto.com.
All right, so we're gonna slide ... So the way this is mounted, that you've got the two top mount bolts that come up, and then that's going through.
Okay. So I lined up the two struts in the mount. They've gone through. Now I can push the bottom mount into place.
So we're going to tighten the top part of the strut assembly, bring it up, and torque it down so that we can work better with the lower mounting, because we have a potential of this sliding out, falling out, while I'm trying to drop the suspension down enough to get the bolts started. So I'm just gonna hand start these top nuts. And they're walking nuts that 1A provides for the new strut mount. There's a lot of dirt in here, I'm just going to get that out of the way, because I want to make it a clear mounting surface.
The manufacturer does have a torque spec for this. It is 54 foot-pounds.
Snug on both. Now I'll get my torque wrench ready. It's preset for 54 foot-pounds.
There's one. Two. Now we can reinstall the plastic cover. That's the two guided tips. Put them in the top. There we go. Snaps right in.
Okay, so now with the top strut assembly mounts tightened ... So I have a pry bar going through the little control arm, and it's just resting on the differential. And now the mounting bolt hole is lined up, I just have to pry the strut out just a hair, and hope it stays there. There we go. Now I can grab the bolt, pull it out just a hair, see if I can get this thing started.
There we go. Let me get my hammer.
Now I can tap that in place. Perfect.
Remember not to tap the bolt all the way in because you've got to get this nut to be able to start. I'm just barely there.
So I'm going to grab mine through my ratchet with my 18 millimeter socket and my 21 millimeter wrench, and let's see if we can start this bolt. And see if we can get that to start thread.
Okay, I'm going to snug that down, and then I'm going to torque it to manufacturer's specs.
Lock up my torque wrench, and I'm going to torque this lower strut bolt and nut to ... Manufacturer's specs is 69 foot-pounds. Well I guess I'm already there.
So for remounting the EVAP canister, as you can see, both bolts broke out, snapped off because they were just rusted. I could try to drill those out, but I know the end result is going to be just a nightmare. So there's plenty of room for me to move this canister around, and just re-tap some guide holes, and I can just use self-tapping screws and zing it up.
And I'm just going to do the same thing back here.
Let's put the lug nuts back on. It's a 19 millimeter socket. Just going to tighten them all down, then they can lower it down and torque it.
So I'm going to torque the wheels to manufacturer's spec, which is 80 foot-pounds. And always do it in a star pattern.
And double check.
Thanks for watching. Visit us at 1aauto.com for quality auto parts, fast and free shipping, and the best customer service in the industry.
Shop Products
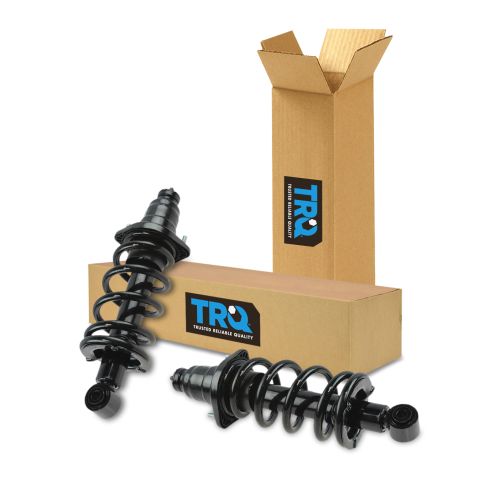
2003-11 Honda Element Rear Driver & Passenger Side 2 Piece Strut & Spring Assembly Set TRQ SCA57183
Part Details:
- 2 Piece
- (1) Rear Driver Side Strut & Spring Assembly
- (1) Rear Passenger Side Strut & Spring Assembly
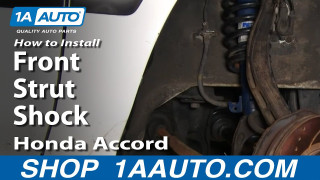
How to Replace Front Struts 1994-97 Honda Accord
Learn how to replace clunking or bouncy struts on your 94-97 Honda Accord by watching this tutorial video from 1A Auto.
