How To Replace Rear Strut 2007-17 Ford Expedition
Created on: 2020-12-17
This video shows you how to install new reliable TRQ struts in your 2007-2017 Ford Expedition.
Tools needed
-
21mm Socket
Torque Wrench
Gloves
Hammer
Rust Penetrant
Pry Bar
Wheel Chocks
Floor Jack
Safety Glasses
Okay, friends to get started, one of the first things we need to do is safely raise and support the vehicle. After that, let's go ahead and remove this center cover and then remove all 6 of our 21-millimeter lug nuts. Remove your wheel. Now we have a nice, clear view of our rear shock, one of the first things we're gonna do is spray down these upper nuts up here. That's gonna make it much easier for us. Right down here, you're gonna see there's another nut with a bolt that goes through. Let's spray that down as well. Perfect. Now let's go ahead and try to loosen these up. You're gonna notice that one of them's gonna be behind. It's a little harder to get to, but you can do it.
Let's get this one. Now I'm just gonna reach around through here. I got my ratchet wrench. Perfect. Now looking under here, you can see where our next nut is. Let's go ahead and remove this as well. I'm gonna hold the backside with a nice ratchet and a socket. With the nut off of there, we can continue on by removing the bolt. Give this a couple of turns to break it free. All right. Now let's continue on to removing this bolt right here. On the backside, you're gonna find that there's a captured nut. We don't really have to worry about that. Let's go ahead and spray it down with some penetrant, and now we'll start removing the bolt.
So now that that's loose, the next thing we need to do is take a nice bolt that looks like this. We're gonna go ahead and put it down through the top and out through this hole. That's gonna help make it so when we put the jack here, it won't be able to slip. So now we're just gonna go ahead and jack this up. As you can tell, it's at an angle, the bolt's gonna hold it from sliding. And now we can continue on to removing this bolt. There goes the captured nut. No problem. Let's go ahead and get this out of here. Perfect. Now let's move along to removing our lower bolt. We're just gonna lower this down. Let's give it a couple of loving bonks. Let's get our bolts out of there. Now let's carefully lower our jack down so it relieves this arm. There we are. Let's go ahead and do this. Let's get our last nut off of there. There it is, friends.
All right, friends, let's get this new shock up and in here. Line up those studs, start in all of your nuts. Okay. So we've got these bottomed out, let's continue on. All right. So the next thing we need to do is get our jack back under here. We're gonna get our shock so it's getting ready to come inside this access point right here for our bolt. Start jacking this up into the area that it's supposed to go. Once everything starts lining up, we'll put our bolts in.
So now that we have this so it's pretty much lined up on this one, we'll go ahead and start our bolt in. That looks decent enough. I'll just continue jacking this so we can access this one. Let's go ahead and get our captured nut back up on here. Screw in this bolt a little bit. So now that we have both of these bolts started, what we're gonna do is we're gonna jack up right under here and try to bring this to the level as if the vehicle was on the ground putting pressure right here. That looks pretty great. Now let's go ahead and snug these up. Now with pressure still underneath that lower control arm, we need to continue on by tightening up these nuts right here. You would torque these to 30 foot-pounds, assuming you can get your socket with your torque wrench in there. If you can't, just kind of make them snug. It's always a good idea to use some thread locker.
Now we're gonna torque this bolt right here to 406 foot-pounds. Let's go ahead and torque this bolt to 266 foot-pounds. Let's go ahead and get our wheel back up on here, start all of our lug nuts, and then we'll torque them to manufacturer specifications. Now with the wheel just barely touching the ground, let's go ahead and torque our lug nuts to 150 foot-pounds.
Get our center cover back on there, lower it down, take it for a road test.
Shop Products


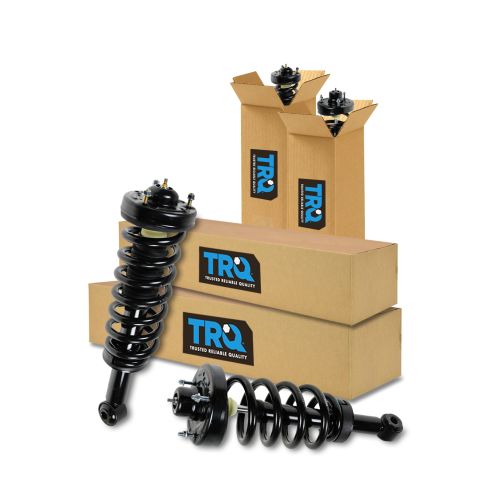
2007-13 Ford Expedition Lincoln Navigator Front & Rear 4 Piece Strut & Spring Assembly Set TRQ SCA57061
Part Details:
- 4 Piece
- (2) Front Strut & Spring Assemblies
- (2) Rear Strut & Spring Assemblies
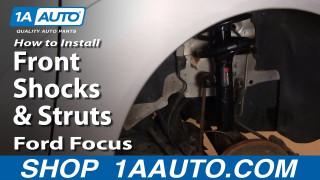
How to Replace Strut Assembly 2000-05 Ford Focus
Watch this video to learn how to fix a sagging or loose suspension. The experts at 1A Auto show how to replace the front shocks in your 00-05 Ford Focus.
