How to Replace Rear Shocks 2008-12 Ford Escape
Created on: 2019-04-17
How to repair, install , fix, change or replace your rear shocks. This video is applicable 08, 09, 10, 11, 12 Ford Escape
-
step 1 :Removing the Interior Trunk Trim
- Grab underneath the latch flooring trim and lift it up and off
- Roll up the trunk carpet flooring
- Grab from the back of the back seat bottom cushion and pull the cushion up
- Lift up the trim flooring with a trim tool and remove the clips
- Remove the side wall trunk trim panel from its clips with a trim tool
- Remove the side wall trunk trim
-
step 2 :Removing the Wheel
- Loosen the 19mm lug nuts with the vehicle on the ground
- Raise the vehicle with a floor jack
- Secure the vehicle on jack stands
- Remove the lug nuts
- Pull off the wheel
-
step 3 :Removing the Rear Shock
- Loosen the lower shock bolt to a couple threads with a 24mm socket and breaker bar and 13/16 inch wrench or 21mm wrench
- Place a jack beneath the lower control arm
- Lower the vehicle to take tension off of the shock
- Remove the upper shock nuts with a 15mm wrench and locking pliers
- Remove the lower shock bolt and washer
- Remove the lower shock
-
step 4 :Installing the Rear Shock
- Compress the shock and let it expand three times
- Insert the shock into place
- Start the lower bolt and nut by hand
- Center the upper stem on the shock
- Put the grommet on (bigger part down first)
- Put the washer on
- Put the nut on
- Tighten the 16mm nut with a 16mm wrench and locking pliers
- If needed, secure the strut with a strap wrench
- Torque the upper nut to 30 foot-pounds
- Torque the lower bolt to 129 foot-pounds
-
step 5 :Installing the Interior Trunk Trim
- Press the interior side wall trunk trim on
- Press the side flooring trim beside the rear seat on
- Lower the rear seat bottom cushion
- Insert the trunk flooring trim on
- Readjust the carpet flooring
-
step 6 :Reattaching the Wheel
- Slide the wheel into place
- Start the lug nuts by hand
- Tighten the lug nuts preliminarily
- Lower the vehicle to the ground
- Tighten the lug nuts to 100 foot-pounds in a crossing or star pattern
Tools needed
-
24mm Socket
15mm Wrench
Torque Wrench
16mm Wrench
Hammer
Rust Penetrant
16mm Socket
Jack Stands
19mm Socket
Trim Tool Set
21mm Socket
21mm wrench
Oil Filter Wrench
13/16 Inch Wrench
Ratchet
Floor Jack
1/2 Inch Breaker Bar
What's up, guys? I'm Andy from 1A Auto. In this video, I'm going to show you how to replace the rear shocks on this 2012 Ford Escape. If you need this part or other parts for your vehicle, click the link in the description and head over to 1aauto.com.
Open up the lift gate. Come back here. We want to take this panel off first. Just grab underneath. Just like that. Set it aside. Then just pull back this carpet. Slide that aside. This panel needs to come off, so we need to move the seats. All right. Just going to grab under the back of the seat here, pull up, fold it forward like that. I'm going to remove this panel. I just need a trim tool to gain access to this panel. Just get underneath here. It's just a clip holding this in, and just pry up, like that. Oh, the clip fell out. That's okay. All right. On the front side over here, there's a little pushpin. Over here, just get in behind the panel. Push this out. Here we go. All right. Now I can pry underneath this push clip. There you go. That one's pretty long, too. And then we can slide this forward a little bit. I'm going to have to pull the seat down. And here, keep the seat belt out of your way.
Just get in behind the panel and push it. Might have to use the trim tool. There's just clips holding it in. Just grab it and give it a good tug. If that door comes off, it's no big deal. Slide this forward and just slide this out. All right. Now we have the ability to access the top part of the shock, but before I take this off, we're going to actually go to the outside, take the wheel off, and start taking it off from underneath. I'm going to remove the wheel. I'm going to use a 19 millimeter socket and a breaker bar. Loosen up the lug nuts before I raise the vehicle up. All right. Now I'm going to remove the lug nuts. Grab the wheel. This wheel's stuck on there pretty good, so just going to put a lug nut on. Take a hammer and hit it from the back side. I can take the lug nut off and pull the wheel off.
All right. So we want to loosen up this nut right here. Before I loosen it up, I'm going to spray it with some rust penetrant. This is pretty rusty. I'm not going to take it off completely, because I still want to support the underneath here, because otherwise the spring is going to push down. Basically the shock is holding the spring from pushing the control arm down, so let's spray it first and then loosen up that nut. All right.
So I'm going to take a 24 millimeter socket and a breaker bar. Loosen up this nut. Now this side of the bolt has this little cage that will stop the bolt from spinning. If yours doesn't have that, you're going to want to put a wrench on the end of that. See, that's starting to spin, but it should stop. And it looks like it's actually going to break, so I'm actually going to get a wrench for this. I'm going to use a 13/16 wrench, or you can use a 21 millimeter wrench as well. All right. It's on there tight.
All right. So I'm just going to leave a couple threads on. This nut is nice and loose, so we'll leave that like that. So at this point I'm going to lower the vehicle. I want to support the lower control arm, because the spring is in there. When I put the jack stand underneath here and lower the vehicle, it's just going to raise this up a little bit, take the tension off the shock. From up top, everything's supported down below. We're going to take the top part of the shock off, use a 15 millimeter wrench. We can loosen this up. You can grab the center so that it doesn't spin. I'm just going to use some locking pliers. If you have a wrench that'll fit on that, you can use a wrench. I couldn't find one that fit. It must be like a six and a half. If you have a six and a half inch wrench. I mean, six and a half millimeter wrench. Then I can take a ratcheting wrench. Loosen this up. Oh, it's starting to spin again. Use the locking pliers.
So, because the top of the shock is spinning like that, I'm just going to use some locking pliers outside here. It's easier to grip onto, and just lock this right here. Then this is just going to go up against the side of the vehicle, and that'll hold that from spinning. And there we go. Got it off. I can take these locking pliers off, just like that. And because this is loose, just take this nut off. Slide that off. Slide the washer off. Slide the bolt out, and slide the shock. And pull it right out.
Here's the old shock. Here's the new shock from 1aauto.com. Comes with this strap for shipping purposes. You can take this off. You can just push down on it and slide it to the side, or you can take some side cutters and cut it. Pull that off. Throw that away. The mounting position is the same. As the shock extends it will be the same length. The top part is the same. The new one comes with these washers and grommets, just like the old. And it comes with a new nut, so that's the same as the old one. Get yours at 1aauto.com and you'll be ready to rock and roll.
So with these shocks, before I put them in, I'm just going to compress them and let them expand three times. That's just going to disperse the oil properly in the shocks. Do the same thing three times. Okay, now take the shock, make sure you put the washer and the rubber grommet on the top, slide that into the hole up there, and we're going to have to compress this a little bit. Just push it up. Get that to line up with the bolt. Take the washer and the nut, get that started. Okay, so we want to center this in the hole. So that's pretty good right there. Take the grommet. Now the grommet has two sides to it, this smaller part and this bigger part, and the same with the lower one. So you want the bigger part that's going to center the shock a little bit better.
Put that in there, and put the washer, now put the nut on. I'm going to take a ratchet wrench and tighten this up. This actually, the new nut, is actually a 16 millimeter, and once you see that center start to spin, take the locking pliers, try to just get on that up top. You could use some needle nose pliers. Just try to hold that until it gets snug, and we're going to torque it. So when I tighten the shock, this upper part is just spinning, so what I can do is take one of these rubber strap wrenches, just get this tight, and I'm just going to have a partner hold this for me while I torque it. And over here. I can torque this to 30 foot pounds. And that's good. At this point I'm going to raise the vehicle. It's safe to do so. Now I'm just going to take a 24 millimeter socket and a ratchet, just tighten this down. I don't really need the wrench for this, because that cage is going to stop that from spinning.
Now I'm going to take a torque wrench, and I'm going to torque this to 129 foot pounds. That's good. Now we're all set on the inside here, so put this interior body panel back on. Just slide this in. Once it's in position, you can start pushing it on. Just clips in place. The weather stripping right here has to go over the panel, so just grab it and fold it over just like that. Make sure that hole lines up right there. Push the seat back there. Now this little push clip is going to go right in here just like that, and I'm just going to slide this pushpin out. Get this in position. Push that down, and then push the other push clip over here. There we go. Close that door, push this seat back underneath. Just take this trim piece and line this up. Just like that. Push it on. Now we can take the carpet. Put that back in position and take this door that fell off and slide that back on.
Now we're going to put the tire back on. Put the lug nuts on. All right. Just going to use the 19 millimeter socket and tighten these down by hand. I'm going to take my socket and a torque wrench. I'm going to torque these to 100 foot-pounds, and I'm going to do it in a star pattern so that the wheel gets tightened down evenly. Just going to go around again. Make sure everything's tight.
Thanks for watching. If you want the parts to do it yourself, check out 1Aauto.com, the place for DIY auto repair.
Shop Products


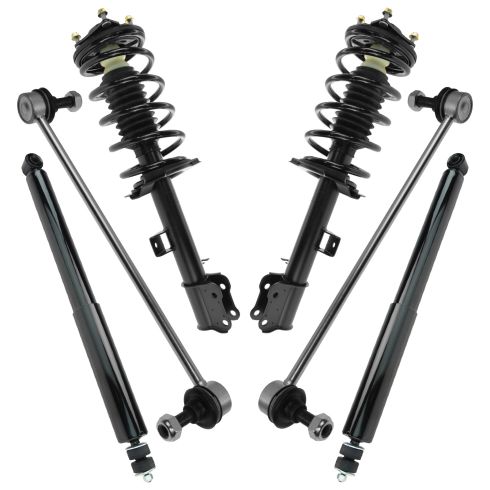
Ford Mazda Mercury Front & Rear 6 Piece Suspension Kit TRQ PSA34477
Part Details:
- (2) Front Sway Bar Links
- (2) Front Strut & Spring Assemblies
- 6 Piece
- (2) Rear Shock Absorbers

How to Replace Rear Shocks 2000-04 Nissan Frontier and XTerra
Check out this video and learn how to replace the rear shocks on your 00-04 Hyundai Elantra. 1A Auto shows you step by step!
