How to Replace Rear Shock Absorbers 2005-14 Chrysler 300
Created on: 2017-01-23
Watch this video to learn how to replace the rear shocks on your 05-14 Chrysler 300.
-
step 1 :Removing the Wheel
- Loosen the lug nuts
- Raise and support the vehicle
- Remove the lug nuts
- Pull off the wheel
-
step 2 :Removing the Rear Shock Absorber
- Remove the two 16mm bolts at the top of the shock absorber
- Compress the shock
- Pull out the top of the shock
- Remove the bottom shock bolt with an 18mm wrench and a 15mm socket and ratchet
- Pull out the shock
- Hold the shock stud with vise grip pliers
- Remove the 15mm nut from the top of the shock
- Remove the shock mount from the shock
-
step 3 :Installing the Shock
- Remove the 15mm nut from the top of the new shock
- Remove the washers from the new shock
- Put the shock mount onto the new shock, with the rubber pointing out
- Put the appropriate washer onto the shock stud
- Fasten the 15mm nut onto the shock stud
- Put the shock into place, top first
- Compress the shock
- Line up the shock with the lower control arm
- Install the bottom shock bolt
- Start the nut onto the bottom shock bolt
- Fasten the bottom shock bolt with an 18mm wrench and a 15mm socket and ratchet
- Tighten the bottom shock bolt to 53 foot-pounds of torque
- Start the two 16mm bolts into the shock mount
- Tighten the two 16mm bolts to 38 foot-pounds
-
step 4 :Installing the Wheel
- Put the wheel into place
- Start the lug nuts
- Lower the vehicle to the ground
- Tighten the lug nuts to 110 foot-pounds in a crossing pattern
Tools needed
-
15mm Wrench
Socket Extensions
Torque Wrench
16mm Wrench
15mm Socket
17mm Wrench
Rust Penetrant
18mm Wrench
Jack Stands
21mm Socket
Gloves
Ratchet
Floor Jack
1/2 Inch Breaker Bar
Hi, I'm Mike from 1A Auto. We've been selling auto parts for over 30 years. We're dedicated to delivering quality auto parts, expert customer service, fast and free shipping, all backed by our 100% satisfaction guarantee. Visit us at 1AAuto.com, your trusted source for quality auto parts.
In this video, we're going to be working with our 2006 Chrysler 300. We're going to show you how to remove and replace the vehicle's rear shock. If you like this video, please click subscribe. We have a ton more information on this and many other vehicles. If you need this part for your car, you can follow the link down in the description over to 1AAuto.com. Here are the items you'll need for this repair.
Using a 21mm socket and a breaker bar, break all of your lug nuts loose about one turn before raising your vehicle. Now these chrome cap-style lug nuts are prone to having this chrome covering get water behind them and loosen up, so if you can't get it on well like I can't here, just give the socket a couple of taps to make sure you get good contact when removing it. Now if these are really loose or you find a lot of them in poor condition like that, it's a good idea to change out all of your lug nuts.
Raise and support your vehicle. We're using a lift to make it easier to show you what's going on, but this job can easily be done at home on a jack and jack stands. Finish removing your lug nuts. You should be able to do this by hand now. Remove the wheel and tire from the vehicle. Now this is an aluminum wheel on a steel hub, so you may have to work it back and forth a little bit to get it to free up.
Remove the two 16mm bolts at the top of your shock with a socket, ratchet, and extension. You should now be able to grab the top of the shock and compress it. Using an 18mm wrench and a 15mm socket and breaker bar, loosen and remove the bottom bolt of the shock. Once you get it loose, you may be able to switch to a socket and ratchet. Now you can wiggle the shock and remove the bottom bolt and remove the shock from the vehicle.
You'll notice on the end of the shock stud here, there's this little portion with two flat edges. Now they do make a special socket to remove that but you don't necessarily need one. We're going to use a pair of locking jaw pliers. Simply lock onto that. Be careful not to hit the actual threads. Lock that on nice and tight. Using a 15mm wrench, loosen the nut on the top of the shock. Remove the nut as well as the top washer there, and remove the shock mount from the end of your shock.
Here we have our old shock that we removed from our vehicle and our new part from 1AAuto.com. As you can see, there are some minor aesthetic differences but the parts themselves will function in the same way. We have the same length shock body and piston under this dust boot, which is new on our new part. We have a nice new solid bushing at the bottom with the eyelet for our bolt. At the top, we have the same stud, which comes with a new nut. This actually fits a variety of applications, so we have two washers here. We'll only be using one of them when we reattach it to our strut mount. When your shocks bad, they stop controlling the rate of motion in your rear suspension and can cause it to feel like it's jarring, like a very harsh movement, or it can feel bouncy because it's not limiting the number of times the suspension can travel up and down after hitting a bump, or, if the mount itself or a bushing goes bad, it can make some loud clunking going over bumps. Fortunately, this new part from 1A Auto goes in direct fit just like the original equipment and will fix you up right.
Remove the nut on the end of your new shock. Remove the washers. This is the only one we want. We'll take our shock mount, make sure the rubber is in good condition. Ours looks nice so we'll go ahead and put it back in. Slide that on. Get your new nut on as tight as you can by hand. Using your 15mm wrench, tighten that nut up. You may need to use your vice grips to keep the top from rotating while you finish tightening it down.
Now we're ready to reinstall on our vehicle. Place the top of the shock roughly where it sits in the vehicle and compress it. Line it up with the hole in the lower control arm and allow the shock to extend out, at which point we'll reinstall our bolt and the nut. Using your 18mm wrench and your 15mm socket and ratchet, we'll snug up that bottom bolt before torqueing. Torque the bottom bolt to 53 foot-pounds.
Reinstall your two 16mm bolts. Make sure you get them both lined up before you tighten either of them down. Torque those bolts to 38 foot-pounds.
Reinstall your wheel and tire. Install all of your lug nuts as tight as you can by hand. Torque your lug nuts to 110 foot-pounds in a cross pattern.
Thanks for watching. Visit us at 1AAuto.com for quality auto parts, fast and free shipping, and the best customer service in the industry.
Shop Products


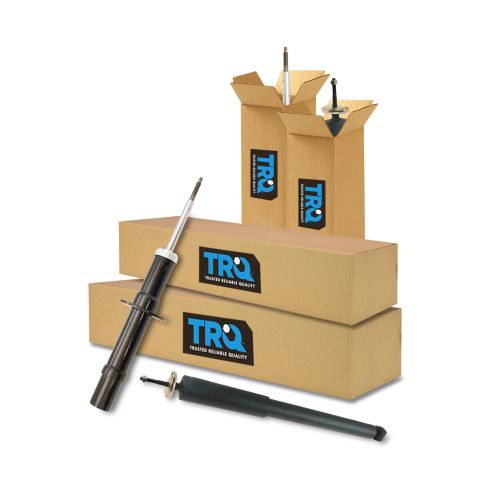
Dodge Chrysler Front & Rear 4 Piece Shock Absorber Set TRQ SBA60522
Part Details:
- 4 Piece
- (2) Rear Shock Absorbers
- (2) Front Shock Absorbers
How to Replace Shock Absorbers 2007-16 Chevy Silverado
You can learn how to change the rear shocks on your 07-13 Chevy Silverado or GMC Sierra. Watch this video where 1A Auto experts show you step by step!
