How to Replace Rear Shock Absorber If Lower Bolt Breaks 2006-11 Honda Civic
Created on: 2018-01-12
How to repair, install , fix, change or replace your rear shocks, even if the lower bolt breaks on 06, 07, 08, 09, 10, 11 Honda Civic.
-
step 1 :Removing the Interior Trunk Trim
- Remove the three pins from the side interior trim panel in the trunk
- Lift the flooring
- Remove the pin from the side interior trim panel in the trunk
- Remove the trim panel from the ledge
- Move the side interior trim out of the way
- Remove the 14mm nut from the shock with a 5mm allen key and 14mm wrench
- Remove the plates from the shock
-
step 2 :Removing the Wheel
- Loosen the 19mm lug nuts with the vehicle on the ground
- Raise the vehicle with a floor jack
- Secure the vehicle on jack stands
- Remove the lug nuts
- Pull off the wheel
-
step 3 :Removing the Rear Shock Absorber
- Support the lower control arm with a floor jack
- Remove the lower bolt with a 14mm socket and breaker bar
- If the bolt snaps, remove it with a hammer and punch
- Wedge the shock out with a pry bar
- Remove the shock
-
step 4 :Installing the Rear Shock Absorber
- Remove the nuts and rubber bushings from the top of the shock absorber
- Place a washer on the stud of the shock absorber
- Place a bushing on the washer
- Place a casing on the stud
- Insert the shock up into place
- Press the bolt through the bottom of the shock
- Thread the nut on to the bolt
- Jack up underneath the control arm to press the shock into place
- Place a bushing on the top of the shock
- Place a washer on the top of the bushing
- Tighten the 14mm bolt to the top of the shock
- Torque the bolt to 22 foot-pounds
-
step 5 :Installing the Interior Trunk Trim
- Insert the interior trunk trim into place
- Press the trunk hatch trim on
- Place the flooring on
- Press the push clips into the interior trunk trim
- Jack up underneath the shock
- Torque the bolt to 43 foot-pounds, counter-holding if needed
-
step 6 :Reattaching the Wheel
- Slide the wheel into place
- Start the lug nuts by hand
- Tighten the lug nuts preliminarily
- Lower the vehicle to the ground
- Tighten the lug nuts to 80 foot-pounds in a crossing or star pattern
Tools needed
-
Adjustable Wrench
14mm Wrench
Socket Extensions
Torque Wrench
Hammer
Rust Penetrant
Pry Bar
Jack Stands
19mm Socket
5mm Hex Wrench
Side Cutters
Flat Blade Screwdriver
Center Punch
10mm Socket
Ratchet
Floor Jack
1/2 Inch Breaker Bar
Hi, I’m Mike from 1A Auto. We’ve been selling auto parts for over 30 years!
To get to the top of the rear shock mounts you have to go inside the trunk before you even raise and support the vehicle or take off the wheel and remove the trim panel that's in here. Use a flat bladed screwdriver, unscrew these plastic clips. Pull that out, put this back here so we don't lose it. This clip here and a clip here. Put this aside. And actually lift this up to get it out of the way. There's another clip here. Just kind of lift up on it. Can pop this trim up by pulling it up and out. Off the clips. And then we're just going to slide the carpet part off. This comes off all the way, that's fine. You can just put it aside. You have to do this for both sides. From here we can get inside to the top of the shock.
I'm going to spray some rust penetrant on the top of the shock. This is a locking nut and in the top of the shock we have to put a five millimeter Allen key into to counter hold it. The nut is 14 millimeter. I'm going to put a 14 millimeter ratcheting wrench on here and a five millimeter Allen key and a breaker bar to counter hold it. I'll finish taking it off with my fingers. Take out our Allen key and breaker bar. Wrench came out with it. Take off that top plate. Just put that down inside here because we're going to reuse it. Take our 19 millimeter socket and breaker bar and while the vehicle's on the ground, we'll loosen our lug nuts.
We'll raise and support the vehicle. With the lug nuts loose I can just take the socket and finish taking them off. Lug nuts loose I'll take the wheel off and tire and put it aside. Need to remove the lower bolt from the shock. Spray some rust penetrant. We're going to support the lower control arm with our floor jack. Take a 14 millimeter socket and a breaker bar, loosen this bolt. The head of our bolt has broken off, the bolt is going through the bottom of the shock and into a captured nut on the other side, it's actually kind of like a rounded welded threaded piece.
So what I'm going to try and do is hit this with a punch and hammer and through and break off that part, and then I'll have to replace the bolt and just put a nut on the other side. We're going to use an air chisel, give me a little more power. Punching this out didn't work, so I'm going to use a reciprocating saw to cut the captured part of the nut off of the control arm. And then we'll replace it with a regular nut on the bolt. Got a slot wide enough now, going to take a small pry bar and wedge it in there and a ball peen hammer and try to tap it away and break it off. There it is.
The shock is loose but part of the bolt is still through the opening on the other side. I'm going to take a pry bar, try to wedge this out. I'm not worried about bending this stamped steel control arm too much because when I put the bolt back through we can pull it back together. I just want to get it apart enough so I can get the shock out. There it is. You may need to compress the shock. You can just grab it, press it down, lift it up and out.
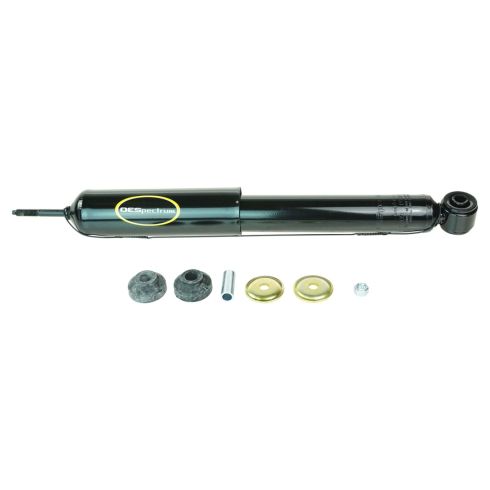
Here's our original shock from our vehicle and our brand new one from 1AAuto.com. It still has the strap on it from shipping, that's why it's compressed, otherwise it is identical in design to the original. This should be normally if you have a rust-free vehicle, this shouldn't be too difficult. This bolt should come right out of here. Unfortunately ours, the bolt head snapped and then I had to cut the bolt off and the captured nut off of the control arm, so I'm going to use a new flange nut and we'll install it just like that. Otherwise this should work great and fit great in our vehicle for us.
This needs to come off before we can install it up into the body. So what I'm going to do is just snip this off with some side cutters. The shock is going to want to expand. Take the nut off of here. Put it aside. Take off this rubber bushing. Separate these. One half's going to go through the body, the other half's going to go down on the top of it. This will go like this. Get our bolts. This is going to get fed up into the body. Put the bolt in there for a second. I'm going to push up against the body, compress the shock, and then lower this down in. Push the bolt through just like that.
Take our nut that we're going to use on the other side and I'm going to thread that on. Just get it snug for now. Car down so you can use the floor jack to lift the suspension up and put the shock up into the trunk. Put this jack up on the lower control arm of it. Make sure it's lined up and push these in place. That's all it takes. Put our bushing in just like that. Put our metal plate and thread the nut on. I'm going to use the ratcheting wrench tighten these. Torque is 22 foot-pounds.
So I'm starting to turn the shock shaft so I can use to use this adjustable wrench. There's some flat spots on either side of this and I can kind of hold it. I'm just going to snug it up. And that feels pretty good. Use our torque wrench with a 14 millimeter deep socket, 22 foot-pounds. I should really have a crow's foot to do this. I don't have one so I've got that snug and tight as I counter held it and just tightened it up. That should be good enough, it's only 22 foot-pounds. It felt good by hand. We'll leave that. So just repeat these steps because you should always replace shocks in pairs and do the other side. Then we put our carpet back in place. Just pushes back up in place. Push it under there.
I'm going to put this trim back in. It just snaps back in place. We can lower this down. Push our trim clips back in and line up the holes. Get that one in place. Push right in. This one lined up. Pushed in and this one here. Going to push this back in. Carpet's back in place. The jack putting some weight on the transmission just like we used it to push the shock back up into the body. I'm going to torque this to 43 foot pounds. I need to counter hold it. Of course if this has the captured nut you don't have to do that. Once it clicks, the bolt is tight. Now we can lower the jack away.
Since we moved the sway bar out of the way while we cut our captured nut off, we're going to reinstall the sway bar link but you shouldn't have had to do that. Otherwise install your wheel and the job is complete. Put the wheel back on the car. Get one of the lugs caught. Get them caught by hand first. We'll torque them with the vehicle weight on it, when it's on the ground, really just need to bring them down until they're seated. The vehicle on the ground, the lug nut torque is 79.6 foot pounds so we're going to do it 80. Do this on a cross pattern.
Thanks for watching. Visit us at 1AAuto.com for quality auto parts, fast and free shipping, and the best customer service in the industry.
Shop Products


How to Replace Front Strut Assembly 2007-13 Chevy Suburban
If the front strut assembly is worn or failing and needs to be replaced, check out this how-to video and follow the steps to DIY
