How To Replace Rear Outside Door Handle 2000-04 Subaru Outback
Created on: 2012-08-20
How to repair, install, fix, change or replace a broken or snapped off exterior door handleon 00, 01, 02, 03, and 04 Subaru Outback models.
-
step 1 :Removing the Door Panel
- Pry up the window switch panel with a flat blade screwdriver
- Disconnect the window switch wiring harness
- Pry off the door handle bezel with a flat blade screwdriver
- Pry off the trim piece inside the door pull with a flat blade screwdriver
- Remove the Phillips head screw inside the door pull
- Remove the Phillips head screw behind the switch panel
- Lift the door panel up and off
- Carefully peel off the water shield
- Pry off the trim piece inside the inner door handle with a flat blade screwdriver
- Remove the Phillips head screw inside the door handle
- Disconnect the latch rods from the door handle
-
step 2 :Removing the Outer Door Handle
- Remove the three Phillips screws from the lock mechanism
- Push the lock mechanism out of the way
- Remove the two 10mm bolts from the outer door handle
- Pull the bolts out of the door with a magnet
- Pull the door handle out from the outside of the door
-
step 3 :Preparing the Door Handle
- Unclip the lock rod from the old handle
- Clip the lock rod onto the new handle
-
step 4 :Installing the Outer Door Handle
- Push the lock rod into the blue clip
- Push the door handle into place
- Insert the two 10mm bolts into the door handle
- Connect the lock rod to the lock mechanism
- Put the lock mechanism into place
- Insert the three Phillips screws into the lock mechanism
-
step 5 :Installing the Door Panel
- Connect the latch rods to the inner door handle
- Put the inner door handle into place
- Insert the Phillips screw into the door handle
- Push on the trim piece inside the door handle
- Put the water shield into place
- Lift the door panel into place
- Push in the door panel clips
- Insert the Phillips screw into the door pull
- Insert the Phillips screw behind the window switch panel
- Connect the window switch wiring harness
- Push in the window switch panel
- Push on the door handle bezel
- Push in the door pull trim piece
Tools needed
-
Socket Extensions
Flat Blade Screwdriver
Phillips Head Screwdriver
Phillips Bit in a Ratchet
10mm Socket
Ratchet
Magnet - Extendable
Brought to you by 1AAuto.com, your source for quality replacement parts and the best service on the Internet.
Hi, I'm Mike from 1A Auto. I hope this how-to video helps you out, and next time you need parts for your vehicle, think of 1AAuto.com. Thanks.
In this video, we're going to show you how to remove and reinstall or replace a rear outside door handle on this 2003 Subaru Outback. Tools you'll need for this job are a flat blade screwdriver, Phillips screwdriver, a ratchet driven large Phillips socket, 10mm socket with a ratchet and a 6 inch extension and an extendable magnet.
Start here, carefully, and if you want use a rag so you don't effect your vinyl, pry out firmly from the top and then pry up and out at the bottom as well. You're really trying to pull up this way and there's a little tab back here. Disconnect that. Take and pry off this bezel around your inside door handle. A little button here, pry that out. There's a Phillips screw here and a Phillips screw here. Remove those. Once you remove those, then reach in behind the panel, pull firmly and push that through and lift up and your panel comes off. That little ringing you heard: this is just the clip from the window switch, it fell off. You just want to push on there before you put that back together. Pull your water shield down.
You're going to want to loosen up your inner door handle here, just take a flat blade screwdriver, and pry a little trap door out. You can pull that out as well. There's a Phillips screw. Remove that. Slide this forward . actually slide it backwards, and bring it off. There's a rod here that comes from the lock mechanism, push up on that clip and then pull this rod out. There's a 10mm bolt. Use a wrench or a socket and ratchet is probably better. Remove this bolt. Then here on the end of the door, there are three screws, you're probably going to need a Phillips bit that's on a socket like this because these usually are in here pretty tight. You can try a Phillips screwdriver, but you want to be careful not to ruin the screws.
Now what you want to do is push the lock mechanism down and out of the way. Now right inside you'll see a 10mm bolt, right there. You're going to remove that and then right through here you'll see another 10mm bolt there and you'll remove that. I'm going to use a socket with a long extension and a ratchet, I also have a magnet here, especially for this back bolt. What I'm going to do is loosen it with the ratchet first. Then basically unscrew it with the socket and extension and as I unscrew it, I have the magnet positioned right underneath so that when the bolt drops down, hopefully the magnet grabs hold of it and brings it out. This one's much easier. As you're unscrewing it, you can reach in with your fingers and unscrew it the rest of the way with your fingers and bring it out.Now, you can just come back here, pull your handle up and down and right up and out.
Obviously, my original is in good shape so we'll put it back in, but you would want to switch this rod to the new handle, take that clip off, and pull the rod off. On the new handle, put it on, and lock the rod back on.
This rod just goes right down. Make sure there's a blue clip in the door latch; make sure the rod goes down into that blue clip. Then bring it up and latch it back in place. For this rear bolt, I just load it into the socket and put it right into the hole and in by hand first. I'm just going to speed it up here as I start the other bolt in and then I tighten them up nice and firm with the socket and ratchet. Now, you have to reach in here and the rod that comes down from the outside door handle, you need to make sure it goes down into the blue clip that's in the latch mechanism. I'm just reaching in there, feeling that, and making sure it goes in and then put the latch up into place. I'm going to start one of the screws on. Here you can see the red arrow points to that blue clip with the rod going down through, so make sure, when you're putting that latch up in there, that rod goes down into that clip correctly. I'll fast forward here as I just put the other two screws into the lock mechanism and then tighten those up.
Then reconnect the lock rod that we disconnected earlier, put the inner door handle back in place, you just put it in, slide it forward and then put the screw back in as well as the screw cover and put your water shield back in place and you're pretty much all set to go.
Put this back on, take your harness, and make sure it goes through there. You kind of line it up by looking at the inside door handle. Make sure that the top latches down. Put in your screws that hold the panel in place. Fast forward here as I just install those two screws. Bring this out, connect the harness. Put it down into place. Put this bezel back on and put this back in place.
We hope this video helps you out. Brought to you by www.1AAuto.com, your source for quality replacement parts and the best service on the Internet. Please feel free to call us toll-free, 888-844-3393. We're the company that's here for you on the Internet and in person.
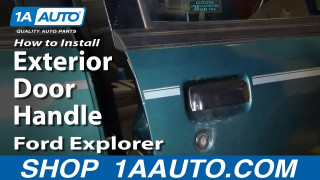
How to Replace Exterior Door Handle 1998-2001 Ford Explorer
Watch this video to learn how to replace an exterior door handle. The experts at 1A Auto show how to replace a broken or snapped outside door handle on your 98-04 Ford Explorer.
