How to Replace Rear Lower Control Arm 2006-10 Ford Explorer
Created on: 2017-05-25
How to repair, install, fix, change or replace failing, rusted, rotted, or damaged front lower control arms on 06 Ford Explorer
-
step 1 :Removing the Wheel
- Loosen the five 19mm lug nuts
- Raise and support the vehicle
- Remove the lug nuts
- Pull the wheel off the hub
-
step 2 :Removing the Sway Bar Link
- Spray the sway bar link with rust penetrant
- Hold the bottom sway bar link bolt with a 16mm wrench or socket and racket
- Remove the 15mm nut from the top of the sway bar link
- Hold the sway bar link sleeve with locking pliers
- Remove the bushing from the top of the sway bar link
- Remove the 16mm bolt from the bottom of the sway bar link
- Drive the link out of the sleeve with a hammer and punch
-
step 3 :Removing the Control Arm
- Spray the three 24mm control arm bolts with rust penetrant
- Loosen the three 24mm bolts, holding each nut with a 24mm wrench
- Support the trailing arm with a jack
- Remove the bolt that holds the control arm to the wheel knuckle
- Remove the bolt that holds the control arm to the strut
- Remove the bolt that holds the control arm to the frame
-
step 4 :Installing the Control Arm
- Connect the bolt bracket to the new control arm
- Line up the control arm with the frame
- Start the bolt that holds the control arm to the frame
- Support the control arm with the jack
- Line up the control arm with the strut
- Start the bolt that holds the control arm to the strut
- Line up the control arm with the wheel knuckle
- Start the bolt that holds the control arm to the wheel knuckle
- Start the three 24mm nuts onto the bolts
- Remove the jack from the control arm
- Place the jack under the wheel knuckle
- Raise the suspension to ride height
- Tighetn the wheel knuckle bolt to 203 foot-pounds of torque
- Tighten the strut bolt to 203 foot-pounds
- Tighten the frame bolt to 185 foot-pounds
- Lower the jack from the suspension
-
step 5 :Installing the Sway Bar Link
- Support the control arm underneath the strut with a jack
- Thread a washer onto the sway bar link
- Thread a bushing onto the sway bar link
- Thread the sway bar link through the control arm
- Thread a bushing onto the sway bar link
- Thread a washer onto the sway bar link
- Slide the sleeve onto the control arm
- Thread a washer onto the sway bar link
- Thread a bushing onto the sway bar link
- Thread the sway bar link into the sway bar
- Drive the sway bar link through the sleeve with a hammer and socket
- Thread a bushing onto the sway bar link
- Thread a washer onto the sway bar link
- Set the suspension to ride height with the jack
- Tighten the 15mm nut and bolt
- Tighten the nut to 22 foot-pounds of torque
- Lower the jack
-
step 6 :Installing the Wheel
- Slide on the wheel
- Start the five lug nuts
- Lower the vehicle to the ground
- Tighten the lug nuts to 100 foot-pounds in a crossing pattern
Tools needed
-
24mm Socket
24mm Wrench
Hammer
Torque Wrench
15mm Socket
Rust Penetrant
16mm Socket
Jack Stands
19mm Socket
Ratchet
Floor Jack
1/2 Inch Breaker Bar
Hi, I'm Mike from 1A Auto. We've been selling auto parts for over 30 years. We're dedicated to delivering quality auto parts, expert customer service, fast and free shipping, all backed by our 100% satisfaction guarantee. Visit us at 1AAuto.com, your trusted source for quality auto parts.
In this video, we're going to show you how to replace the rear lower control arm. We show you on the passenger side. The driver's side is the same procedure on the 2006 Ford Explorer that we're working on. Hope you like the video. If you do, please click subscribe, check out all our other videos for Explorers plus lots of other makes and models of vehicles. Check out 1AAuto.com in the link in the description. All your parts needs, whether you're a car, truck, SUV, or whatever. Here are the items you'll need for this repair.
With the vehicle on the ground, take a 19 millimeter socket, or your tire iron, and loosen up your lug nuts. Raise and support your vehicle, you can use jack and jack stands; we are using a lift. Remove the lug nuts the rest of the way, and remove the wheel and tire.
Spray the top of the stabilizer link with some penetrating oil. Let it sit. There’s a 16 millimeter on the bottom for the stabilizer link, and 15 millimeter on top. The nuts usually come off pretty easy on these, but a lot of times the link inside is so rusted that this won't come apart, but we'll see what happens.
If this top bushing is stuck, with a good set of locking pliers, usually you can start twisting it, and lift it up and off. Then, we'll put the locking pliers on the bottom, and we'll just start to try to unlock each piece as we go. I'll put my 16 millimeter back on here. That bushing's free. Get the top bushing here. Top bushing's free. Now, we'll try the plastic sleeve.
This is usually where you run into some problems. Looks like everything's spinning at least. Take a lot of penetrating oil, and go right down from the top and let that sit for a while. We're pretty lucky, because ours seems to be coming apart. Most of the time, when the link goes bad, this shaft is broken anyways, and then things will be so rusty, what you'll end up doing – the easiest thing can be to just cut right through here with either a reciprocating saw or a torch. Ours, like I said, seems to be coming out. We'll put the nut on top. After we've let it soak for a while, we're just going to put the pliers back on there again, twist it around and hopefully that gets some of that penetrating oil to drop down in.
Now, we're using a driving pin. Up to this point, you can lock a set of pliers onto the upper part, and drive the link out.
These three bolts, one, two, three, are all 24mm. Spray the back of them. These two have nuts that you have to hold with a wrench. This one has a nut that has a bracket that holds it in place. Use a nice big breaker bar for leverage, and loosen them up. I’m taking the nuts off, but leaving the bolts in place, and support this trailing arm. We're on a lift, so I'm using a twist jack. If you had your vehicle on jack stands, use your floor jack. Once you have this out of it's nut, you kind of release the jack a little bit. That usually allows this to come out. We got to find the other sweet spot, get that out, then jack it back up, and that gets this all apart, and it might help to have a little hammer around. Pull that bolt out, control arm comes down, and then you can remove this bolt. Then the control arm comes off.
A lot of times what happens is on your control arm, this bushing goes bad or they just get rusted to a point where you have to replace them. Ours is still in good shape, so we are going to put it back in the vehicle. You'd want to make sure that you take this bolt with tab, put it into your new control arm, then put it in place.
It makes it a step easier to take your tire up and out of here, but if you just take the control arm, push it towards the front of the vehicle, push the bolt in place and through, and lift it up. Your longest bolt is the one for the strut. Just push the strut in. Bring the jack back out from the front control arm, put it under this one, raise it up. This one will kind of keep an idea of where your strut is.
Then you may need to raise it up more, or with just a little help from the hammer, put it through. Actually when I did that, this almost fell into place. Put some more pressure on the control arm. Tap the top of the knuckle down. You can see it comes through most of the way. Set the nut back on, and thread it through.
Then we'll put the other two nuts on preliminarily. We're going to just tighten them, but we don't want them seated yet. We want to raise it up into ride position before we tighten and torque them.
Bring the jack down, and move it out. Now you want to get your suspension jacked up into the ride position. Then we want to torque these to 203, 203, and 185 foot-pounds. We're going to let it back down, and just adjust the position so we can put our sway bar link in.
Here’s a new sway bar link from 1AAuto. You can see it's a little bit different from the original, but it's going to fit and function the same way. Put it up into place. I've already got a washer and bushing down here. I've got to put the next bushing with the shoulder facing towards the control arm, and then washer goes on there, and then the sleeve. I'm going to push this up through, and a washer like that. Again, shoulder facing up towards the sway bar.
I want the sway up. Put the link assembly in. With the back side of a socket, drive the whole shaft right up through. The shoulder goes down towards the sway bar. Washer on top. Start the nut on top. At this point, I can put some more pressure on my suspension, but not too much. The bolt and nut are 15 millimeter. I'll preliminarily tighten up the nut. Okay, with a torque wrench, tighten the nut to 22 foot-pounds. Remove your jack.
Reinstall your wheel and tire. Put the vehicle back on the ground. You want to tighten your lug nuts to 100 foot-pounds using a star pattern.
Thanks for watching. Visit us at 1AAuto.com for quality auto parts, fast and free shipping, and the best customer service in the industry.
Shop Products
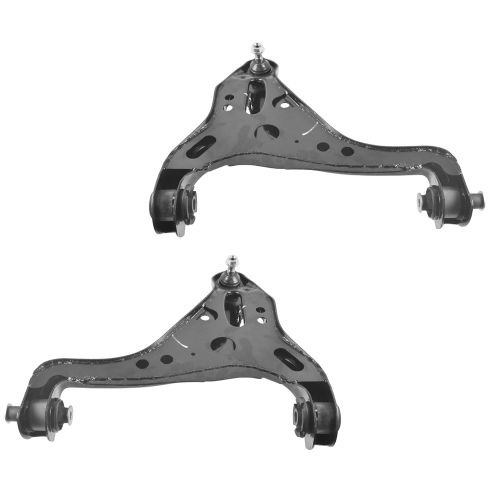
Ford Mercury Front Driver & Passenger Side 2 Piece Control Arm with Ball Joint Set TRQ PSA62247
Part Details:
- 2 Piece
- (1) Front Driver Side Lower Control Arm with Ball Joint
- (1) Front Passenger Side Lower Control Arm with Ball Joint
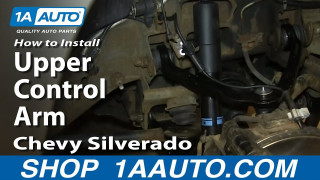
How to Replace Upper Control Arm 2000-06 Chevy Suburban 1500
Watch this video to learn how to replace a loose, rusted, or damaged upper control arm. The experts at 1A Auto will show you how to replace the lower control arm on your 00-06 Chevy Suburban or Silverado, or GMC Yukon or Sierra.
