How to Replace Rear Liftgate Latch 2004-16 Cadillac SRX
Created on: 2019-02-04
How to repair, install, fix, change or replace a broken or loose liftgate latch on 04, 05, 06, 07, 08, 09, 10, 11, 12, 13, 14, 15, 16 Cadillac SRX
-
step 1 :Removing the Liftgate Panel
- Remove the trim door from the hatch pull with a pick
- Remove the T30 screw from the hatch pull
- Pry out the liftgate panel with trim tools
- Pull the panel straight down and once loose, toward the rear
- Disconnect the electrical connectors
-
step 2 :Removing the Liftgate Latch
- Remove the T30 screws from the liftgate latch
- Slide the latch through the door
- Disconnect the wiring harness
- Remove the latch
-
step 3 :Installing the Liftgate Latch
- Connect the electrical connector
- Press the liftgate latch into place
- Tighten the T30 Torx screws to the latch
-
step 4 :Installing the Liftgate Panel
- Manually close the liftgate to test the latch
- Open the liftgate
- Connect the wiring harnesses to the liftgate panel
- Clip in the liftgate panel trim closest to the latch first
- Line up the rest of the panel and clip it in
- Tighten the T30 Torx to the hatch pull
- Press the trim button to the hatch pull into place
Tools needed
-
Socket Extensions
T30 Driver
Ratchet
Trim Tool Set
Pick
Hi, I'm Mike from 1A Auto. We've been selling auto parts for over 30 years.
What's up, guys? I'm Andy from 1A Auto. In this video, I'm going to be removing and replacing the liftgate latch in this 2013 Cadillac SRX. If you need this part or other parts for your vehicle, click the link in the description and head over to 1aauto.com.
Open the liftgate. Next, we're going to take this cover off. You can try to take this off with a trim tool, right here—right here—and get underneath. It's a little bit tight, so I'm just going to use a pick. Just be careful not to scratch the plastic. Get underneath here and pop it off there. Slide it out. Then we're going to take this screw out. It's a T30, so use a T30 socket extension and ratchet.
So, there're multiple clips that hold this in, underneath here; then a couple of retainers that go that way on the back. So, we're just going to take some trim tools—we actually sell these trim tools at 1aauto.com. Just go underneath here; try to pry it out a little bit.
Just grab it with your hands and pull it straight down—just going to force it—and then the back is going to come this way—just like that. See—these are those clips that are in the back. Be careful not to break those. And then you have all these other retainers, all around. Then we have to disconnect this electrical connector. Push down on this lock; slide it off. I'm going to take a T30; I'm going to take these three screws out. Take a T30 and a ratchet; pull that screw out. Pull that bolt out. All three of those are out, and we can grab the latch and slide it through here, and the connector, right here. We need to slide this gray piece up. That's just a lock. And push down on the lock, and slide the connector out.
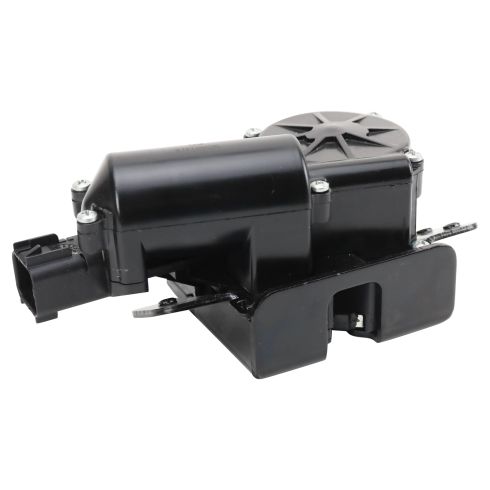
This is the old part. This is the new latch from 1aauto.com. As you can see, the shape is the same. Flip it over. The latch part is the same. Connectors are the same. Get yours at 1aauto.com and you'll be ready to rock 'n' roll.
Now we're going to take the new latch. We're going to plug in the connector, right here. Now we'll push down on that lock tab. I'm going to feed that wiring harness back in. Put that latch in position, like that. Next, we're going to take these screws—you can put a little bit of Threadlocker on them if you need to. Get these started here. Get this one. I'm going to get them all started first, before I tighten them down. I'll take the T30 and the ratchet and I'll tighten this down. I'll snug these down.
Before I put this panel on, I'm just going to make sure everything's working properly. Just manually close the liftgate. Latch is good. I'm going to open the liftgate, and it's working properly.
I'll take this cover. Connect the connector, right here; lock it on, and you want to slide these two pins in from the back first. Lock those on and then line up the other guides. There's a guide pin right here—you line that up and then line the other one up as well. Just push; give it a tap. Install this bolt with a T30 socket extension, and once I get it down, I'll snug it up with the ratchet. Just snug—not too tight. It is plastic. Get this little cover; line it up, lock it in. We can close this.
Thanks for watching. Visit us at 1aauto.com for quality auto parts, fast and free shipping and the best customer service in the industry.
Shop Products

How to Replace Door Lock Actuator Latch 2006-10 Volkswagen GTI
How to repair, install, fix, change or replace a broken or snapped power door lock actuator on 06, 07, 08, 09, 10 VW GTI
