How to Replace Rear Lateral Link 1997-2001 Toyota Camry
Created on: 2016-09-23
This video shows how to replace the wheel and rear lateral link yourself, including torque specs
-
step 1 :Removing the Wheel
- Loosen the lug nuts with the vehicle on the ground
- Raise the vehicle with a floor jack
- Secure the vehicle on jack stands
- Pull off the hub cap
- Remove the lug nuts
- Pull off the wheel
-
step 2 :Removing the Rear Lateral Link
- Loosen the 19mm nut near the spindle with a socket and ratchet
- Loosen the 19mm nut near the subfram with a 19mm socket and ratchet and wrench
- Remove the plate
- Tap the link off if needed
- Remove the lateral link
-
step 3 :Installing the Rear Lateral Link
- Measure and adjust the new rear lateral link so that it matches the old link
- Press the lateral link into place
- Replace the plate
- Tighten the 19mm nuts to the lateral link
- Torque the nuts to 134 foot-pounds
- Lock the adjusting lock nuts with a 24mm wrench
-
step 4 :Reattaching the Wheel
- Slide the wheel into place
- Start the lug nuts by hand
- Tighten the lug nuts preliminarily
- Lower the vehicle to the ground
- Tighten the lug nuts 76 foot-pounds in a crossing or star pattern
- Reattach the center cap
Tools needed
-
Measuring Tape
24mm Wrench
Socket Extensions
Torque Wrench
Jack Stands
19mm Socket
Ratchet
Floor Jack
1/2 Inch Breaker Bar
Brought to you by 1AAuto.com, your source for quality replacement parts and the best service on the Internet.
Hi, I'm Mike from 1A Auto. I hope this how-to video helps you out, and next time you need parts for your vehicle, think of 1AAuto.com. Thanks!
In this video, we're going to be working with our 1998 Toyota Camry. We're going to show you how to remove and replace your lateral link in the rear.
This is essentially a tie rod for the rear of your vehicle, in the same way, we have an inner and outer tie rod in the front. This has an adjusting sleeve in the middle that allows us to stick the rear of the spindle farther out for tow-in or pull the rear in toward the subframe, here, for more tow-out to make sure we have a better alignment and a vehicle that goes down the road straight and wears tires evenly.
If you like this video, please click 'Subscribe'. We have a ton more information on this car, as well as many other makes and models. If you need this part for your vehicle, you can follow the link down in the description over to 1AAuto.com.
Here are the items you'll need for this repair: 19mm, 24mm sockets, wrenches, ratchet, and socket extensions; breaker bar; torque wrench; tape measure; and jack and jack stands.
Grab on to the hub cap and remove it from the wheel. We're going to use a 21mm socket and breaker bar to remove all five lug nuts. We'll crack them loose now. Raise and support the vehicle, and then finish removing the lugs. We've put our vehicle on a lift to make it easier to film for you, but this job can be easily done with a jack and jack stands. Remove the wheel and tire.
Using a 19mm socket and a breaker bar, loosen the nut on the spindle side of our lateral link. Now that the nut has been broken loose, finish removing it with our socket and ratchet. Using a 19mm breaker bar on one end, and we're using another 19mm breaker bar to support the bolt,—but you could use a wrench if you can get in there with it—and we're going to break the nut loose and finish removing it with a ratchet. We'll repeat this step on the opposite nut so we could remove this bracket and slide our lateral link off. Now that we've got the nuts off, we can remove this plate and remove our lateral links from the vehicle. You may have to tap or pry these off a little bit.
Here, we have our old trailing arm that we removed from our vehicle and our new part from 1AAuto.com. As you can see, both parts are exactly the same. These are clocked a little differently because of the adjusting sleeve in the middle. We'll deal with that in a little bit. This one is missing the joint on the end, because ours was frozen to the bolt. We had to end up breaking off the arm, and then cutting through the sleeve to be able to remove everything, and install our new arm.
This arm allows us to adjust the rear of our spindle either in or out to adjust the tow of the rear spindle. This makes sure that our vehicle goes down the road straight and smooth, and wears tires evenly. If you have a bad lateral link, or a frozen one that's preventing you from aligning the rear end, this new part from 1A Auto is going to go in direct fit just like your original equipment and fix you up right.
Before installing our lateral link, we'll measure the distance from the inside edge of the islet to the inside edge of the opposite islet. We're getting just about 18 1/2" here. We'll go ahead and get our new one close so we'll be able to safely drive our vehicle to go get an alignment.
Now, we'll loosen both of the locking nuts so we can move our adjusting sleeve. Now that we've got it set to just about the right length, go ahead and bring the lock nuts back down. We'll tighten these up when they're in the vehicle just because it will be a little bit easier. If we get them snug for now, then it shouldn't rotate and cause us any issue going in.
Reinstall the lateral link with the shorter of the two ends facing in. We'll reinstall that plate over the ends of our lateral links, as well as the two 19mm nuts. Then we'll install the washer and the nut on the spindle side. We'll tighten all these down with a 19mm socket and ratchet. Torque these bolts to 134 ft/lbs.
Now, we'll just lock those lock nuts into place using a 24mm wrench, here. Then we'll take our vehicle to get a proper 4-wheel alignment. Reinstall the wheel and tire. Get all the lug nuts down as tight as you can by hand. Lower the vehicle carefully back onto the wheel and tire. Torque the lug nuts to 76 ft/lbs in a cross pattern. Line up the notch in the hub cap over the valve stem. Tap the hub cap back into place.
Thanks for tuning in. We hope this video helped you out. Next time you need parts for your car, please visit 1AAuto.com. Also check out our other helpful how-to and diagnosis videos.

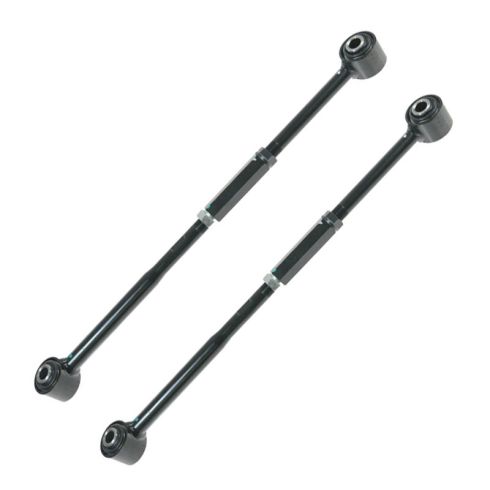
Toyota Avalon Camry Solara Rear Driver & Passenger Side Lateral Link 2 Piece Set TRQ PSA61357
Part Details:
- Adjustable
- (1) Rear Passenger Side Rearward Lateral Link
- (1) Rear Driver Side Rearward Lateral Link
- 2 Piece Set

How to Replace Rear Upper Trailing Arms 1997-2004 Nissan Pathfinder
How to repair, install, fix, change or replace a broken, busted, bad, loose, or damaged trailing arm on 97, 98, 99, 00, 01, 02, 03, 04 Nissan Pathfinder.
