How To Replace Rear Hub Bearing 1992-99 Buick LeSabre
Created on: 2013-07-02
How to repair, install, fix, change or replace a worn out, vibrating or groaning rear wheel bearing hub on Buick LeSabre and Pontiac Bonneville, model years 92, 93, 94, 95, 96, 97, 98, and 99.
-
step 1 :Removing the Wheel
- Pry off the center cap with a flat blade screwdriver
- Loosen the 19mm lug nuts with the vehicle on the ground
- Raise the vehicle with a floor jack
- Secure the vehicle on jack stands
- Remove the lug nuts
- Pull off the wheel
-
step 2 :Removing the Brake Drum
- Spray rust penetrant on the lug studs
- Pry off the drum with flat blade screwdrivers
- Pull off the drum
-
step 3 :Removing the Brake Shoes
- Remove the brake shoe springs with the vise grip pliers
- Hold the front retaining pin in place by hand
- Pry out the front retaining spring with a flat blade screwdriver
- Remove the brake shoe
- Remove the brake adjuster
- Pry the emergency brake cable out of the front brake shoe
-
step 4 :Removing the Wheel Hub
- Disconnect the wheel speed sensor wiring harness
- Loosen the four T50 Torx bolts from the wheel hub
- Loosen the wheel hub with a hammer and chisel
- Remove the four T50 Torx bolts from the wheel hub
- Pry out the hub with a pry bar
- Clean the wheel spindle with a wire brush
-
step 5 :Installing the New Wheel Hub
- Put the hub into place with the wheel speed sensor toward the back of the car
- Insert the four T50 bolts into the wheel hub
- Tighten the T50 bolts to 45 foot-pounds of torque
-
step 6 :Installing the New Brake Shoes
- Pry the emergency brake cable into the front brake shoe slot with vise grip pliers
- Lift the front brake shoe into place
- Thread the retaining pin into the brake shoe
- Put the adjuster into place
- Remove the adjuster clip
- Put the rear brake shoe into place
- Thread the retaining pin into the brake shoe
- Put white grease on both ends of the adjuster clip
- Insert the adjuster end into place
- Twist on the retaining spring
- Clean the brake shoes with mineral spirits
- Hook the springs on with the vise grip pliers
-
step 7 :Installing the New Brake Drum
- Try to slide the brake drum on
- If necessary turn the adjuster wheel with a flat blade screwdriver
- The brake rotor should slide on with some resistance
-
step 8 :Reattaching the Wheel
- Slide the wheel into place
- Start the 19mm lug nuts by hand
- Tighten the lug nuts preliminarily
- Lower the vehicle to the ground
- Tighten the lug nuts to 100 foot-pounds in a crossing or star pattern
- Reattach the center cap
-
step 9 :Testing the Brakes
- Pump your brakes repeatedly until they feel firm
- Test your brakes at 5 miles per hour and then 10 miles per hour
- Road test the vehicle
Tools needed
-
Socket Extensions
Torque Wrench
Hammer
Rust Penetrant
Pry Bar
Jack Stands
19mm Socket
3/8 Inch Drive Ratchet
3/8 Inch Breaker Bar
T50 Socket
Flat Blade Screwdriver
Chisel
White Grease
Lug Wrench
Ratchet
Wire Brush
Floor Jack
Brought to you by 1AAuto.com, your source for quality replacement parts and the best service on the Internet.
Hi, I'm Don from 1A Auto. I hope this how-to video helps you out, and next time you need parts for your vehicle, think of 1AAuto.com. Thanks.
In this video we're going to show you how to replace a rear hub in this 1997 Buick LeSabre. This procedure is the same for boththe right and left sides, as well as a whole bunch of different GM cars such as Bonneville, Deville, Olds 88, Park Avenue, et cetera. You'll need a new hub from 1A Auto.com or a pair of hubs if you want to replace both, jack and jack stands, lug wrench or a 19 millimeter socket with a breaker bar, or a pipe for some extra leverage on your ratchet, two large screwdrivers or pry bars, penetrating oil, pliers, T50 Torx driver with a ratchet and extension, hammer, a wire brush, and a torque wrench.
Remove the wheel. Pry the center cap off with the large screwdriver or small pry bar. If you don't have the benefit of air tools, start with your vehicle on the ground, loosen the lug nuts, then raise and secure the vehicle. Remove the lug nuts rest of the way. Remove the wheel and tires.
Now spray the hub and around the lug studs with some penetrating oil. I'm using two large screwdrivers to pry off the drum. Then just wiggle your drum off. I'm using a small vice grip. I'm going to connect it right here in the end of the spring and pry that spring off. Remove the spring. I'm using a large screwdriver again, with a flat tip, and I'm going to pry out the big spring that goes around. Once that's out, you can pull out your shoes. The parts that fell off here, this one goes here, and this is the end of your adjuster. That can come out now, too.
For this shoe, pull it out, and then remove the emergency brake. There are four Torx 50 bolts that hold the hub in on each corner. On the back side, you've got the speed sensor harness. I'm just using a flat blade screwdriver to pry up on the connector.
I'm using an extension, the Torx 50 bit, and a 3/8" drive ratchet. I'm going to the move the holes here, in the hub, to get to each one of these bolts. We'll fast forward as we remove those four bolts. As you saw, it takes some force to break them loose at first, but then they come right out. You'll probably want to just leave a couple of them in, just loosely.
There's a little notch right in here on the upper left on this side, and down here. Try and get yourself a chisel or something in there. You can see there, we broke it loose with the chisel between one of the corners. Now we'll just use our Torx bit and extension, get the bolts out the rest of the way, and then pry it out the rest of the way. Clean up the inside surface of your spindle.
I've got the old part, and new part from 1A Auto. They're identical. It's going to go in with the speed sensor facing towards the back of the car. We'll speed it up as we just feed the rest of those four bolts in there and get them tightened up preliminarily. You want to torque these to 45 foot pounds.
Connect the bar to your E-brake first. Use a screwdriver to pull the spring out. Reinstall the adjuster and leave off this end. Using the screwdriver, pry up on the clip and get your shoe in underneath it. Take the clip and put it in. Before putting your adjuster in, by the end of it, just put a little grease on both ends. Pry out a little bit and put the end in. Don't damage your clip. We've got this end of the tensioner, or the adjuster here, below the hole, and it's in, and the same with his side here. You can go back in with the spring. I'm using mineral spirits to clean off the brake shoes. You can use brake cleaner, any kind of solvent. Now do the same thing for the inside of the drum.
I'll speed up here as we put the wheel back on. Put the lug nuts on preliminarily, and then put it down on the ground. Tighten the lug nuts. Always pump your brakes before you do a road test, make sure you got a nice firm pedal. Obviously we showed you the passenger side. The driver, in the rear, is the same. We always recommend that you do service your brakes in pairs.
We hope this video helps you out. Brought to you by www.1AAuto.com, your source for quality replacement parts and the best service on the Internet. Please feel free to call us toll-free, 888-844-3393. We're the company that's here for you on the Internet and in person.
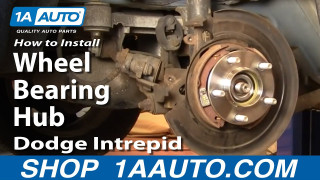
How to Replace Rear Wheel Bearing Hub 1998-2004 Dodge Intrepid
Check out this video of a rear wheel bearing hub for a 98-04 Dodge Intrepid.
