How To Replace Rear Hatch Glass 1982-92 Chevy Camaro Iroc-Z
Created on: 2011-09-02
How to repair, install, fix, change or replace a broken rear hatch glass on a Camaro Iroc-Zon model years 82, 83, 84, 85, 86, 87, 88, 89, 90, 91, and 92.
-
step 1 :Beginning the Repair
- This is part of a multi part series
- Consult the other 1986 Camaro videos for instructions on removing the hatch
- Remove the hatch as described in those videos
-
step 2 :Removing the Interior Panel
- Rest the hatch upside down on cloth rags
- Remove the six Phillips head screws from the interior hatch panel
- Pull off the interior hatch panel
-
step 3 :Disconnecting the Glass
- Remove the four Phillips screws from the glass brace
- Remove the eight 13mm nuts from the glass brace
- Disconnect the wiring from the latch
- Pull off the glass brace
-
step 4 :Removing the Glass
- Support the glass
- Carefully separate the hatch from the glass
- Remove the nylon washers from the hatch
- Remove the nylon washers from the glass
-
step 5 :Removing the Spoiler
- Pry the plugs out of the hatch with a flat blade screwdriver
- Remove the 10mm bolts from the spoiler
- Remove the 10mm bolts from the latch mechanism
- Note the position of the latch mechanism
- Pull off the spoiler
-
step 6 :Continuing the Repair
- This is part of a multipart series
- Consult the other 1986 Camaro videos for further instructions
Tools needed
-
13mm Socket
Socket Extensions
Flat Blade Screwdriver
Phillips Head Screwdriver
10mm Socket
Ratchet
Cloth Rags
7/16 Inch Socket
Brought to you by 1AAuto.com, your source for quality replacement parts and the best service on the Internet.
In this video, we're going to remove or actually take apart the rear hatch. We already removed it in a previous video, so we're going to take the panel off and the spoiler and things like that. Tools you'll need are a 7/16"� socket, a 10 millimeter socket with a ratchet, and probably an extension, as well as a Phillips screwdriver, and some blankets and something to support the rear window on.
We're here. We're looking at the rear hatch, the glass, and the panel itself, upside down. We're going to remove the panel from the class because we want to paint the panel. We don't want to paint the glass, and we're going to start doing that by removing this interior panel, which is just a series of six Phillips screws right here along the edge. We'll remove those first.
We'll just fast forward here as I'm removing those Phillips screws. They are pretty protected from the elements so they should come out pretty easy on any car. Once we have those removed, what you do is you want to lift up and push forward on this panel. The panel comes off.
Now we're going to remove four more screws. There's two here on this side and then two on the other side, and then we're going to remove these eight nuts here, and then the glass will separate from the panel. I have screws out, and I put them in a little bag where I have all my hardware for safekeeping. Take a 13 millimeter socket. In here there's just a wire clipped to that panel, so I just pinch the clip and push it through.
Now I'm using a stool to support the glass. Just slowly basically pull up on the glass, push down on the panel, and you can feel it just start breaking loose. Just apply even pressure and eventually it will pretty much just break loose. It has some urethane sealing it to the glass and it breaks loose. Then, pull it right off.
Now I want to make sure that we get all the nylon washers off the panel as well as the nylon washers off the glass, so I'm just speeding through. Take all those out, and put them in my plastic bag for safekeeping.
Now I'm going to remove the spoiler from the panel. I'm just using a screwdriver and prying out those plugs that cover the bolts and putting them in my plastic bag. Keeping the work pace up here, with a 10 millimeter socket with a ratchet and extension, undo all those bolts that hold the spoiler, and as well as I remove the nuts that hold the latch mechanism onto the panel. Here's a close-up of how that's on there. This is angled towards the rear. That's over towards the driver side of the vehicle.
Just end here, put all the nuts from the spoiler and the latch in the bag, and then I have a larger bag to hold that as well as the latch mechanism.
We hope this video helps you out. Brought to you by www.1AAuto.com, your source for quality replacement parts and the best service on the Internet. Please feel free to call us toll-free, 888-844-3393. We're the company that's here for you on the Internet and in person.
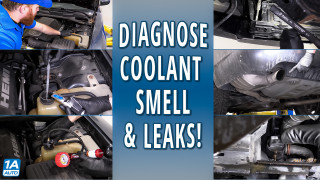
Diagnosing Coolant Smells and Leaks Coming From Your Car SUV or Truck
This video shows you how to diagnose a coolant system for leaks.
