How to Replace Rear Hatch Exterior Trim Garnish 2000-07 Toyota Highlander
Created on: 2018-03-07
How to repair, install, fix, change or replace a broken, or missing erear hatch garnish on 04 Toyota Highlander.
-
step 1 :Removing the Rear Hatch Trim
- Pry off the upper trim from the windshield
- Pry off the side trim from the windshield
- Pry off the trim door form the pull handle
- Remove the 10mm bolt from the pull handle
- Pry the trim down with a trim tool
- Pry out around the trim and remove the trim panel
-
step 2 :Removing the Exterior Hatch Handle
- Pop loose the lock rod latch with a flat blade screwdriver
- Remove the 10mm sockets from the hatch handle
- Remove the handle
- Release the control cable ball from the mechanism
- Remove the 10mm bolts from the garnish
-
step 3 :Removing the Door Lock Cylinder
- Unclasp the lock cylinder rod clip
- Remove the lock cylinder rod from the lock
- Remove the 10mm bolts form the door lock cylinder
-
step 4 :Removing the Exterior Hatch Trim Garnish
- Press the remaining white clip with needle nose pliers
- Pull the garnish off the hatch
- Pry the wiring out of the body with a trim tool
-
step 5 :Installing the Exterior Hatch Trim Garnish
- Press the garnish into the hatch
-
step 6 :Installing the Door Lock Cylinder
- Insert the door lock cylinder into place
- Tighten the 10mm bolts to the door lock cylinder
- Connect the cylinder lock rod
-
step 7 :Installing the Exterior Hatch Handle
- Connect the control cable ball to the mechanism
- Insert the handle into place
- Tighten the 10mm bolts to the handle
- Tighten the 10mm bolt to the garnish
-
step 8 :Installing the Rear Hatch Trim
- Insert the clips into the trim
- Press the trim up into the hatch door
- Tighten the 10mm bolt to the pull handle
- Press on the door to the pull handle
- Attach the side trim to the windshield
- Attach the upper trim to the windshield
Tools needed
-
Socket Extensions
Flat Blade Screwdriver
Ratchet
Swivel
Needle nose pliers
Hi, I’m Mike from 1A Auto. We’ve been selling auto parts for over 30 years!
To remove your hatch trim panels, they need to be removed in order. You start with the top one, the ones on the sides, and then you can remove this large panel here. Let's start with this one on the driver's side. The clip is not going straight in. It's actually clipping onto the sheet metal this way, so you have to push it up and off. This one's kind of worn out. There might be more force to get yours off and then you'll go along and pop it out of the sheet metal. If it's hard to remove, you can use a plastic prying tool. You can get these from 1A Auto and you can push it in here and help you pry it out.
So there's a metal clip here and here. There's supposed to be one here. It's missing. Somebody probably had this off before, and then this clip here clips over the sheet metal this way because otherwise, the wiring harness would be in the way. You can put that aside.
This trim panel uses the same style clips. You pull down on it. Pull it away from the hatch and also going to work it out from behind the bigger panel. The metal clips stay inside the metal hatch panel. It's not a big deal. You can just make sure you push these back in over it when you put the trim panel back on. Remove the other side the same way. Pull it out of the clips and then you have to work it underneath this one. So that metal clip came with it. But these two stayed. Not a big deal. The pull handle here.
You're going to remove this plastic cap using the plastic trim tool. Use a 10 millimeter socket extension and a ratchet to remove these bolts. Take the grab handle out. Trim panel is held in with clips around the edge. You need to separate it from the door. Sometimes you can get your hand up here. If you can't, you can go back to your plastic trim tools. Slide it in here and then it'll help me pry it down. Usually once you get one free, you can start to work around the edge. You got to pull it with some amount of force. It feels like you're going to break it. But you're just popping the clips out of the metal. Sometimes the clips come loose and those can be reused. I'm just going to dump those out there. If the clips stay in the panel, it's not a big deal. We can take those out afterwards.
Use a 10 millimeter socket to remove these nuts here. They will need a universal joint, which allows us to flex. Put some electrical tape over it, so it stays a little stiffer, it's not just flopping over. You'll have to get up in here and remove this 10 millimeter nut. If it's too tight, you can loosen the window wiper motor. These are 10 millimeter bots. Just loosen them up. Now, it's coming out a little bit, just like that. You don't want to try to remove it, because it's still attached to the wiper arm. Now, you can slide this up in here and break this free. I'll get this nut out of here. This will pull down and out of here. You can pop the cable out, and then feed it underneath, and remove the handle
To remove your lock cylinder, you'll want to move this vibration damper out of the way. Connected to it is a harness that goes up to the plate lights, so we'll unplug that and pull it out of the way. It's easier to unbolt this, remove it, and then unclip the harness from there. But you'll need to remove it because you can't quite access the 10mm bolts holding in the lock cylinder. This is only held in with three 10mm bolts. It's easy to remove and just get out of the way. Break it free. I'm going to hold onto it when I loosen this last one, because it does have some weight to it. You can either let it hang by this, but it's kind of in the way. Then you can remove your lock cylinder, but I'm going to get it out of the way.
Just take needle nose pliers, push in the two tabs. We'll put this aside. Pull the lever off from this little yellow clip. You push it off with your finger. It'll unclip, just like that, and then the lever comes right out. Put that aside. Remove the two 10mm bolts. Pull the lock cylinder out.
Use the needle nose pliers to squeeze together this white clip. It'll be removed. Push it up at the same time. Probably clipped it in. Get in here with the prying tool. Start to push it out. We'll go along with everything else removed. We're going to get the same thing over here. Push this one together, and we'll hold it together, and then I'll push out on the garnish just like that. Now it's loose. I'll carefully lower this down and grab onto it. Lift it off of the hatch. The harness. One of the license plate bulbs goes through. I'm just going to pull it out. Just going to use the plastic prying tool to help me pry it up out of the body and feed it out with the connector and take everything off.
If you're replacing this entire garnish, now would be the time you could swap over your plate light assemblies. Just unscrew them, remove them, and put them in the new piece. These are fine. We're going to reuse it, so I'm not going to bother taking them out. Just make sure this harness is popped in here so it sits nice and flush, just like that. Lower this down. This little grommet went around here. I'm going to feed the wiring harness in and push it through. Now you can push this into place and line up all the holes. The white clips will temporarily hold it in place, and then we'll bolt it back in.
Reinstall the door lock. The plate does have an angle to it. It's going to match the angle from the sheet metal in the hatch. It's going to go in this way and sit nice and flush. Try to install it this way—it's going to be upside-down. It won't fit right. Get it up in place. Get one of these bolts captured. The other one captured. Tighten these up. Not going to over-tighten them. Get them snug and then go a tiny bit more.
Put the rod back on here. This one slid all the way down when I closed the hatch, so just going to lift it up where you can see it, push it back into place, and then flip the yellow over it to lock it in place. When you turn the lock, it actuates this lever. That locks the latch on the hatch. Going to put this damper piece back up in place. It has a tab on this side that goes in the square opening here.
Get the wiring harness out of the way. Line it up. Capture the bolt. Capture the other two bolts. Tighten these up. Plug this connector back in for the license plate lights, and then clip it back into place here.
Reinstall the door handle. Put this little cable underneath, just like this. That little ball holds it. Our cable did break right here. Shouldn't be too big a deal. We'll leave it. Feed it up into place, over those studs. Feel get tight, I'll stop. I don't want to break it out of the plastic and the garnish. Fingers up in here, get this nut started. Get up here with the universal joint and socket. Tighten that up. We'll re-tighten the bolts that are holding on the wiper motor. Get this back up in place.
If the trim clips stayed in the hatch panel, take a trim clip tool. Just put it on here. Pop it right out. Do that for all the ones that may have stayed behind. These'll just slide back into the panel just like that. Couple of ours are missing. Not a big deal. There's plenty of these holding on. This one over here.
In fact, I'm going to move this one, since some of these are missing, over here. You start with the side trim panel. Going to be a little easier to install these first because the lower trim panel will fit in this groove and the upper one fits over here. So the metal clip stayed on this part of the trim. The other two metal clips stayed inside the body. So we'll kind of line them up. Push them in. Give them a good hit do the same for the other side. Take our rear lower trim panel and get it up in place. Push the clips back in. Final trim piece. We'll put this upper one on. It needs to slide over this and then will get pushed into these openings here. Up with it. Push it in and down. Get it lined up. The trim panel's installed.
To reinstall the pull hand, get the bolt through the metal bracket, 10 millimeter socket. Tighten it. Reinstall the plastic cap and the pull handle's reinstalled.
Thanks for watching. Visit us at 1AAuto.com for quality auto parts, fast and free shipping, and the best customer service in the industry.
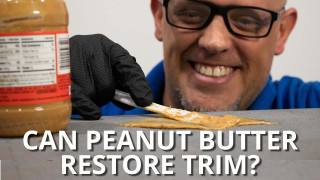
Can Peanut Butter Really Restore Faded Plastic on Your Car Truck SUV
In this video Andy tests three different ways to restore weathered plastics
