How to Replace Rear Engine Mount 2001-05 Honda Civic
Created on: 2016-05-13
If the rear engine mount is broken or worn and needs to be replaced, this video has all the steps needed to help you replace it yourself
-
step 1 :Removing the Wheel
- Loosen the 19mm lug nuts with the vehicle on the ground
- Raise the vehicle with a floor jack
- Secure the vehicle on jack stands
- Remove the lug nuts
- Pull off the wheel
-
step 2 :Removing the Rear Engine Motor Mount
- Carefully jack up underneath the oil pan with a jack and a block of wood
- Jack up underneath the motor a little to support the engine
- Disconnect the front exhaust hanger with a pair of pliers
- Disconnect the two exhaust hangers at the resonator
- Let the exhaust hang
- Remove the two 14mm bolts recessed into the subframe
- Remove the 14mm bolt above the recessed bolts
- Remove the three 17mm bolts from the rear engine bracket
- Turn the front wheels to the left by hand
- Pull the rear motor mount and bracket down and out
-
step 3 :Preparing the New Rear Engine Motor Mount
- Remove the 17mm nut from the motor mount and bracket
- Remove the motor mount
- Insert the new motor mount to the bracket
- Tighten the 17mm nut to the motor mount and bracket
- Leave enough play to move the rubber mount freely
-
step 4 :Installing the Rear Engine Motor Mount
- Insert the rear motor mount into place
- Insert the shortest 17mm bolt into the top hole
- Insert the longer 17mm bolts into the bottom two holes
- Tighten the 17mm bolts
- Torque the 17mm bolts to 47 foot-pounds
- Release the jack from the oil pan
- Tighten the 17mm bolt in the center of the rubber mount
- Insert the two 14mm bolts recessed into the subframe
- Insert the 14mm bolt above the recessed bolts
- Reconnect the exhaust hangers at the front and rear
-
step 5 :Reattaching the Wheel
- Slide the wheel into place
- Start the lug nuts by hand
- Tighten the 19mm lug nuts preliminarily
- Lower the vehicle to the ground
- Tighten the lug nuts to 80 foot-pounds in a crossing or star pattern
Tools needed
-
Socket Extensions
Torque Wrench
14mm Socket
17mm Wrench
Rust Penetrant
Channel-Lock Pliers
17mm Socket
Jack Stands
Ratchet
Floor Jack
Block of Wood
Brought to you by 1AAuto.com, your source for quality replacement parts and the best service on the Internet.
Hi, I'm Mike from 1A Auto. I hope this how-to video helps you out, and next time you need parts for your vehicle, think of 1AAuto.com. Thanks.
In this video, we're going to show you how to replace the rear engine mount. This is a 2003 Honda Civic. It has the 1.7-liter VTEC motor, pretty much the same as any 2001- 2005 Civic with the 4-cylinder. Items you'll need include a new rear engine mount from 1aauto.com, 14mm to 17mm sockets with ratchet and extensions, a 17mm wrench, jack and jack stands, torque wrench, and some penetrating oil.
With the vehicle raised and supported, remove your four 19mm lug nuts. Now we'll be using the piece of wood on a floor jack to jack up against the bottom of the oil pan. Always be careful not to use too much pressure because an aluminum oil pan can crack. Just jack it up a little to support the motor while we disconnect the mount.
Disconnect the front exhaust hanger, and two, at the resonator. Let the exhaust hang. There are two 14mm bolts recessed into the subframe and one up top. Remove the three 17mm bolts on the rear engine bracket. If you have access to power tools, we recommend using them, but all this can be done by hand.
Turn the wheels all the way to the left to make enough room to move the motor mount through this opening. With the motor mount out of the vehicle, you can detach the rubber mount from the bracket. We're going to use a 17mm impact socket and an air gun. If you don't have access to power tools, you can also do this by hand.
Here we have our old part from the vehicle and our new part from 1AAuto.com. As you can see, all of our mounting locations are exactly the same. It's going to bolt right in just like your original.
We'll want to make sure these bolts face the bracket and assemble outside of the vehicle, and ensure that this spacer is on the outside of the bracket. We won't tighten the motor mount all the way so the rubber moves freely; otherwise, we'll preload the mount and cause premature wear of the part.
Put the motor mount back through the opening in the driver's wheel well. Install the smallest of the three bolts in the top hole. The longer two will go in the bottom two holes. Tighten by hand. Bring them down tight with an air ratchet or a hand ratchet. Torque to 47 foot-pounds.
Release your jack or, in our case, jack stand from the motor so there's no preload on the rubber mount. With the engine hanging, tighten the bolt through the center of the rubber mount with a 17mm wrench. Reinstall your three 14mm bolts. Reconnect the rubber exhaust hangers.
Reinstall the wheel and tire on the hub. Start your lugs by hand. Always tighten your lug nuts in a cross pattern. Let the jack or lift down so the tire touches without putting the full weight of the vehicle on. Torque your lug nuts to 80 foot-pounds in a cross pattern.
Thanks for tuning in. We hope this video helped you out. Next time you need parts for your car, please visit 1AAuto.com. Also check out our other helpful how-to and diagnosis videos.
Shop Products


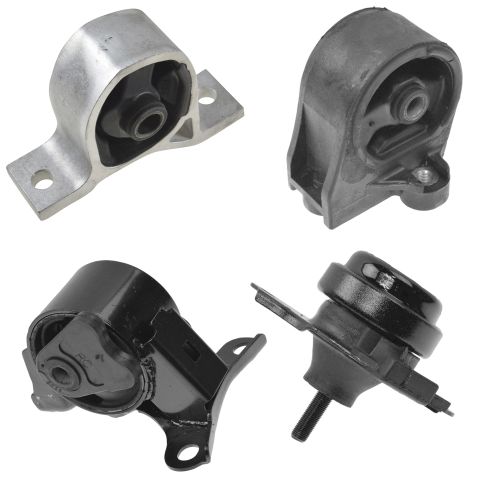
2001-05 Honda Civic L4 1.7L 4 Speed Automatic Transmission 4 Piece Engine & Transmission Mount Kit TRQ MTA34443
Part Details:
- 4 Piece
- (1) Transmission Mount
- (1) Front Lower Engine Mount
- (1) Front Engine Mount
- (1) Rear Engine Mount

How to Check Motor Mounts 2003-07 Honda Accord
How to check the motor mounts on 07 Honda Accord
