How to Replace Rear Drum Brakes 1995-2009 Ford Ranger
Created on: 2016-09-15
Check out this video to learn how to replace the rear drum brakes on your 95-09 Ford Explorer. You can do it yourself with help from 1A Auto!
-
step 1 :Removing the Wheel
- Pry off the center cap with a flat blade screwdriver
- Remove the wheel lock lug nut with a wheel lock key
- Loosen the 19mm lug nuts with the vehicle on the ground
- Raise the vehicle with a floor jack
- Secure the vehicle on jack stands
- Remove the lug nuts
- Pull off the wheel
-
step 2 :Removing the Brake Drum
- Pull off the drum
- Tap around the edges and in between the studs if necessary
- Remove the wheel on the opposite side
-
step 3 :Removing the Brake Shoes
- Remove the upper brake shoe springs with the vise grip pliers
- Remove the e-brake cable eyelit
- Remove the upper plate from the pin
- Remove the springs and rocker plate the rest of the way
- Remove the left brake shoe spring with the vise grip pliers
- Twist off the pin with the vise grip pliers
- Remove the left brake shoe
- Twist off the rear retaining spring with the vise grip pliers
- Twist off the pin with the vise grip pliers
- Pry the emergency brake cable out of the brake shoe
-
step 4 :Removing the E-brake Actuator
- Remove the adjustor
- Remove the spring
- Pry off the horseshoe clip with pliers
-
step 5 :Installing the E-brake Actuator
- Insert the spring washer onto the brake shoe
- Insert the horseshoe clip to the e-brake
- Crimp the ends of the horseshoe clip
- Install the spring and adjustor to the shoe
-
step 6 :Installing the New Brake Shoes
- Clean the backing plate friction points with a wire brush
- Apply white grease to the friction points
- Lift the left brake shoe into place
- Thread the retaining pin into the brake shoe
- Twist on the retaining spring with vise grip pliers
- Install the spreader bar with the spring facing the right brake shoe
- Put the right brake shoe into place
- Thread the retaining pin into the brake shoe
- Twist on the retaining spring with vise grip pliers
- Push the brake shoes together by hand
- Insert the plate into place
- Insert the pivot to the brake shoe hole and hook the longer spring to it
- Connect the eyelit
- Hook the longer springs on with the vise grip pliers
-
step 7 :Installing the New Brake Drum
- Try to slide the brake drum on
- If necessary turn the adjuster wheel with a flat blade screwdriver
- The brake rotor should slide on with some resistance
-
step 8 :Reattaching the Wheel
- Slide the wheel into place
- Start the lug nuts by hand
- Tighten the lug nuts preliminarily
- Lower the vehicle to the ground
- Tighten the lug nuts to 100 foot-pounds of torque in a crossing or star pattern
- Reattach the center cap
Tools needed
-
Flat Blade Screwdriver
Torque Wrench
Jack Stands
19mm Socket
Ratchet
Floor Jack
Brake Parts Cleaner
1/2 Inch Breaker Bar
Brought to you by 1AAuto.com, your source for quality replacement parts and the best service on the Internet.
Hi, I'm Mike from 1A Auto. I hope this how-to video helps you out, and next time you need parts for your vehicle, think of 1AAuto.com. Thanks!
In this video we're going to be working with our 2001 Ford Ranger. We're going to show you how to remove and replace your rear drum brakes. This includes the shoes, hardware, and the brake drum itself. We're only going to show you on one side, but this process is the same for the other. You always want to do brakes in a pair.
If you like this video, please click Subscribe. We have a ton more information on this truck, as well as many other makes and models. If you need these parts for your vehicle, you can follow the link down in the description over to 1AAuto.com.
Here are the items you'll need for this repair: wheel lock key, 19mm socket and breaker bar, flat blade screwdriver, brake cleaner, torque wrench, jack and jack stands.
Using a flat blade screwdriver, carefully pop out the hub cap. Ours has a wheel lock key. If yours doesn't, you'll just have to remove the regular lug nut the same way you would any other. We'll insert the key and a 19-millimeter socket and a breaker bar, break that loose, and then the rest of our lug nuts. Raise and support your vehicle. We're using a lift to make it easier to film, but you can easily do this at home with a jack and jack stands. Finish removing your lug nuts by hand, and then remove the wheel and tire from the vehicle.
Remove the drum. Sometimes these can get a little stuck, so you may need to use a hammer to tap around the edges or in between the studs on the hub to break the rust loose, but ours is going to come off nice and easy. You just want to wiggle it a little to make sure it doesn't get hung up, and remove it from the truck. Remove the wheel and tire and drum from the opposite side of the vehicle, but do not start disassembling both sides of the brakes at the same time. You'll want to use one side as a reference so you can get the other side set up. This will be a mirror image of that one. You can then get the new parts in on that side and use them as a reference to do this side.
Now we have access to an exact mirror image of the brakes we'll be working on. We know where everything goes, in case you forget through the process of disassembly and reassembly. We're going to use break tools to get these drums apart. You can get these as a one-piece universal tool that has all the hooks and slides like this on one pair of pliers, or if you don't have access to any of those things, a good pair of needle-nose locking jaw pliers can grab these springs and remove and install them the same way. If you have these tools, slide them over the pin, rotate it under the spring and pop it off. It's that much easier.
Remove this eyelet from the e-brake cable. This plate does come off. Ours is a little rusted on, so we're going to use a flat blade screwdriver to try and work it off of the pin. Remove that as well. Remove the springs that you've already disconnected. Removing this. Take that rocker plate off at the same time. Unhook the other end of the adjuster cable and remove that as well. The lower springs are much easier and can be done with needle-nose locking pliers.
Simply grab the spring, and pull the hooks out. This break tool is for the retainer springs. You can push down, rotate them until they come off of their pin. Remove the pin. The spreader bar and springs will come out with the shoe. If you don't have access to one of those retainer spring tools, you can use a regular pair of pliers. Hook onto the end of the cap, push down, and rotate it off. Remove that pin and this shoe will come all the way out of the truck. Grab the end of the e-brake cable with a pair of pliers and pull it out of the e-brake actuator on the back of the rear shoe.
Grab the spring on the auto adjuster. Move it out of the way. Normally this adjuster should slide right off, but ours is rusted on there from sitting, so put the pliers on the top of the pin and the back of the plate and try to squeeze them together. We may be able to loosen up the rust by working it side to side. We can remove our spring and plate that way. Remove the horseshoe clip by placing the end of the pliers over the open end and on the back of the pin, squeezing together. Sometimes, once you get it started, it's easier to get into this gap and try to pry it apart with a flat blade screwdriver. Remove the spring washer and the e-brake actuator from the back of the shoe.
Here we have our old brake components that we removed from our truck and our new parts from 1AAuto.com. We also have some stuff down here at the bottom that's going to have to get reused when we reinstall our new parts. It's dirty but it all still works fine.
See, we have the same shoes, same spring kits, same size drum with the same bolt pattern and bore in the middle. These breaks have sat for a long time. You can see there's some heavy rust buildup in them. Very uneven scoring and pitting inside of the drum itself, and the actual shoes have become glazed over from heat. They're not all that much thinner than the new shoes because they aren't really worn out from age. They are worn out from overheating, which is going to prevent them from getting a good grip like this nice fresh friction material wheel here inside of a nice smooth surface in the drum, to ensure that they stop the way they're designed to and the springs allow them to move and go back to their resting position, just like they should from the factory. If your old drums are worn out, corroded, glazed or not returning properly due to worn out, rusted, or broken hardware, this new kit from 1A Auto is going to go in direct fit, just like your original equipment and fix you up right.
Our e-brake actuator will go on to the back side of the shoe here. We'll reinstall the spring washer we're actually reusing from the other side. We've got to press down to compress the spring washer and slide the horseshoe clip on at the same time. Once you have it set onto the channel in the pin, make sure that horseshoe clip gets seated all the way on, and then crimp the ends together with a pair of pliers. Install the spring for the auto adjuster onto the plate for the adjuster itself. Work that spring onto the pin. Slide the lock tab in. Spray down the backing plate with some brake cleaner just to get all that dust out. Make sure everything moves nice and smooth, and stays clean once it goes in. Make sure you have a drain bucket underneath before you start spraying.
Grab the end of the parking brake cable. You have to try to hook the spring back. Pull it out of the way so you can hook the cable into its position. Turn it around to the back. Set the shoe into place. Be sure that the arm from the wheel cylinder hooks into that top slot. Send the pin through the backside of the backing plate through the hole in the shoe. Install your spring. Get the cap on there. Use your pliers or your break tools. Slide the skinny part of the pin into the channel and the retainer in, and rotate it 90 degrees so that it locks into place.
Install the spreader bar. Be sure that this end sits onto the e-brake arm here at the back and that the spring and the longer end face the front. Again, if you ever have any questions, we have that other side for reference. The longer thinner end of this adjuster wheel will face the front. The slot at the bottom of the shoe and we'll set it into there. We'll make sure that our front shoe hooks into both the adjuster wheel and the spreader bar. Then we'll insert our pin, spring, and retainer.
Place the plate over the top pin here. Set this pivot into the hole and hook the longer skinnier of the two top springs through it. Hook the end of your spring into the channel on the auto adjuster. Bring it around the back of that pivot point and hook it around the pin. Hook the top spring with a pair of break pliers, anchor them to the other shoe. Make sure that you are not digging into the actual material when you do this. Set the spring. Hook the shorter, thicker spring into the opposite side and install it using the same method.
Hook into the shoe and then fold the spring and send it behind the adjuster. Grab onto your spring with a pair of locking needle-nose pliers and insert it into the small hole on the opposite shoe. Make sure that everything is seated in properly, and we're ready to install our drum. Install the drum. Get a feel for it. Ours moves very freely, so we'll remove it again. This adjustment can be done from the rear, but I find it a lot easier to do it from the front. Simply turn the adjuster wheel, bring the shoes out and farther apart, and test fit the drum again. We'll repeat these steps until the shoes lightly drag against the inside of our drum. That feels good. Now we'll take our drum off to use this side as a reference and repeat this process on the opposite side.
Reinstall the wheel and tire. Get all your lug nuts on as tight as you can by hand. Lower your vehicle back down. With the weight of your vehicle back on the wheel and tire, you can torque your lug nuts and reinstall your center cap. Torque the lug nuts to 100 foot-pounds in a cross pattern. Line up your center cap. Tap it back into place.
Thanks for tuning in. We hope this video helped you out. Next time you need parts for your car, please visit 1AAuto.com. Also check out our other helpful how-to and diagnosis videos.
Shop Products


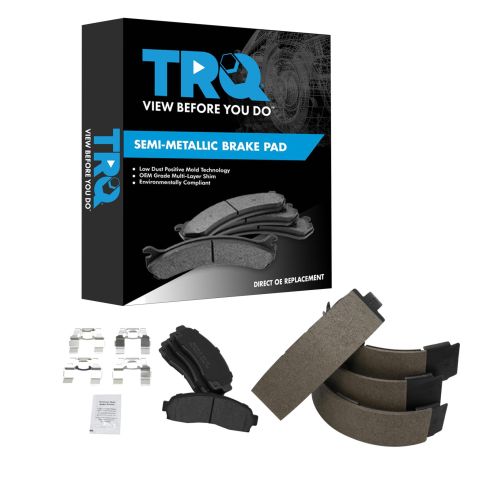
Ford Ranger Mazda B2300 B3000 B4000 Front & Rear Semi-Metallic Brake Pads TRQ BFA81452
Part Details:
- (1) Rear Brake Shoe Set
- Semi-Metallic
- (1) Front Semi-Metallic Brake Pad Set
- Yes
How to Replace Rear Parking Brake Shoes and Hardware 2010-14 GMC Terrain
How to repair, install, fix, change or replace your own worn, squeaky, fading old brakes on 10, 11, 12, 13, 14 GMC Terrain.
