How To Replace Rear Door Panel 2003-07 Cadillac CTS
Created on: 2011-10-14
Check out this video to learn how to remove the rear door panel on your 03-07 Cadillac CTS. 1A Auto shows you how to do it yourself!
-
step 1 :Removing the Door Panel
- Pry off the lock button with a putty knife
- Wrap a putty knife in a rag to protect the interior finish
- Pry off the door handle bezel with the putty knife
- Pry off the trim piece inside the door pull with a putty knife
- Remove the two Phillips screws from behind the door pull
- Pry out the door panel by hand
-
step 2 :Reinstalling the Door Panel
- Push the door panel into place using the locating tabs
- Push in the door panel clips
- Insert the two Phillips screws behind the door pull
- Push in the door pull trim piece
- Push the lock button into the door
- Slide on the door handle bezel
- Push in the door handle bezel
Tools needed
-
Flat Blade Screwdriver
Phillips Head Screwdriver
Putty Knife
Cloth Rags
Brought to you by 1AAuto.com, your source for quality replacement parts and the best service on the Internet.
In this video we're going to show you how to remove and re-install the rear door panel on this 2006 Cadillac CTS; same as any '03 to '07 CTS. The only tools you'll need are some type of a flat-bladed tool, such as a putty knife, also probably a regular knife could work. You'll also need a Phillips screwdriver.
I use a household putty knife, just to pull up on this lock, the little keyway there, and the lock button comes out. I go in underneath and you pry up, and you get it started coming out. I'm just using a paper towel to protect my interior. Do the same thing over here. I just pry up and pull the door handle out a little bit and pull down and out at the same time, and pull the bezel off. Right in, behind your door pull, there is a little oval shaped plug. Use your putty knife or a screw driver and pull that out. In behind there, you see two Phillips screws. We'll fast forward as we take those two screws out. I try not to drop them down in. I actually do. I drop one of them down in but it's not a big deal since we're taking off the door panel anyways. It's easy to get back. Once you get the screws out, you just kind of work your hands in behind and give the door panel a tug and then work it up and it comes right out. My screw just fell down into the insulation here.
You've got a couple of longer locating tabs. One goes in this oblong hole down here, and one goes into the hole up here. So I just kind of look and put them in. You have to lift it up a little bit on to the top there. Push all the pins in. I'm going to put in the Phillips screws. Again, we'll fast forward as I just put those Phillips screws in and tighten them up nice and firm. Put this thing back on. Put your lock button down on and lock that back on. This piece goes on here. Put it back into place and it goes back on like that.
We hope this video helps you out. Brought to you by www.1AAuto.com, your source for quality replacement parts and the best service on the Internet. Please feel free to call us toll-free, 888-844-3393. We're the company that's here for you on the Internet and in person.
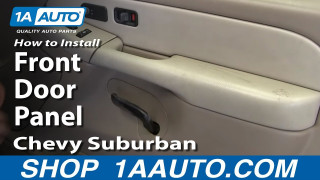
How To Remove Front Door Panel 2000-06 Chevy Suburban
You can remove the front door panel on your 00-02 Chevy Suburban or Tahoe. Check out this video to learn how from 1A Auto.
