How to Replace Rear Disc Brakes 1995-2002 Ford Explorer Part 2
Created on: 2010-11-24
This is Part 2 of a video on how to replace the rear disc brakes on your 95-02 Ford Explorer. Check out part 1, also on this site!
-
step 1 :Consulting Part 1 of the Video
- This is part 2 of a 2 part video
- Please refer to part 1 for the preceding steps
- Perform the procedure from part 1
-
step 2 :Checking the Emergency Brakes
- Enlist the help of an assistant
- Instruct the assistant to press and release the emergency brake
- Check that the brake shoes move correctly
- Instruct the assistant to press and release the emergency brake
- Check that the brake cable moves
-
step 3 :Adjusting the Brakes
- Turn the adjuster wheel with a flat blade screwdriver
- Apply penetrating oil if necessary
-
step 4 :Replacing the Emergency Brake Shoes
- Pull down the tab
- Remove the springs
- Pull off the shoes
- Replace the shoes
-
step 5 :Replacing the Brakes
- Slide the disc on
- Reattach the brake pads to the piston
- Inspect the slides. They should move freely
- If necessary, remove the slides, clean and grease them, and then slide them back in
-
step 6 :Cleaning the Brake Shoe Slides
- Clean the brake shoe slides with a wire brush
- Apply grease to the brake shoe slides
-
step 7 :Reattaching the Brake Pads
- Slide the brake pads into place
- Insert the 10mm bolts from the back
- Tighten the bolts to 20 foot-pounds
-
step 8 :Replacing the wheel
- Slide the wheel into place
- Start threading the lug nuts by hand
- Tighten the lug nuts
- Lower the vehicle
- Tighten the lug nuts to 90 foot-pounds in a star pattern
- Replace the hub cap
-
step 9 :Road Testing the Vehicle
- Pump the brakes repeatedly to return fluid to the cylinder
- Test the brakes at very low speed to ensure they work
Tools needed
-
Flat Blade Screwdriver
Torque Wrench
Rust Penetrant
Jack Stands
White Grease
10mm Socket
Lug Wrench
Ratchet
Wire Brush
Floor Jack
Assistant
Brought to you by 1AAuto.com, your source for quality replacement parts and the best service on the Internet.
This part two of two in a two part video about replacing the rear brakes on a Ford Explorer. Please check our other videos for the first part of this video. Go ahead and press it and release it."� You can see now that moves independently. Press again and release it."� That's how you want it to work. If you're inspecting your emergency brake you always want to make sure this, the cable moves. So, have somebody press the brake and watch the cable. Make sure the cable and the arm moves, and the shoe should spread out when that happens. You can adjust your brakes. Down here you see this little star shape. That actually is a slot right here that you reach a screwdriver through and adjust that, although, most of them are, like this one, frozen up. Use a little bit of penetrating oil again. Let it sit for a while to see if you can get that to move so you can adjust that.
As far as these shoes, you can see they look pretty thin, but these are emergency brake shoes. Really all they do is hold the car in place they don't really do any braking, so they don't need much pad. There's almost never a reason to replace your shoes, just a matter of making sure everything's working freely and they're providing the emergency brake function. If you did want to replace them, these clips here you push down. You can see this little tab right here. You push those clips down on each side, and removed these springs, and then this shoe would basically come apart and off. To put them back together, I'm just going to show you parts from 1A Auto, they're going to go on just like the original. Like I said that these brakes from this vehicle are fine. So, I'll put the original stuff back together.
We'll put our disc back on. They press back on when you put the wheel back on and tighten the lug nuts up. We'll put the pad back in, pretty easy. There are three keys. Make sure they all go inside the piston. Squeeze. Then your outer one slides in. Come on. What you want to do is, you need to pull this slide out some. You want to make sure these slides are in good shape. They need to be nice and free like these are. If they're not, what you want to do, is pull them right out, clean them up, and put a little grease on them. Put them through the hoop, push it back in, pull that hoop on this side, and make sure they're sliding back and forth well. Another important thing to do, is . there's some stainless steel slides here that the brake shoes slide on . make sure you use a wire brush and clean those up. There's also one here. This one is actually broken, so I'll have to clean it up and put in on there before I put the disc together.
On these slides I just put a little tiny bit of grease. Put this one up and kind of hold on to it. Push that and slide back. Push it down and on. Put our 10mm bolts back in. You can tighten it up probably to about 20 foot-pounds. Tighten them up, but you don't have to wrench them really tight. Then we'll put the wheel back on, and we want to make sure before you road test the car, you pump the brake a bunch of times. When you move this cylinder back into itself it needs time to get the fluid back in there and fill itself back up. So, before you road test, pump the brakes a bunch of times, and then do a slow stop from like five miles an hour and make sure everything is working. Now I'll tighten these up to about, usually, 90 foot-pounds. Use the star pattern.
We hope this helps you out. Brought to you by www.1AAuto.com, your source for quality replacement parts and the best service on the Internet. Please feel free to call us toll-free, 888-844-3393. We're the company that's here for you on the Internet and in person.
Shop Products


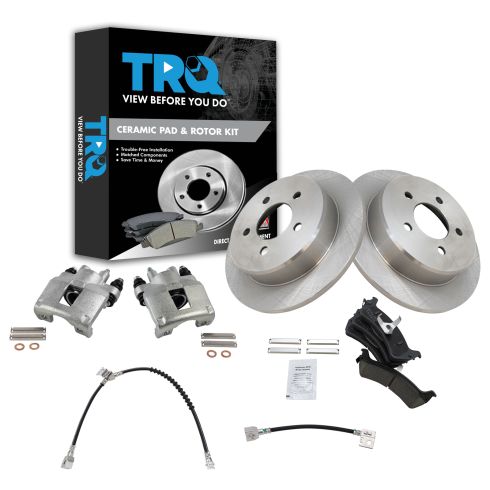
Ford Explorer Mercury Mountaineer Rear Ceramic Brake Pad & Rotor Kit with Calipers & Hoses TRQ BKA29755
Part Details:
- Premium Posi
- Ceramic
- (2) Rear Brake Rotors
- (1) Rear Ceramic Brake Pad Set
- (2) Rear Replacement Brake Hoses
- (2) Rear Brake Calipers
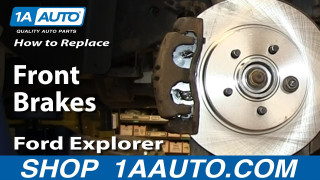
How to Replace Front Brakes 2002-05 Mercury Mountaineer
That squealing sound means it's time for new brakes! Save money and do it yourself. Learn how by watching this video from 1A Auto!
