How To Replace Rear Caliper 2002-06 Nissan Altima
Created on: 2013-12-16
Watch this video to learn how you can replace the rear brake caliper on your 2002-06 Nissan Altima.
-
step 1 :Remove the wheel
- Loosen the lug nuts with your 21 mm socket and breaker bar
- Raise and secure the vehicle
- Remove the lug nuts and set the wheel aside.
-
step 2 :Inspect your brakes
- See how much life is in your brake pads.
- Check for deep grooves in the rotors.
-
step 3 :Remove the caliper
- Remove the 19 mm bolts with a socket and breaker bar
- Use a flat blade screwdriver to pry off the caliper.
- Remove the brake line by removing the 12 mm bolt holding it in place.
-
step 4 :Install the new caliper
- Install the brake line with a new copper crush washer with your 12 mm socket and ratchet.
- Bolt down the caliper with your 19 mm socket and ratchet.
- Torque the caliper bracket bolts to 85-90 ft lbs.
- Remove the 14 mm bolt on the caliper and pull the caliper back to install the brake slides and pads.
- Push the caliper back together and secure with the 14 mm bolt.
- Torque the 14 mm bolts to 25 ft lbs.
Tools needed
-
14mm Wrench
12mm Socket
Funnel
A Piece of Pipe (for leverage)
Torque Wrench
14mm Socket
Jack Stands
19mm Socket
21mm Socket
8mm Socket
Brake Fluid
Ratchet
Floor Jack
1/2 Inch Breaker Bar
Brought to you by 1AAuto.com, your source for quality replacement parts and the best service on the internet. Hi, I'm Don from 1A Auto. I hope this how-to video helps you out and the next time you need a part for your vehicle, think of 1AAuto.com. Thanks. In this video, we show you how to replace the rear brake caliper on this 2003 Nissan Altima. It's the same process on these Altima's from 2002-2006. We show you on the passenger side but it's the same process on the driver's side. The items you'll need for this is 8, 12, 14, 19, and 21 millimeter sockets and ratchet, and a piece of pipe for leverage, 14 millimeter wrench, brake fluid, Jack and Jack Stands, a torque wrench and a funnel.
You want to start off by removing your wheel. If you don't have air-powered tools, you want to loosen up those 21 millimeter lug nuts on the ground, raise the vehicle and remove them the rest of the way. Then you can pull your wheel off. Now is where you want to inspect your brakes. You can look in here and see how much life is left on your brake pads, then you want to feel your rotor and make sure it's not too deeply gouged. Ours is actually in really bad shape. We're going to start off by removing the caliper. You want to remove these 2 19 millimeter bolts. We'll just fast-forward as Don does this. You can see he's using that piece of pipe for some extra leverage to help break those bolts free. Once the bolts are removed, using a flat blade screwdriver, just pry that off. Then you can set that aside. The flexible brake line is held in place by a 12 millimeter bolt, just use a socket and ratchet or wrench to remove it. Reinstall the brake line. Make sure you put a new copper crush washer between the line and the caliper as well as the end of the bolt and the line. Then tighten that up and tighten that bolt to about 30-35 foot pounds.
Now you can reinstall the caliper and bracket and we'll install the brake shoes in later. Put the 19 millimeter bolts in place and you'll want to tighten those up to 85-90 foot pounds. Now you want to remove this 14 millimeter bolt right here. Once the bolt's removed, pull your caliper back and then push your brake pad slides into place. Once the slides are in place, you can put your brake pads back in. Push your caliper back into place and place that 14 millimeter bolt. We'll fast-forward here as Don tightens that up. Tighten these bolts up to 25 foot pounds. You'll want to bleed the brakes. Start out by loosening your bleeder screw and wait until it starts dripping fluid. When it drips fluid, then tighten it back up and this is just a gravity feed initially. To further bleed the brakes have a helper in the car press the brake pedal then loosen the bleeder and you'll see fluid will come out. Then tighten up the bleeder, have them let of the pedal and repeat that until there's no air in the lines. It usually takes 2 or 3 repetitions. Reinstall the wheel and tire and hubcap and then just tighten the lug nuts preliminarily.
Now torque the lug nuts to 100 foot pounds in crossing pattern. After bleeding the breaks, you're going to want to replace the brake fluid that was lost so fill your brake fluid up to the fill line. Make sure you replace your cap. After doing any repair on the brakes, before taking it out onto the road it's important to do a couple things first. First you want to just pump the brakes until the brake pedal firms up. Then you want to do a stop test from 5 mph and then 10 mph.
We hope this video helps you out. Brought to you by www.1AAuto.com, your source for quality replacement parts and the best service on the internet. Please feel free to call us toll free 888-844-3393. We're the company that's here for you on the internet and in person.
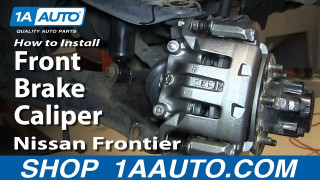
How to Replace Front Brake Caliper 2001-04 Nissan Frontier
Watch this video to learn how you can replace the front brake caliper on your 01-04 Nisan Frontier. 1A Auto will show you how!
