How to Replace Rear Brakes Rotors 2005-14 Chrysler 300
Created on: 2017-01-26
Save money and change your own brakes on your 05-14 Chrysler 300! Learn how with this video from 1A Auto!
-
step 1 :Removing the Wheel
- Loosen the lug nuts with the vehicle on the ground
- Raise the vehicle with a floor jack
- Secure the vehicle on jack stands
- Remove the lug nuts
- Pull off the wheel
-
step 2 :Removing the Brake Pads
- Remove the two 15mm bolts from the caliper bracket
- Pull the caliper off with a flat blade screwdriver
- Put the caliper aside
- Pry the brake pads off with a flat blade screwdriver
-
step 3 :Removing the Brake Rotor
- Remove the two 18mm bolts from the caliper bracket
- Pull off the brake caliper bracket
- Strike the drum surface of the rotor with a hammer to loosen the rotor
- Pull the rotor off
- Clean the hub surface with a wire brush
-
step 4 :Preparing the New Brake Pads and Rotors
- Pry off the brake pad shims with a flat blade screwdriver
- Clean the brake pad shims with a wire brush
- Clean the caliper bracket with a wire brush
- Apply brake grease to the shim-mounting area of the caliper bracket
- Place the shim onto the caliper bracket
- Apply grease to the caliper shims
- Pull out the caliper slides
- Apply grease to the caliper slides
- Push the caliper slide into the caliper
-
step 5 :Installing the Brake Rotor
- Apply grease to the hub surface
- Put the rotor onto the hub backwards
- Spray the rear of the rotor with brake cleaner
- Pull off the brake rotor
- Slide the brake rotor on
- Spray the front of the rotor with brake cleaner
- Put the caliper bracket into place
- Insert the two 18mm bolts into the caliper bracket
- Tighten the two 18mm bolts to 88 foot-pounds of torque
-
step 6 :Installing the Brake Pads
- Put the brake pads into the caliper bracket
- Apply grease to the back of the brake pads
- Push back the caliper piston with grove lock pliers
- Put the brake caliper into place
- Insert the two 15mm bolts into the caliper
- Tighten the two 15mm bolts to 23 foot-pounds of torque
-
step 7 :Reattaching the Wheel
- Slide the wheel into place
- Start the lug nuts by hand
- Tighten the lug nuts preliminarily
- Lower the vehicle to the ground
- Tighten the lug nuts to 110 foot-pounds in a crossing or star pattern
Tools needed
-
Socket Extensions
Torque Wrench
Hammer
15mm Socket
Pry Bar
Jack Stands
18mm Socket
Brake Parts Cleaner
21mm Socket
Flat Blade Screwdriver
Paper Towels
Bungee Cord
Anti-Seize Grease
Chisel
Slip-Joint Pliers
Ratchet
Wire Brush
Floor Jack
1/2 Inch Breaker Bar
Hi, I'm Mike from 1AAuto. We've been selling auto parts for over 30 years! We're dedicated to delivering quality auto parts, expert customer service, and fast and free shipping, all backed by our 100% satisfaction guarantee. So visit us at 1AAuto.com, your trusted source for quality auto parts.
In this video, we're going to be working with our 2006 Chrysler 300. We're going to show you how to remove and replace your rear brake pads and rotors.
If you like this video, please click 'subscribe.' We have a ton more information on this and many other vehicles. If you need these parts for your car, you can follow the link down in the description over to 1AAuto.com.
Here are the items you'll need for this repair: 15-21mm sockets, ratchet, socket extensions, breaker bar, jack and jack stands, flat blade screwdriver, pry bar, bungee cord, mechanics wire, chisel, hammer, wire brush, brake grease, paper towels, brake cleaner, torque wrench, slip-jaw pliers
Using a 21 millimeter socket and a breaker bar, break all of your lug nuts loose about one turn before raising your vehicle. Now, these chrome cap style lug nuts are prone to having this chrome covering get water behind them, and loosen up. If you can't get it on well, like I can't here, just give the socket a couple of taps to make sure you get good contact when removing it. Now, if these are really loose, or you find a lot of them in poor condition like that, it's a good idea to change out all of your lug nuts.
Raise and support your vehicle. We're using a lift to make it easier to show you what's going on, but this job can easily be done at home on a jack and jack stands. Finish removing your lug nuts. You should be able to do this by hand now. Remove the wheel and tire from the vehicle. Now, this is an aluminum wheel on a steel hub, so you may have to work it back and forth a little bit to get it to free up.
Remove the two 15 millimeter bolts securing the caliper to the bracket. We'll do this using a 15 millimeter socket and ratchet. Now, in this case, our guide pin is rotating as well, so we'll grab a pair of pliers to hold that steady while we remove the bolt. Using a flat blade screwdriver, or a small pry bar, remove the caliper and, using mechanic's wire, zip ties, or a bungee cord, just tie it up and secure it out of the way. Using that same screwdriver, remove the brake pads.
All right, that one is really stuck on there, so we'll remove the bracket and then tap that out with a hammer. Using an 18 millimeter socket and ratchet, remove the two bolts securing the caliper bracket to the spindle. Be sure to crack both of these loose before removing either one fully. Remove the caliper bracket from the vehicle.
Now, around the ring of our rotor, we have some very heavy build-up. This is from dissimilar metals like the aluminum wheel being attached to these steel rotors and hubs for so long. To try to make it a little easier to remove, we're going to use a small chisel and the hammer just to break as much of that stuff out of the crease as we can, so we aren't fighting it when we remove our rotor.
Now, this rotor is no good, so I could just hit the face of the rotor. To show you another way, if you were to be reusing this, you can tap in between the studs on the face of the rotor to free it up from the hub. You may have to hold the rotor and tap this side to help release it. Ours is stuck on the e-brake, so we're going to have to remove it the hard way.
Here we have our old brake rotor and pads that we removed from our vehicle, and our new parts from 1AAuto.com. As you can see, these parts are exactly the same, with the same hub surface and bolt pattern, same center bore, and same drum and hat rotor style. What I mean by that is that this rotor has a drum inside of the rotor itself, which will have our small drum brake style parking brake hardware inside of it.
Now, some big problems with our old rotor, on top of the fact that it's rusty on the surface, is that somebody did what we call a pad slap. What that means is they just put a new set of pads onto the rotor without checking that the rotor could accept another use of pads, having it machined, or simply replacing it; because that's the norm for a lot of do-it-yourself-ers. What that causes is these rust build-ups and deep, deep grooves in the rotor.
You can see how nice and smooth this one is, and we have these big thick edges on the ends of our rotor here where the material has actually been worn away to the point that it's no longer within spec. That can cause some issues with heat dissipation, especially in a single style rotor like this, not a vented one like you see more commonly on front brakes. Too much heat can cause brake fade, as well as warping rotors, which is another serious braking concern.
Now, our pads weren't super worn-out, but you can see all this channeling in them from the rust and from the rotors not being machined to a new surface. These pads were forced to mate to whatever surface the old ones left on the rotor. Here's our new ones. You can see, nice, thick, smooth. When these go onto our new rotors, they'll actually blend in together to some degree while they're braking, as opposed to chewing up and wearing away faster like they've done here. If your vehicle needs a new set of rear brakes, these new brakes from 1AAuto.com are going to go in direct fit, just like your original equipment, get your vehicle stopping safely and smoothly, and fix you up right.
Using the small flat blade screw driver, pry off the brake shims. Now, ours aren't very rusty, so we're just going to clean them off with a wire brush and reuse them. If yours are heavily corroded, cracked, or broken in any way, you'll want to replace them completely. Otherwise, using a dust mask and a small wire brush, remove any build-up from the contact surfaces. These don't need to be perfectly clean and smooth. You just want to remove any of the heavy build-up to make sure that the pads fit and ride smoothly.
Apply a thin coat of brake grease once you've removed the build-up. Clean off your shim the same way. Once again, these don't have to be perfect, as long as you've got the heavy build-up off. We'll snap them back into place, coat the top surface with a thin coat of grease as well. Now, while the pad doesn't ride on this portion out here, coating it in grease will help prevent it from rusting and building up debris, making it easier the next time we have to do a brake job. Remove the pin. With a clean paper towel or a rag, wipe all of the old grease off your guide pin. Inspect that it's not rusted, corroded, or misshapen in any way, and apply a thicker coat of grease to that. Reinstall it. Be sure that it sits around its boot properly, and that it moves freely and the boot doesn't come off in the process.
We'll now repeat these steps on the opposite side of the caliper bracket. Using a steel wire brush, remove all the rust build-up from your hub surface. Apply a thin coat of brake grease to the surface of your hub, as well as the bore of the hub. This will prevent the wheel from freezing onto the hub, as well as the rotor. Install the rotor onto the hub backwards, and spray the brake surface, as well as the drum inside of the brake hat there, with some brake cleaner to remove the rust preventative that they put on it before it leaves the factory. Then, install it onto the hub the correct way and spray down this side as well.
If you have an old axle nut lying around, place it over a wheel stud and start one of your lug nuts; just tighten that down as tight as you can by hand. Don't need to go crazy tight on there. What that's going to do is prevent your rotor from moving around too much while you install your brake caliper carrier, pads, and caliper.
Reinstall your caliper carrier, as well as the two 18 millimeter bolts. We'll just start by hand for now. Then, tighten down your hardware with an 18 millimeter socket and ratchet. Torque the caliper carrier bolts to 88 foot-pounds.
Install your brake pads into the shims in the caliper carrier. Apply a thin coat of brake grease to the backing plates of the brake pads. This will prevent them from seizing to the caliper. Using a pair of tongue and groove pliers, carefully collapse the piston. Make sure you go nice and slow and smooth. Then reinstall your caliper and your two guide pin bolts. Tighten the caliper pin bolts down with a 15 millimeter socket and ratchet. Torque the caliper pin bolts to 23 foot-pounds. Remove the lug nut and axle nut from your hub, if you used them. Install all of your lug nuts as tight as you can by hand. Torque your lug nuts to 110 foot-pounds in a cross pattern.
Thanks for watching. Visit us at 1AAuto.com for quality auto parts, fast and free shipping, and the best customer service in the industry.
Shop Products


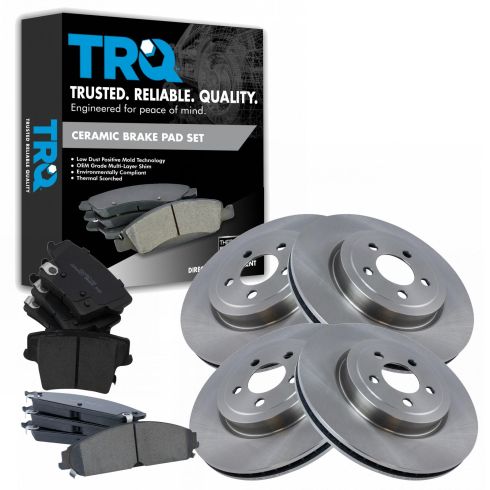
Dodge Charger Magnum Chrysler 300 Front & Rear Ceramic Brake Pad & Rotor Kit TRQ BKA11818
Part Details:
- Ceramic
- Premium Posi
- Vented
- Vented
- 5 Lug
- 12.60 in. (320mm)
- 13.58 in. (345mm)
- (2) Front Brake Rotors
- (2) Rear Brake Rotors
- (1) Front Ceramic Brake Pad Set
- (1) Rear Ceramic Brake Pad Set
How to Replace Front Brakes 2014-17 Infiniti QX50
This video shows you how to install new, quality TRQ brake pads and rotors on your 2016-19 Infiniti QX50.
