How To Replace Rear Brakes 1997-2003 Ford F-150
Created on: 2017-06-28
Need to replace the rear brakes? This video will show how to remove and install the brake pads and brake drum on the 97-03 Ford F-150
-
step 1 :Removing the Wheel
- Loosen the 19mm lug nuts with the vehicle on the ground
- Raise the vehicle with a floor jack
- Secure the vehicle on jack stands
- Remove the lug nuts
- Pull off the wheel
-
step 2 :Removing the Brake Pads
- Pry the brake pads into the caliper with a flat blade screwdriver to push in the pistons
- Remove the 10mm bolts from the brake caliper
- Pull the caliper aside
- Pry the brake pads off with a flat blade screwdriver
- Remove the brake pad slides
-
step 3 :Removing the Brake Drum
- Tighten a lug nut to the hub
- Tap the drum to loosen it
- Remove the lug nut
- Pull the drum off
-
step 4 :Installing the New Brake Drum
- Slide the drum on
- Thread on one lug nut to hold the drum in place
- Adjust the emergency brake, if necessary
- Clean the drum with brake parts cleaner or mineral spirits
-
step 5 :Installing the New Brake Pads
- Put an old pad in the caliper
- Use a large C-clamp and the old pad to push the pistons back
- Apply grease to the back of the pads and their contact point on the cast iron
- Install the new brake pads into the bracket
- Put the caliper on
- Tighten the caliper bolts
- Remove the lug nut from the hub
-
step 6 :Reattaching the Wheel
- Slide the wheel into place
- Start the lug nuts by hand
- Tighten the lug nuts preliminarily
- Lower the vehicle to the ground
- Tighten the lug nuts to 100 foot-pounds in a crossing or star pattern
Tools needed
-
Large C-Clamp
Hammer
Socket Extensions
Flat Blade Screwdriver
Torque Wrench
19mm Socket
Bungee Cord
Anti-Seize Grease
Mineral Spirits
10mm Socket
Ratchet
Hi, I'm Mike from 1A Auto. We've been selling auto parts for over 30 years. We're dedicated to delivering quality auto parts, expert customer service, fast and free shipping, all backed by our 100% satisfaction guarantee. Visit us at 1AAuto.com, your trusted source for quality auto parts.
With the vehicle on the ground, 19 millimeter socket with a big breaker bar, or your tire iron, and loosen the lug nuts. Raise and support the vehicle. Just one note, on these wheels, you may have plastic trim covers that you have to remove first, but they're all missing on this. You loosen them up. Then raise, support the vehicle, and remove the lug nuts. Once you remove your lug nuts, remove the tire.
Use a large screwdriver or a small pry bar. You can see the pistons sticking out a little bit right here. We want to pry out. That'll push that piston back in, and it'll loosen everything up, so the caliper comes off easier. Two 10 millimeter bolts hold the caliper in place, 10 millimeter socket with a ratchet to remove. With the bolts out, rotate the top back first, and you can take that off. Then remove the pads.
Pry away from the caliper, and pull them down. The outer one slides out, then the inner one just pulls out of the piston, and out. Then just make sure that your caliper doesn't fall by putting a flexible retaining device on it just to hold it in place. We're going to put a lug nut on, just to keep it from flying off too far unexpectedly.
The emergency brake is a set of brake shoes inside. What's happening is, there's actually a lip that's not allowing the drum, or the hub, not allowing the rotor to come off. The brake shoes will stick on the back sometimes. You just got to keep working it off. Original rotor and pads from the vehicle, and new rotor and pads from 1A Auto. You can see the pads are exactly the same. They're going to mount exactly the same. High quality.
This is the wear mark, so you know when you're checking your brakes, if that's worn down, it's time to replace them. And rotor, exact replacement has the surface for the emergency brake on the back. It's going to install and function just like your original.
Reinstall, put the rotor in place. If you need to, you can adjust your emergency brakes by turning the dial down here. But normally if you can get the rotor on, and there's a little bit of resistance, then that's a good starting point. I'm just going to put a lug nut on and tighten it up, just to hold things in place while I put everything else together. I'm going to use some good quality break parts cleaner on the back side. I'll wet a rag, make sure I twist it, rotor all the way. Then the front side, spray it on, and wipe down the rotor surface.
I've reinstalled my old pad into the inside of the caliper, and using a C-clamp, just to make sure that the piston is all the way seated. You can see as we tighten up the C-clamp, the piston goes back in. We can remove that, and remove the pad, and just note on the back side of the caliper. This right here is the surface that you want to be putting the C-clamp against. We're going to put just a little bit of brake grease on the cast iron here where the pads ride. Then we'll also apply some to the back of the pads themselves to keep them from squeaking.
Put the inner pad in first, and then put in our outer pad. Then just use some brake cleaner. Clean off the pads, make sure you didn't get any grease on them, or oil. Then just check these slides. Make sure they're nice and free. If they're not free, you can pull them right out, clean them up, grease them, and put them back together. Ours are free. Sometimes you have to pull them out a little bit when you're putting it together. Down on, and put these bolts in. You just got to move the caliper into the right spot, and they'll go in. Tighten these up. You don't want to over-tighten them, though. Remove the lug nut.
Lift your wheel up in place. Start the lug nuts on, and then tighten them up preliminarily. Anytime you do brake work, you want to pump the brakes. Make sure you have a good firm pedal before you move or road test the vehicle. With the lug nuts preliminarily tightened, lower your vehicle down, and torque your lug nuts to 100 foot-pounds, using a crossing pattern.
Thanks for watching. Visit us at 1AAuto.com for quality auto parts, fast and free shipping, and the best customer service in the industry.
Shop Products


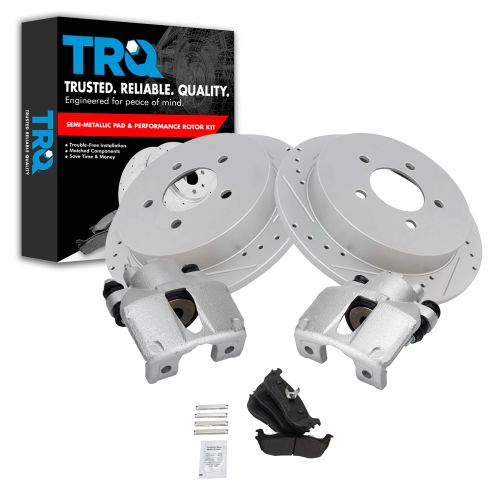
Ford Lincoln Rear Semi-Metallic Premium G-Coated Performance Brake Pad & Rotor Kit with Calipers TRQ Performance BKA18471
Part Details:
- Solid
- Performance
- Premium G-Coated
- Premium Posi
- 13.15 in. (334mm)
- Semi-Metallic
- 5 Lug
- Slotted X Drilled
- Performance
- (1) Rear Semi-Metallic Brake Pad Set
- (1) Rear Premium G-Coated Performance Brake Rotor Set
- (2) Rear Brake Calipers
How to Replace Rear Brake Pads and Rotor 2003-11 Ford Crown Victoria
Watch this video to learn how to replace the rear brake pads and rotors on your 03-11 Ford Crown Victoria, or Mercury Grand Marquis
