How To Replace Rear Brakes 2009-15 Toyota Prius
Created on: 2020-09-10
This video shows you how to install new, quality TRQ brake pads and rotors on your 2009-15 Toyota Prius.
Tools needed
-
Hammer
Socket Extensions
Pry Bar
Jack Stands
10mm Wrench
Pocket Screwdriver
Locking Pliers
Brake Caliper Hanger
Wheel Chocks
Ratchet
Floor Jack
Needle nose pliers
Torque Wrench
14mm Socket
Brake Parts Cleaner
21mm Socket
14mm Flare Wrench
Flat Blade Screwdriver
Socket Driver
Paper Towels
Copper Anti-Seize
Brake Grease
10mm Socket
Brake Caliper Compressor Tool. Quad Piston. Ratchet Style.
Wire Brush
In the trunk area I'm gonna remove this carpet. And unlock this. And pull this out of the way. And take this cargo piece out. And grab this panel and just slide it out. There is a clip right there. Then pull this cover off. Just a couple of clips right there. Just gives you more access. Then I'm gonna disconnect the negative terminal. You can use a 10-millimeter wrench. And just slide this up and out of the way. That's good.
I'm gonna pull the hubcap off. Just use a prybar. Just get in behind here and pop it off. Now I'm gonna take a 21-millimeter socket, remove the lug nuts and pull the wheel off.
Now I'm gonna use a 14-millimeter wrench and take the caliper bolts off. And if the slide starts spinning, you can hold the slide with some pliers. We'll loosen this one up also. And take this out. And just grab the caliper and just try to slide it off. And you can take a brake caliper hanger and try to attach it to the coil spring. Just so there's no tension on the brake hose. That's good. And you wanna take these springs out. Just use some needle nose pliers and just slide them up. You can grab the pads and slide the pads out.
And we can take this brake caliper bracket off. Use a 14-millimeter socket. Take these two bolts out and slide the bracket off. Now I'm gonna remove the rotor. Now, what you can do is there's two screw holes right here. You can find some bolts that fit those threads. This just helps you remove the rotor. It's good to just put a little bit of pressure on there. You can take a hammer and just give it a tap right here and right there, there you go. And slide the rotor off.
Now I wanna clean up the hub surface. You can use a wire brush. Just get some of that rust off. Or you can use a die grinder. Just be careful, you don't wanna sand it down too much.
I'm just gonna take a little thin coat of anti-seize and just give it a coat. This just prevents rust. Now I'm gonna install the rotor. I'm gonna put it on backwards first. Just take some brake parts cleaner, just wash down the surface of the rotor, just wipe it with a rag. And flip it around, do the same on this side.
Just so the rotor doesn't fall off or move out of place, I'm just gonna take a lug nut and temporarily put it on there. Then we're gonna clean up the caliper. Just grab these caliper slides and slide these out. I'll just take a little brake parts cleaner. Just clean this up and wipe it off. You can do the same in there. Or if you have a, almost like a pipe cleaner, you can clean it out like this. Take a little brake parts cleaner, spray it in there, and just clean it up.
Take a little brake caliper grease. That looks good. And slide it back in. Make sure that seals around the boot. Do the same for the other side. And now we can take off these anti-rattle clips or brake pad clips. Just use a small screwdriver. Slide these off. There we go. And take a wire brush and just clean up some of this rust. And just take a little thin coat of caliper grease, brake caliper grease, just coat in there. And take the new pad slide clips, anti-rattle clips, and slide those in position. You can do another thin coat right on where the pads are gonna contact, just like that. Then you can do the same on the other side.
Now take the caliper bracket and line it up. Install the bolts, then torque those bolts to 42 foot-pounds. Then you can take the brake pads. Now, the one with the squealer or the brake warning indicator is gonna go on the inside and the indicator's gonna be down, facing down. Slide that in position. And take the one without the squealer, put that on the outside.
Now we can take these springs, install those springs. There's two little holes on the brake pad itself. One at the top, one at the bottom. It just stays like that. Now, before I pull the caliper off the hanger, I'm just gonna use this caliper compressing tool. This is the type that spins the piston as it tightens up. All right. Looks good. And as I tighten this up, it's gonna compress the piston.
So you want the piston lined up like this because there is a tab on the brake pads itself on the inboard pad that has to line up in that slot. And take the hanger off. And slide this over. And start the caliper bolts. Now I'm gonna torque this bolt to 25 foot-pounds and I'm just gonna use some pliers to prevent the stud from spinning or the slide from spinning. Do the same on the top.
I'm gonna take this lug nut off and put the wheel on, and put the lug nuts on. Now I can torque this wheel to 76 foot-pounds in a star pattern or a cross pattern so that you tighten the wheel down evenly. I'll just go around again just double check.
And take the hubcap, line it up with the valve stem. Now just slowly pump on the brake pedal. Just very slow. There's a little bit of an air gap between the caliper piston and the brake pads. You wanna take up that air gap. Now double check the brake fluid, make sure it looks good. Adjust accordingly. And reconnect the 12-volt battery. Tighten down the terminal. Make sure it's not loose. That looks good. And put this cover on first. And this cover. And take this cargo bin, slide that in place. And this cover. And lock it down. And the carpet.
Shop Products


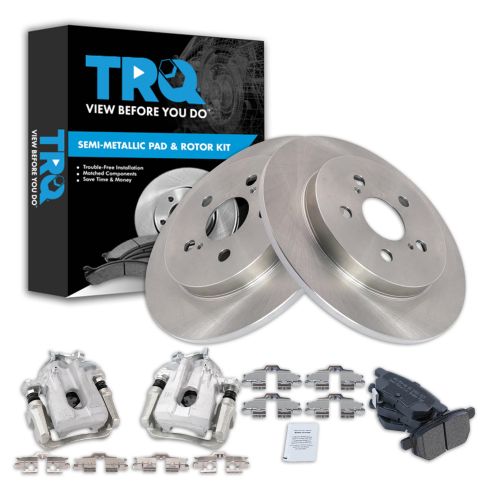
2010-13 Toyota Prius Rear Semi-Metallic Brake Pad & Rotor Kit with Calipers TRQ BKA26728
Part Details:
- Solid
- Semi-Metallic
- Premium Posi
- 10.20 in. (259mm)
- 5 Lug
- (2) Rear Brake Rotors
- (1) Rear Semi-Metallic Brake Pad Set
- (2) Rear Brake Calipers
How to Replace Rear Brakes 1994-2002 Dodge Ram 1500
Watch this video to learn how to replace the rear drum brakes and hardware on your 94-02 Dodge Ram.
