How to Replace Rear Brakes 2009-10 Pontiac Vibe
Created on: 2017-12-12
How to repair, install, fix, change or replace your own worn, squeaky, fading old rear brakes on 09, 10 Pontiac Vibe.
-
step 1 :Removing the Wheel
- Loosen the lug nut covers with a 22mm socket
- Pry off the center cap with a flat blade screwdriver
- Loosen the lug nuts with the vehicle on the ground
- Raise the vehicle with a floor jack
- Secure the vehicle on jack stands
- Remove the lug nuts
- Pull off the wheel
-
step 2 :Removing the Brake Pads
- Loosen the 14mm caliper bolts
- Hang the caliper from a bungee cord
- Pry the brake pads off with a flat blade screwdriver
-
step 3 :Removing the Brake Rotor
- Remove 14mm bolts from the brake caliper bracket
- Pull off the brake caliper bracket
- Pull the rotor off
- If the rotor will not come off, thread the lug nuts and strike the hub area of the rotor with the ball end of a ball peen hammer
-
step 4 :Preparing the New Brake Pads and Rotors
- Carefully turn the adjustor on the caliper clockwise with needle nose pliers
- Clean the brake pad slides with a wire brush
- Apply grease to the caliper slides
- Clean the rotor with brake parts cleaner
-
step 5 :Installing the New Brake Rotor
- Slide the rotor on
- Thread on one lug nut to hold the rotor in place
- Put the bracket back into place
- Tighten bolts with a 14mm wrench
-
step 6 :Installing the New Brake Pads
- Apply grease to the brake pad tabs
- Install the new brake pads into the bracket
- Put the caliper on
- Tighten bolts with a 14mm wrench
- Remove the lug nut from the rotor
-
step 7 :Reattaching the Wheel
- Slide the wheel into place
- Start the lug nuts by hand
- Tighten the lug nuts preliminarily
- Lower the vehicle to the ground
- Tighten the lug nuts to the spec foot-pounds in a crossing or star pattern
- Reattach the center cap
- Tighten the lug nut covers with a 22mm socket
Tools needed
-
14mm Wrench
Torque Wrench
14mm Socket
Pry Bar
Jack Stands
Brake Parts Cleaner
21mm Socket
Rubber Mallet
Dead Blow Hammer
Paper Towels
Bungee Cord
Ratchet
Wire Brush
Floor Jack
Needle nose pliers
1/2 Inch Breaker Bar
Hi, I’m Mike from 1A Auto. We’ve been selling auto parts for over 30 years!
To remove the hubcap, these things that look like lug nuts are actually little plastic caps, and they screw onto the real lug nuts. That's what holds the hubcap on. We're going to take our 21 millimeter socket and just loosen them by hand. They shouldn't be on there too tight. If you have to, you could use a small ratchet, but these ones are coming free with my hand. So loosen these up. You should be able to pull the hubcap right off. With the vehicle still on the ground, take our 21 millimeter socket and a breaker bar and loosen all the lug nuts. With the lug nuts loosened, we can raise and support the vehicle with a jack and jack stands. We're going to use our two post lift. With the vehicle in the air remove the rest of the lug nuts. They should be pretty loose. I can use my hand and remove the tire and wheel. I'll hold on to the wheel as I take the last lug nut off so it doesn't come falling off on me. Put these lug nuts aside. Take our wheel off.
Rear caliper has the parking brake integrated into it, so I won't really be able to grab this. Kind of compress the piston, because it basically threads out and it's part of your parking brake. These are 14 millimeter caliper bolts. We need to remove those and take the caliper off. Using a 14 millimeter box wrench, get the bottom one broken free and break the top one free. Lift the caliper up and off.
I will hang this with a bungee cord from the spring to so it doesn't dangle on the e-brake cable or the brake hose. Use a small pry bar or a large flat bladed screwdriver and pop the pads out. There are two bolts holding the caliper bracket on: one here and one here at 14 millimeter. We need to use a 14 millimeter socket and a breaker bar to loosen those. Probably in there pretty tight. Since that's so tight, I'm going to use a dead blow mallet to hit this. With those freed up, I'm going to switch to a ratchet to make removal a little quicker. I'm going to hold on to the bracket as I remove the top one so the bracket doesn't fall. Pull the bracket out and the rotor is so loose it's ready to come right off. If this rotor is frozen in place you could spray some rust penetrant here on the hub and you could thread some eight millimeter bolts in here evenly and push this off. Luckily for us it came right off.
In our car here unfortunately the dust shield has rusted away, so I just kind of took the bits that were left and pushed them out of the way so they don't touch the rotor. On this particular style of caliper, because the e-brake cable and parking brake is integrated into it, the piston is part of the adjuster, so it actually threads and locks so it can't go back all the way in. So when you pull the e-brake inside the car or the parking brake, it pushes the piston out and locks the pads. There is a special tool for this. You can get them and it will help you spin this in. Or you can use some needle nose pliers and very carefully I'm going to turn this clockwise. It's going to spin down and retract. It's probably going to take you longer using pliers but it'll work.
If this doesn't want to spin in easily in a particular direction, sometimes the opposite side may be counterclockwise and vice-versa. Just make sure that you're not forcing it. I'm just going to move the bungee cord out of the way. There should be a direction that this turns easily and one direction it will not turn. So if it doesn't turn one way, try the other way. Clean our caliper hardware and the stainless steel brackets. Just clean them with a little brake parts cleaner and a wire brush. Repeat that for both sides.
Install our new brake rotor. I'm going to put it on backwards first so I can clean the outside of it with brake parts cleaner. And I'll flip it over. I'll actually take one of our lug nuts, hold it in place, and just spray down with some brake parts cleaner.
Reinstall the caliper bracket. Capture the top one first, and then the bottom one. Tighten up the bracket bolts. Make sure those are nice and tight. Pads that we took out are in good shape. We just want to show you how to remove them, so we're just going to clean and reuse them. This would be the same with our brand new pads. Just want to make sure that this surface is nice and clean with brake parts cleaner. We'll put a little bit of caliper grease on here and pop them in place. Push those clips over. Pop those in place.
There's these little locating tabs on the brake pads. Just like this on the outside one there's one on the inside here. It needs to line up into one of these openings here. So I'm just going to have to turn this just a little more, get it to line up to basically vertical like that. Now when this sits down it should sit right in place. Yeah, that lines up nice.
Reinstall the bolts. I'm just going to tighten these up. Tighten the bottom one. Remove the lug nut.
Reinstall the wheel. Do the same for the other side. Tighten the lug nuts and torque them when the vehicle's on the ground and then we're going to pump our brake pedal. The vehicle on the ground tighten your lug nuts to spec. Go the cross pattern. Go line up the valve stem opening with the valve stem in the wheel. Should fit right in place. Take the 21 millimeter socket and just thread these on. Just do them hand tight because they're just plastic. You don't want to break them. To push the calipers back out since we compressed them I'm going to gently press on the brake pedal. Don't mash it to the floor. Just kind of gently press it, build up the pressure, and you'll feel it get harder as the brake caliper piston move out to meet the pads. That feels good.
Thanks for watching. Visit us at 1AAuto.com for quality auto parts, fast and free shipping, and the best customer service in the industry
Shop Products


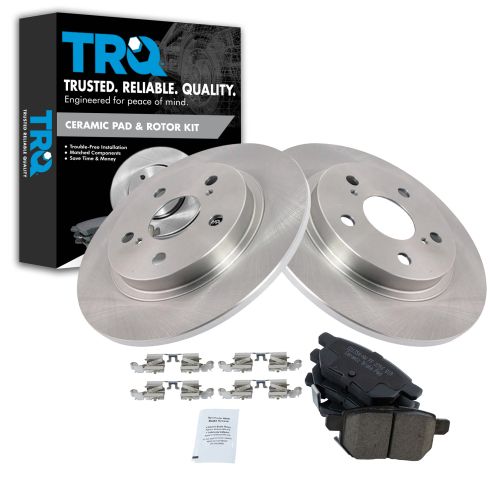
Toyota Pontiac Scion Rear Ceramic Brake Pad & Rotor Kit TRQ BKA11143
Part Details:
- Ceramic
- Premium Posi
- Solid
- 10.98 in. (279mm)
- 5 Lug
- (2) Rear Brake Rotors
- (1) Rear Ceramic Brake Pad Set
How to Replace Rear Brakes 2013-17 Honda Accord
Watch this video to learn how to install new engineered to fit TRQ rear brake rotors and pads on your 2013-17 Honda Accord.
