How to Replace Rear Brakes 2008-17 Nissan Rogue
Created on: 2017-04-19
Learn how to replace and properly prepare new brakes by following our experts in this how-to video
-
step 1 :Removing the Wheel
- Loosen the 21mm lug nuts with the vehicle on the ground
- Raise the vehicle with a floor jack
- Secure the vehicle on jack stands
- Remove the lug nuts
- Pull off the wheel
-
step 2 :Removing the Brakes
- Loosen the two 14mm guide pin bolts from the caliper
- Remove the two 14mm guide pin bolts from the caliper
- If the bolts are stuck, wedge the bolt out with a few wrenches
- Pull off the brake caliper
- Hang the caliper aside with a bungee cord
- Remove the two 17mm bolts from the caliper bracket
- Pull off the caliper bracket
- Slide off the brake rotor
- Remove the brake pads from the caliper bracket
-
step 3 :Preparing the Brakes
- Pry the shims off the caliper bracket with a flat blade screwdriver
- Clean the caliper bracket with a wire brush
- Clean the brake shims with a wire brush
- Apply brake grease to the shim mounting area on the caliper bracket
- Clip the shims onto the caliper bracket
- Pull out the caliper slide pins
- Clean any old grease or debris off the pins with a paper towel
- Apply brake grease to the pins
- Slide the pins into the bracket
- Clean the hub surface with a wire brush
- Use a power sander if necessary
- Apply brake grease to the hub surface
-
step 4 :Installing the Brakes
- Slide the rotor onto the hub backwards
- Spray the back of the rotor with brake parts cleaner
- Slide off the rotor
- Slide the rotor onto the hub normally
- Spray the front of the rotor with brake parts cleaner
- Put the caliper bracket into place
- Install the two 17mm bolts into the caliper bracket
- Put the brake pads into the caliper bracket
- Apply brake grease to the back of the pads
- Compress the brake caliper piston with pliers
- Remove the bungee cord
- Place the caliper onto the bracket
- Fasten the 14mm bolts into the caliper
-
step 5 :Installing the Wheel
- Slide the wheel into place
- Start the lug nuts by hand
- Tighten the lug nuts preliminarily
- Lower the vehicle to the ground
- Tighten the lug nuts to 80 foot-pounds of torque in a crossing or star pattern
Tools needed
-
Torque Wrench
14mm Socket
Channel-Lock Pliers
17mm Socket
Jack Stands
Brake Parts Cleaner
21mm Socket
Bungee Cord
Anti-Seize Grease
Ratchet
Wire Brush
Floor Jack
1/2 Inch Breaker Bar
Hi, I'm Mike from 1AAuto. We've been selling auto parts for over 30 years! We're dedicated to delivering quality auto parts, expert customer service, and fast and free shipping, all backed by our 100% satisfaction guarantee. So visit us at 1AAuto.com, your trusted source for quality auto parts.
In this video, we're going to be working with our 2009 Nissan Rogue all-wheel drive. We're going to show you how to remove and replace your vehicle's rear brake pads and rotors.
If you like this video, please click Subscribe. We have a ton more information on this and many other vehicles. If you need these parts for your car, you can follow the link down in the description over to 1aauto.com.
Here are the items you'll need for this repair: 14-21mm socket, ratchet, breaker bar, wire brush, brake grease, brake cleaner, groove jaw pliers, torque wrench, jack and jack stands
Loosen your lug nuts with a 21 millimeter socket and a breaker bar. You want to loosen them all about one turn. Raise and support your vehicle. We're using a lift to make it easier to show you what's going on, but this job can easily be done at home with a jack and jack stands.
Now, normally you can remove lug nuts by hand, but these are recessed pretty far into the wheel, so I'm just going to use the 21 millimeter socket and my hand to remove the rest of our lug nuts. Remove your wheel and tire.
Remove the two 14 millimeter caliper bolts with a 14 millimeter socket and ratchet. Make sure you crack them both loose before removing either one fully. Now this pin is pretty stuck in the caliper bracket. You'll want to use some wrenches that are smaller than the flange of the bolt but bigger than the shank of the bolt. Use those to get over it and pry it out while you turn it to help wedge it and force it out of the caliper. Now you'll see I'm using two wrenches to bridge this gap, so you kind of pry them out as far as you can, and if you reach a point where you can't go any further, add another wrench.
Now, normally we would use a bungee cord to secure these, but this caliper isn't very heavy and I have a nice flat control arm back here where we can just rest it out of the way. Loosen the caliper bracket bolts with a 17 millimeter socket. Ours are pretty rusted, so we're using a breaker bar. You may just be able to use a ratchet. Again, be sure to break both loose before removing either one fully. Our brake pad fell out. That's fine. We're going to be replacing them anyway. Remove your caliper bracket from the vehicle. Remove your brake rotor.
Here we have our old brake parts that we removed from our vehicle and our new parts from 1AAuto.com. As you can see these parts are exactly the same. We have the same dimensions on the rotor. This small hole here is an access for your e-brake adjuster so you can adjust that up. However, there should be a rubber plug here that's missing on our part. Our brake pads actually aren't that bad. The reason we're replacing these brakes is due to the heavy corrosion and rust build-up on the rotors. This is caused from partially from the vehicle sitting.
The other portion of this issue is: you can tell by the wear on the brakes that this vehicle has had just brake pads put on it without having the rotor machined which is fairly uncommon, or a new rotor installed. Of course we always recommend you do pads and rotors as a set. So if your old brakes are rusted and corroded, or the backing on your brakes is worn down, these new parts from 1A Auto will go in direct fit, just like your original equipment, and fix you up right.
Remove your brake hardware. Use a screwdriver if necessary, but these pop off pretty well by hand. Use a wire brush to clean all the rust and debris build-up where your brake hardware sits in the bracket. You don't have to go crazy with this. It's not going to be perfectly smooth, but you do want to get the majority of the heavy build-up off of there. We'll then take our hardware which ours really isn't that bad. If yours is really rusted, broken, or doesn't have its spring to it, then you'll need to replace them. But we're just going to clean ours off with a wire brush. Apply a thin coat of brake grease to the caliper bracket where your hardware sits. This will prevent more rust from building up underneath it, as well as helping to hold in those clips a little bit better. Reinstall your hardware.
You'll notice one side is shorter than the other, so make sure it goes together correctly. Make sure this one with the long tab goes on the bottom. We'll apply a thin coat of grease to this as well. You'll notice some coating places that the brake pad does not ride in. But that's just again to help prevent with rust and debris build-up. Using a wire brush clean the rust and debris off the surface of your hub to make sure your rotor sits flat and straight. Ours is pretty bad so as opposed to a wire brush we're going to get an air grinder on here and rip some of that material off. We'll now apply a thin coat of grease to the hub. Again, this is to keep parts from rusting together or rusting at all, so next time we'll just wipe the old grease off and apply a nice new coat, rather than go through all the work and effort of grinding it and cleaning it down again.
Install your rotor onto the hub backwards. Spray down the surface of the rotor with some brake parts cleaner. This will remove any dirt and debris, as well as the oils they use to prevent these parts from rusting while they're being stored. We'll then flip the rotor around and you can see we have this cool kind of star shape to the hub which means the location of your e-brake adjuster hole doesn't matter because it will work in any of the positions, and then we'll spray down the front side too.
Reinstall your brake caliper bracket, as well as the two 17 millimeter bolts. Tighten them down with a 17 millimeter socket and ratchet. Install your brake pads and apply a coat of grease to the back side of the pad where the caliper will contact it. Using a pair of groove jaw pliers carefully and slowly compress your brake caliper piston. Grease your guide pins.
Reinstall your brake caliper over the pads. Make sure that you get your boots lined up and start your pins. We'll then tighten down our pins with a 14 millimeter socket and ratchet.
Now normally you would want to reinstall the rubber cover for your e-brake adjuster, but ours is missing so we'll reinstall the wheel and tire. I'll get one nut started on there, we'll get the rest on as best we can and then tighten them down by hand with our 21 millimeter socket. We'll then torque our lug nuts to 80 foot-pounds in a cross pattern.
Thanks for watching. Visit us at 1AAuto.com for quality auto parts, fast and free shipping, and the best customer service in the industry.

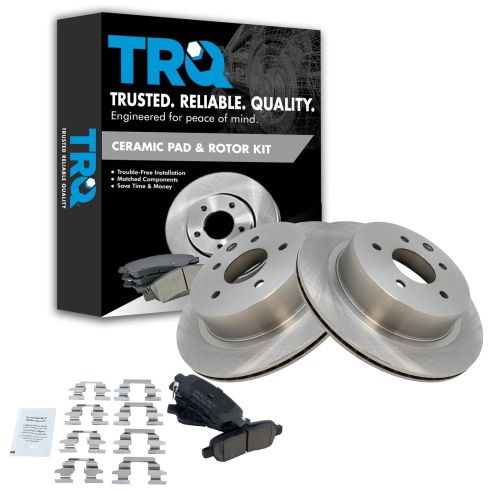
Nissan Infiniti Rear Ceramic Brake Pad & Rotor Kit TRQ BKA10689
Part Details:
- Ceramic
- Premium Posi
- 11.50 in. (292mm)
- Solid
- 5 Lug
- (2) Rear Brake Rotors
- (1) Rear Ceramic Brake Pad Set

How to Replace Front Brakes 2001-06 BMW 325Ci
How to repair, install, fix, change or replace your own worn, squeaky, fading old brakes on 06 BMW 325Ci
