How to Replace Rear Brakes 2004-12 Chevy Malibu
Created on: 2020-08-13
This video shows you how to install new TRQ rear brake rotors and pads on your 2008-12 Chevy Malibu.
Tools needed
-
Torque Wrench
Hammer
Socket Extensions
Rust Penetrant
Pry Bar
Jack Stands
19mm Socket
Brake Caliper Piston Rewind Cube Tool
Brake Parts Cleaner
Flat Blade Screwdriver
Brake Caliper Hanger
Socket Driver
Paper Towels
Copper Anti-Seize
Wheel Chocks
Brake Grease
Ratchet
Floor Jack
Wire Brush
1/2 Inch Impact Gun
Okay, friends. The first thing you need to talk about anytime you're working on your vehicle is safety. You want hand and eye protection. With that said, safely raise and support your vehicle so the wheels are off the ground. Once you've done that, we're going to remove all 5 of our 19-millimeter lug nuts. Remove your wheel. To do the brakes, what we're going to need to do is push back our caliper piston, which is located right inside here. A lot of times, what people like to do is to open up the bleeder screw so that way there you're not forcing any fluid back up through the lines. The only problem with that is if it's in the condition that this one is with a lot of corrosion, more than likely what's going to happen is the bleeder screw is going to break off and you're going to have to buy yourself a caliper. What I would prefer to do is, of course, go ahead and leave this in here, and that'll end up just pushing in the caliper piston slowly. The next thing we're going to do is remove our caliper slider bolts. Using a pry bar, we're going to get the caliper off of here.
You might just have to work it back and forth a little bit. Take a peek at your caliper piston right here and also the boot. You want to make sure that you don't see any tears in the boot, and you also want to make sure you don't see any fluid. If you see fluid, it's probably brake fluid, in which case, you have to replace your caliper. To push back this caliper piston, you're going to need something that's going to be able to fit into those two grooves. We're going to need to twist at the same time as we push in. This isn't the type of piston that you can just go ahead and press in. I have a little tool here that has multiple edges. I found the set that fits in there. So, I'm going to line it up with the slots. I'm going to press and twist at the same time. All right. Set this aside. Now, we're going to go ahead and get the pads out of here. These are really frozen in there.
Now that we have the pads out of there, looking from the backside, you can see your two caliper bracket mounting bolts, remove them both. Next, we're going to take one of our lug nuts, start it right onto one of these lug studs. Spray down the rotor area where it connects onto the hub with a little bit of penetrant. Take your hammer and give it a couple of loving bonks. Remove that lug nut. Remove your rotor. Next, we need to clean up the mating surface where our rotor is gonna ride. Make sure you get it in between the area where your studs and your hub are. You want to make sure there's no raised areas. You can try using a brush, or if you find that there's large chunks, go ahead and use a screwdriver or a pry bar and just go ahead and scrape it right out of there. Okay. So, this looks pretty decent, let's move along to the backside though. If you were to look back here, you're going to see that there's all sorts of raised things, there's loose flakes of rust, there's all sorts of debris. You want to make sure you clean this up as well. If you leave something back there that could break free, it might potentially get behind your rotor or even between your rotor and your pads, which, of course, will cause a major issue.
Once you feel as though you have it cleaned down as well as possible, let's hit it with a little bit of parts cleaner. Let that fully dry. Now, we're going to apply a little bit of copper never-seize to our hub. So, we made it over to the bench so we can clean up our caliper bracket. One of the first things we need to do is get everything off of it that doesn't need to be there. Let's get the tins off of here. Set that aside for recycling. Take your caliper sliders, give them a little twist to pull them right off of there. Once you've done that, go ahead and remove the boots. Always inspect your boot. Make sure it's not torn or worn or crispy or hard. This one looks good. So, we would just take a rag, clean out the inside, do the same to both. That looks great. Now, let's clean up our sliders. You'll notice when you clean these up, one of your sliders is going to have a little rubber boot and then the other one won't. You want to make sure that you put the slider that had the boot in the same corresponding hole that you removed it from. Another thing to think about with your sliders is to check the condition. If it looks like they're rotted and pitting, or even they're rusted to the point that they might get stuck inside here, obviously that's going to be an issue. Make sure you clean this up and especially make sure you clean up this area right here, which is where the boot's gonna ride. If there's anything there that's going to cause a discrepancy where moisture can get in, obviously, you're going to have an issue overall.
We have the sliders and the boots cleaned up. We need to clean out the inside ports on our caliper bracket. This is where the sliders are going to be, and they need to be nice and clean. Grab a nice collection bucket with some hand protection and eye protection. We're going to spray a little bit of cleaner inside there, and then we'll use a bore brush to clean it out completely. Now that we have the ports cleaned up, it's important to make sure that you check this area right here and there. That's also where the slider boots are gonna ride. Make sure those are in good condition. Once you know that those are good as well, we're going to move along to the area where the tins are supposed to be. We need to make sure that there's no raised areas here. You can try to scrape it out. You could use a little brush, see if you can get it out. Or, of course, you can use one of those little sanding discs wheels, those work the best. You want to just make sure you have it nice and clean and a smooth surface. Okay. So, these look great. I did all four corners, they look amazing. One last thing that I'd like to mention, some people don't pay attention to this, but if you look along the rest of the bracket, just kind of make sure you don't have any large flakes. Anything like that could, of course, cause braking issues overall. Okay.
So, now, it's time to add a little bit of lubricant to this. We're going to go along all the areas that we just cleaned up. You want to make sure that you use it. It's going to help with vibration dampening and noise reduction. Now it's going to be time to get our caliper tins on here. You're going to notice they're both the same, so you really don't have to worry about anything. Go ahead and slide it in there. And you want to make sure that it's completely clicked in. It needs to be locked in because if it's free in any way, it could potentially slide in some way and cause a brake issue. Now it's gonna be time to get our caliper boots on there. I always like to take a little bit of lube. I'll just go right along the hole like that. And you especially want to make sure you get it along the outside, along that little ridge. That's gonna help keep moisture out of there. We'll just go ahead and force this up on there. Give it a nice little twist to make sure the lube's completely situated. Do the same to the other one. Now that we have those on there, let's go ahead and take some lube and put it right on the pins. Coat that complete pin all the way around, and, of course, make sure you get up near that lip.
Once you have it completely lubricated, go ahead and slide it inside there and then just kind of work it around a whole bunch of times. You also want to make sure that the boot is sitting in the lip. Give it a little wiggle, do the same to the other side. Okay. Both of those are in, we've got our tins on there. It's nice and clean. Let's get back over to the vehicle. So, we made our way back over towards the vehicle but before we go ahead and get the rotor on here, we want to make sure that we clean it down first. Here's a little bit of parts cleaner. Go ahead and clean the outside braking surface, turn it over, and make sure you clean the inside braking surface. Let's get the rotor up on here. I always like to hold it on with one of my lug nuts. That's just going to keep it from moving around and keep anything from potentially getting in between the rotor and the mating surface of the hub. Let's get our bracket up on here. Start in both of your bracket bolts, snug them up, and then we'll torque them to manufacturer's specifications. I'll torque these to 96 foot-pounds.
It's going to be time to install your pads. What's important to pay attention to is your wear indicator. You want to match up the wear indicator pad to the one that's came off of the vehicle originally so it's in the same spot. The pad with the wear indicator needs to go on the inside portion of the rotor. There we are. Now, we're just gonna take a little bit of that caliper grease, and we're going to go right along the piston area where it's gonna connect onto the pad and then along each of these ears. This is only going on the mating surfaces, and it's to help with vibration dampening and noise reduction once again. Put the caliper up and over your pads, line it up with your sliders, of course. We'll put in both of our bolts, snug them up, and we'll torque those to manufacturer's specs as well. Torque these to 26 foot-pounds. Fill up on here. We'll start on the lug nuts, and then we'll torque them down to 100 foot-pounds. Let's torque these to 100 foot-pounds in a criss-cross manner. Torqued. Let's go ahead and check and top off our brake fluid and pump up the brake pedal.
Shop Products


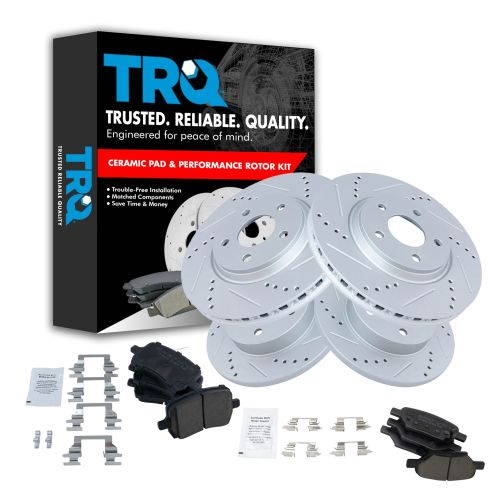
Chevrolet Pontiac Saturn Front & Rear Ceramic Premium G-Coated Performance Brake Pad & Rotor Kit TRQ Performance BKA12292
Part Details:
- Ceramic
- Premium Posi
- Vented
- 10.63 in. (270mm)
- Solid
- 5 Lug
- 11.65 in. (296mm)
- Performance
- Premium G-Coated
- Slotted X Drilled
- Performance
- (1) Front Ceramic Brake Pad Set
- (1) Rear Ceramic Brake Pad Set
- (1) Front Premium G-Coated Performance Brake Rotor Set
- (1) Rear Premium G-Coated Performance Brake Rotor Set
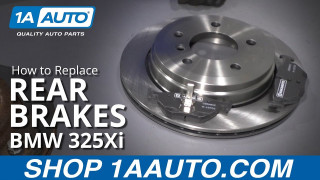
How to Replace Rear Brakes 2001-05 BMW 325Xi
Learn what steps are needed to remove the old rear brakes and prepare and install new ones with this how-to video
